Scooter Doc

Currently Offline
Lance Duke Touring 250
Posts: 695
Likes: 0
Joined: Apr 10, 2010 15:43:25 GMT -6
|
Post by mthomas on Apr 25, 2010 6:28:34 GMT -6
Thanks for all the kudo's, I think it looks like a different scoot. Everything I did to get it ready and to paint it is in the frst post, it was very easy.
|
|
Scooter Doc
Currently Offline
Lance Duke Touring 250
Posts: 695
Likes: 0
Joined: Apr 10, 2010 15:43:25 GMT -6
|
Post by mthomas on Apr 24, 2010 21:12:54 GMT -6
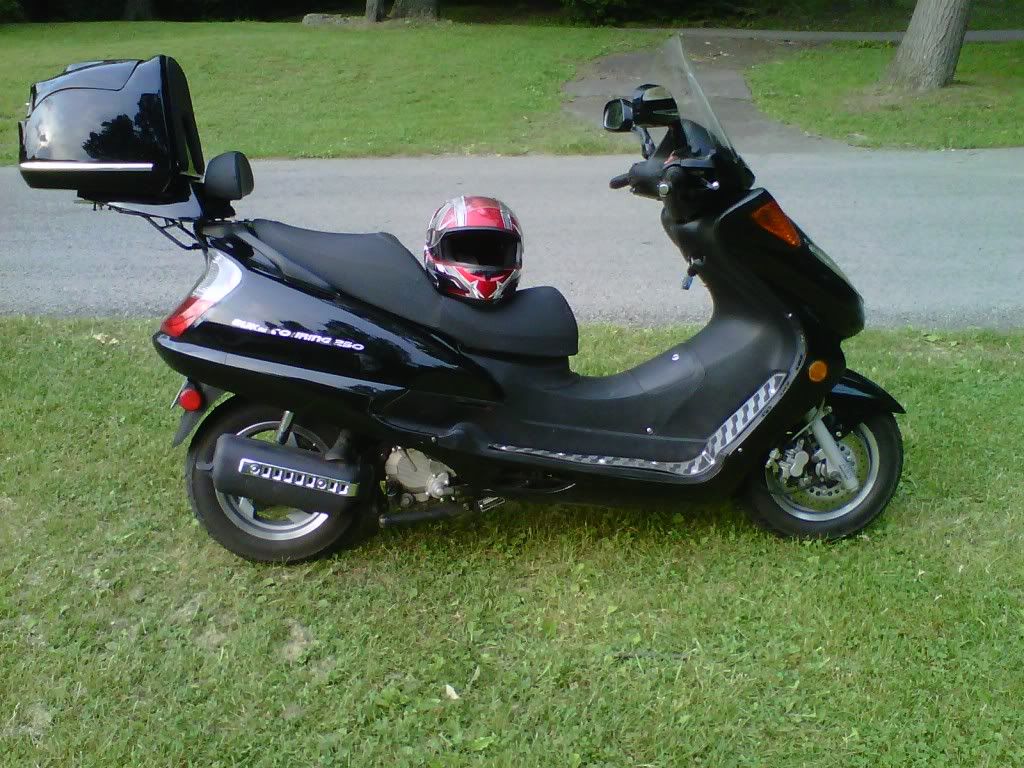
Well I saw the most scary part of a Chinese scoot today...the rear brake. I was unhappy with the way the back brakes held in comparison to the front so with rainy weather today, I decided to pull the wheel and take a look see. Not real thrilled with the design. The pads looked glazed so I took some 120 grit and sanded the up. I also sanded the inside of the rim. While I had it off, I painted the exhaust pipe and fender bracket. I also wire brushed and cleaned up the rusty bolts. Put it all back together and looked like a million. Oh and I also put on the trunk. I think it took me longer to figure that thing out than to take off the wheel.
|
|
Scooter Doc
Currently Offline
Lance Duke Touring 250
Posts: 695
Likes: 0
Joined: Apr 10, 2010 15:43:25 GMT -6
|
Post by mthomas on Apr 24, 2010 20:48:30 GMT -6
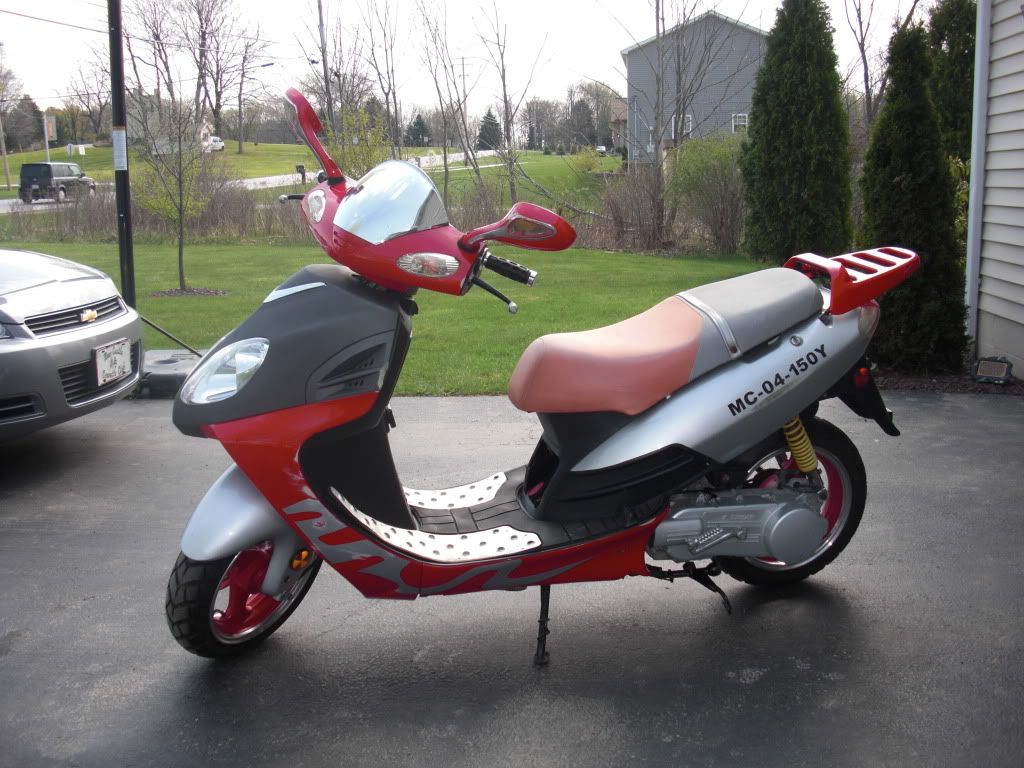
OK, Let's see if I can mess this up! Here's the before picture...notice the peach seat 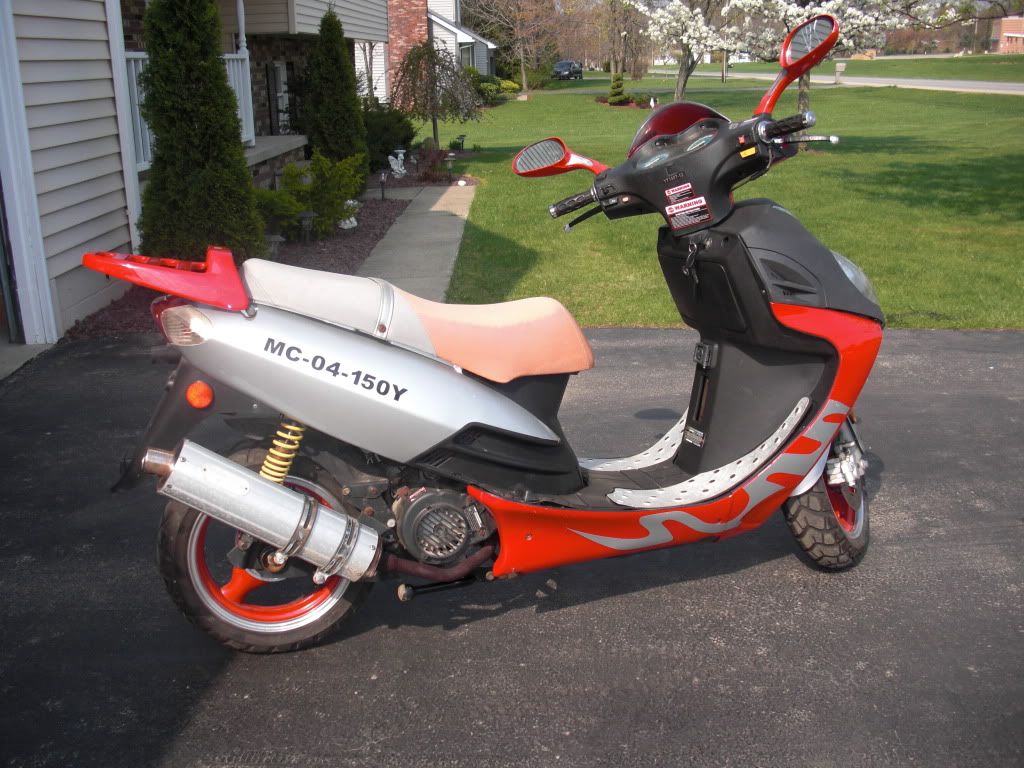 Here's the after picture...Ta-da 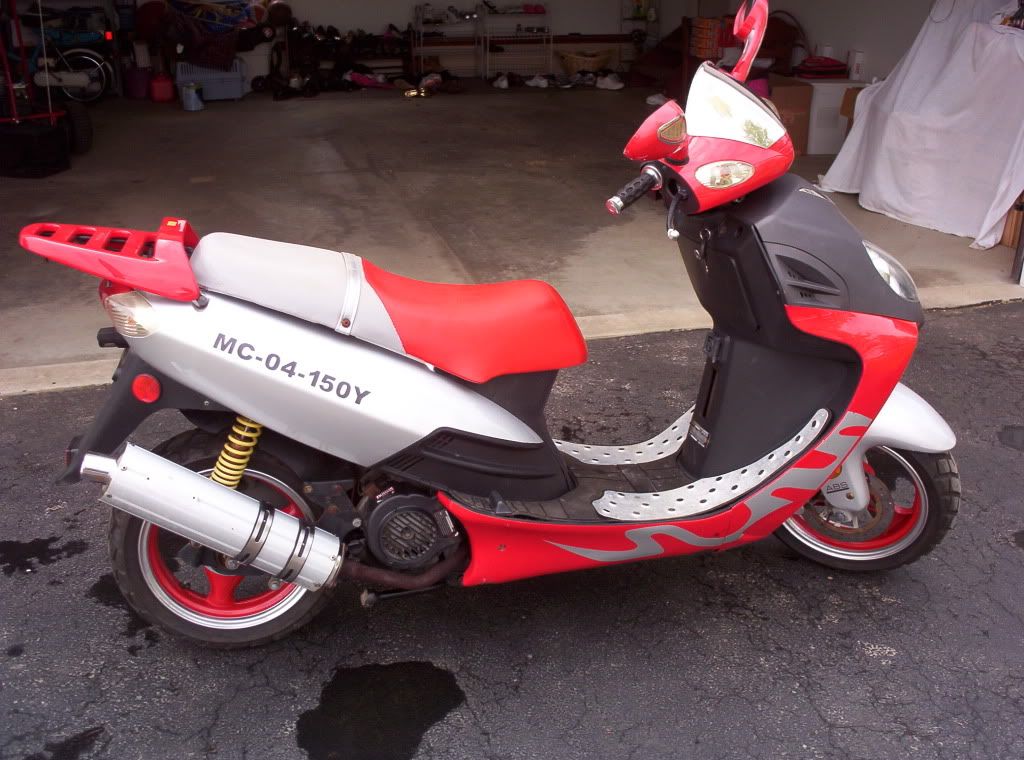 Here's the seat 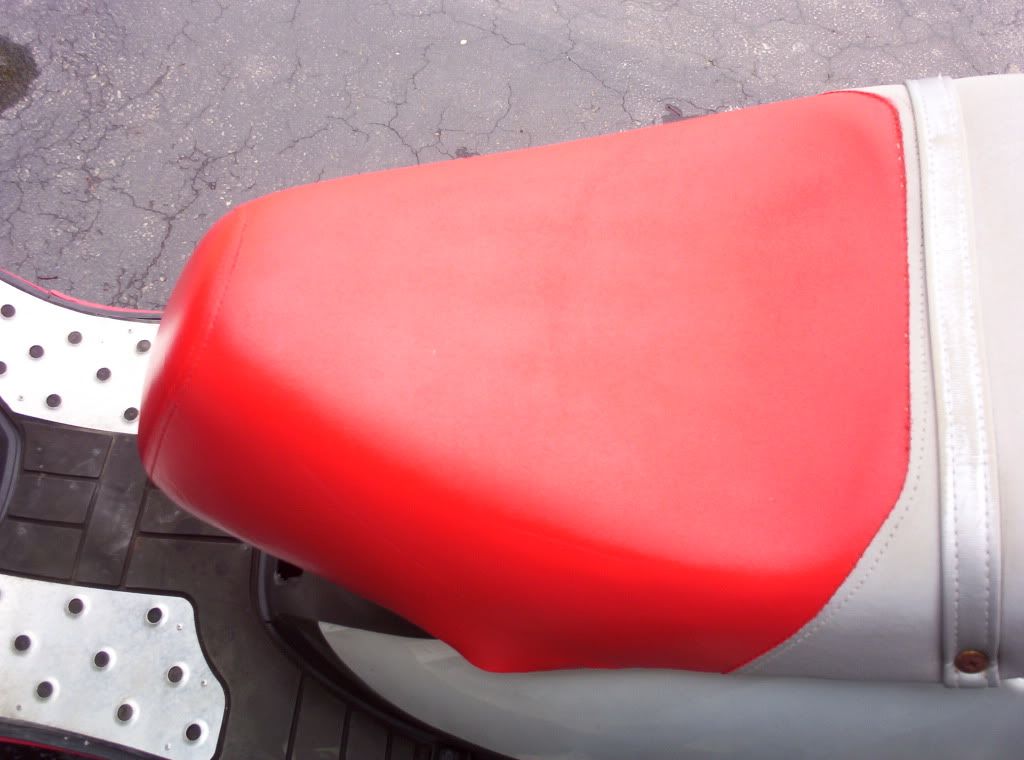 |
|
Scooter Doc
Currently Offline
Lance Duke Touring 250
Posts: 695
Likes: 0
Joined: Apr 10, 2010 15:43:25 GMT -6
|
Post by mthomas on Apr 23, 2010 19:58:45 GMT -6
I was wrong. I pulled out the old plug which was an NGK not an Autolite and the gap was actually was about .028. I regapped the new plug and put it back in and it ran much better. Wierd
|
|
Scooter Doc
Currently Offline
Lance Duke Touring 250
Posts: 695
Likes: 0
Joined: Apr 10, 2010 15:43:25 GMT -6
|
Post by mthomas on Apr 23, 2010 7:57:28 GMT -6
I painted my seat and took the valve cover off to see if I could adjust the valves without taking all the freakin plastic off. Did you have any luck with the valves like that? The last time I tried that I almost needed neck surgery. Rich Yea, I know what a contortionist feels like. Also, I decided to take out the air cleaner box to give me more room and line of sight. Unfortunately, the one screw was stripped so I could not remove it. I had to do the whole valve adjustment through the access panel in front under the seat. I adjusted them both to .004 andwhen I rotated the fan to get TDC I went to adjust the wrong valve and could not understand why it was so tight...what an idiot. Got them both done and can now hear a slight ticking so it must be good. Also, I took it for a short ride and did not feel much of a difference in power, it did start better when I shut it off and tried to restart while it was warm so that is a good thing. |
|
Scooter Doc
Currently Offline
Lance Duke Touring 250
Posts: 695
Likes: 0
Joined: Apr 10, 2010 15:43:25 GMT -6
|
Post by mthomas on Apr 22, 2010 18:14:58 GMT -6
Thanks for info guys. Mine is at .032 but the manual says .7-.8 which is .028-.032. I noticed a small miss after adjusting the valves. SHould I close up the gap to .28 to see if it's a bit hotter and stops the miss or should I leave it and look elsewhere? Seemed like it ran better with the Autolite plug.
|
|
Scooter Doc
Currently Offline
Lance Duke Touring 250
Posts: 695
Likes: 0
Joined: Apr 10, 2010 15:43:25 GMT -6
|
Post by mthomas on Apr 21, 2010 18:55:17 GMT -6
Does anybody know what the plug gap is in English? The manual says .7-.8MM. I put an new NGK plug in and since my gap tool is in English and I tried to take the gap off the old one but it does not seem to run as good. I checked it today and the NGK is at .032 and I think .7mm is about .027". Anybody know fo sho?
|
|
Scooter Doc
Currently Offline
Lance Duke Touring 250
Posts: 695
Likes: 0
Joined: Apr 10, 2010 15:43:25 GMT -6
|
Post by mthomas on Apr 21, 2010 18:44:45 GMT -6
Well, I painted my seat today and I would recommend this to anybody that has an ugly seat.. ;D My Roketa has one of those half red and half silver matching seats. When I got the scoot, the PO left it out in the weather and the half red was half peach and looked like arse. So I read up and decided to try and paint mine. I took off a mirror and went to the Auto Zone and bought some matching touch up paint and matching vinyl paint. Dupli-color brand set me back about $6. I removed the one screw holding the seat and scrubbed it with a bristle brush and some Simple Green to get it completely clean. Make sure you let it dry overnight or the tape and paint won't stick. I then used some blue masking tape to tape off the silver portion of the seat using old newspapers to to cover the silver. Make sure it is about 70 degrees both the paint and the seat. Also, make sure the humidity is down (not raining). Shake the can thoroughly and the first coat need to be VERY light. The can was almost 18 inches from the seat and was dusted on. Let the first coat dry completely before putting on the second, third and fourth coats. I put mine out in the sun to dry for at least 3-4 hours between coats. Let it dry overnight and put back on. Looks like new. I will get some pics and post ASAP.
|
|
Scooter Doc
Currently Offline
Lance Duke Touring 250
Posts: 695
Likes: 0
Joined: Apr 10, 2010 15:43:25 GMT -6
|
Post by mthomas on Apr 20, 2010 20:55:46 GMT -6
I painted my seat and took the valve cover off to see if I could adjust the valves without taking all the freakin plastic off.
|
|
Scooter Doc
Currently Offline
Lance Duke Touring 250
Posts: 695
Likes: 0
Joined: Apr 10, 2010 15:43:25 GMT -6
|
Post by mthomas on Apr 17, 2010 9:13:23 GMT -6
Just an FYI, I installed 45w standard bulbs in mine and have had no issues with melting the housing. I have NOT ridden at night so I can't tell about the visibility. I got the bulbs from Bulbtown and they were $1.25 each with a $6 flat rate so I got 4 bulbs for a little over $11.
|
|
Scooter Doc
Currently Offline
Lance Duke Touring 250
Posts: 695
Likes: 0
Joined: Apr 10, 2010 15:43:25 GMT -6
|
Post by mthomas on Apr 13, 2010 6:10:09 GMT -6
Leo,
I just changed mine yesterday. First, Bulbtown has them for $1.25 plus a flat $6.00 shipping so I bought 4 shipped to me for like $11.00. Take the cowl off as there are only 4 screws. Unhook the quick disconnect so you can work on the headlights. Put the cowl upside down on a blanket so you don't scratch it. Mine has a wire clip that has to be released on one side and is hinged on the other side. Move the wire clip out of the way and remove the socket, twist the bulb counterclockwise and remove. Good ides to check the contacts for corrosion. Also be careful about the ground wire, I broke mine and it was a devil to get it re-soldered on. Replace the bulb by putting in and twisting clockwise making sure it is seated fully. Replace the socket and there are three notches, make sure they are fitted correctly. replace the wire and cover. At this point what I did is hook up the connect and let the cowl just sit there and fire up the scoot. Check the light making sure it works before putting the cowl back together. You may need to wiggle it around if it is not working properly. That's it.
|
|
Scooter Doc
Currently Offline
Lance Duke Touring 250
Posts: 695
Likes: 0
Joined: Apr 10, 2010 15:43:25 GMT -6
|
Post by mthomas on Apr 12, 2010 5:45:11 GMT -6
Thanks guys,
It is rock solid and runs like a champ. As you can see, almost EVERY nut and bolt has rust so I have been taking a handful out and cleaning them with a wire brush. You can also see from the scratches, he laid the bike down so I need to find some touch up paint. Also, the seat has faded and I was reading the other day about vinyl paint and I may give that a try. In the mean time, I have been riding it around the block and enjoying the weather.
|
|
Scooter Doc
Currently Offline
Lance Duke Touring 250
Posts: 695
Likes: 0
Joined: Apr 10, 2010 15:43:25 GMT -6
|
Post by mthomas on Apr 11, 2010 21:10:16 GMT -6
|
|