|
|
Post by Bashan on Sept 6, 2011 9:02:14 GMT -6
No experience with it, first time I've seen it. If it works there'll be a lot of scooter owners using it. It did say in the instructions that maximum size for filling a crack or hole is 3/8". I'm not entirely sure what you need to do with it. Also, it sounds like you'll need to tap out the filler with a thread. I don't know if it would stand up to that. Let us know what happens, an intriquing product for sure. Rich
|
|
Scooter Doc
   
Currently Offline
Posts: 1,936
Likes: 7
Joined: Jun 18, 2010 22:25:14 GMT -6
|
Post by sprocket on Sept 6, 2011 12:58:43 GMT -6
I have used their other product POR15 and it worked well... there are many of these types of products basically a metal/ceramic filled plastic.
I don't think it can replace aluminum tig welding in most applications in an engine but it might work, depends what you want to do with it...
|
|
|
|
Post by runningslow on Sept 6, 2011 13:01:17 GMT -6
I'll take some pictures once I've got the motor off the bike. I'm not entirely sure what I'm dealing with myself, yet.
|
|
|
|
Post by runningslow on Sept 7, 2011 7:37:20 GMT -6
Woohoo!! Looks like I'll be getting my old head back from Jake, so I should be good to go! Though, I do still want to try repairing this one, if possible, since they're so freaking rare.
I swear, my next scooter will have a more common engine!!!
|
|
|
|
Post by Bashan on Sept 7, 2011 8:15:52 GMT -6
I swear, my next scooter will have a more common engine!!! |
|
|
|
Post by runningslow on Sept 14, 2011 10:47:16 GMT -6
The new/old head should be waiting for me when I get home tonight. (Thanks jake!) Looking at my schedule, I'm thinking Saturday morning is when I'll finally start tearing into the bike. I'll try to get as many pictures as possible.
I'm going to try and reuse the head gasket, after a careful cleaning and using some Permatex Copper. Scrappy thankfully lists a QMK gasket set on their website, so should I need to go that route, I can. At least it appears that the gaskets won't be as hard to track down as a new head, heck he even has a piston & ring set.
I suppose this would also be a good time to try my hand at lapping some valves, too.
|
|
|
|
Post by runningslow on Sept 22, 2011 6:55:14 GMT -6
Well, its been a few days and I got the motor off the bike, pulled the head and got a good a good look at what happened. I have some pictures and I'll post them later.
Looks like I may have just overtightened one of the exhaust studs, because that's all that cracked. The combustion chamber and the rest of the appears to be in pretty good shape.
I'm still planning to use the old head, because frankly its in one piece and I don't have to mend anything. But, I'll try to repair the broken one as a spare.
I went ahead and ordered a new gasket set from Scrappy. The finish on the used one was wearing away and I just didn't trust it. While I was at it, I also ordered a side mount airbox to experiment with. I'd like to be able to use the space under the seat for additional storage.
I also had another little snag when it came time to pull the engine. When I tried to disconnect my oil cooler lines, I had forgetten that I completely stripped one of the fittings, and this time around I started to strip the other. So.... I made an executive decision to just cut the oil lines, with the intent to replace them with new hoses and fittings.
Once I had the motor on my workbench, I went to work with a brand new bolt extractor and actually managed to break the bolt extractor one the first fitting I tried to remove. Sheared right off. Now, I'm afraid that I may have to take it to a machine shop to get those removed.
I also think at this point is the time when I'm going to undertake some body work and repaint the scooter. Get it ready for the nice cool winter riding season down here.
|
|
|
|
Post by runningslow on Sept 26, 2011 7:23:49 GMT -6
Well, its been a few days and I got the motor off the bike, pulled the head and got a good a good look at what happened. I have some pictures and I'll post them later. Looks like I may have just overtightened one of the exhaust studs, because that's all that cracked. The combustion chamber and the rest of the appears to be in pretty good shape. I'm still planning to use the old head, because frankly its in one piece and I don't have to mend anything. But, I'll try to repair the broken one as a spare. I went ahead and ordered a new gasket set from Scrappy. The finish on the used one was wearing away and I just didn't trust it. While I was at it, I also ordered a side mount airbox to experiment with. I'd like to be able to use the space under the seat for additional storage. I also had another little snag when it came time to pull the engine. When I tried to disconnect my oil cooler lines, I had forgetten that I completely stripped one of the fittings, and this time around I started to strip the other. So.... I made an executive decision to just cut the oil lines, with the intent to replace them with new hoses and fittings. Once I had the motor on my workbench, I went to work with a brand new bolt extractor and actually managed to break the bolt extractor one the first fitting I tried to remove. Sheared right off. Now, I'm afraid that I may have to take it to a machine shop to get those removed. I also think at this point is the time when I'm going to undertake some body work and repaint the scooter. Get it ready for the nice cool winter riding season down here. The gasket set I ordered didn't appear to have the correct head gasket. The stud spacing was wrong. The side mount airbox will NOT fit on my scooter. In fact, I don't think it'll fit any long case motor. That being said, I did finally attempt to mount my K&N style filter and got it fit nicely using a bit of the snorkel from my original airbox. I'll take a picture soon. I may actually try Rich's tupperware housing, if I can find a container that I like. I managed to extract the oil line banjo bolts from the engine block by cutting the heads with my Dremel so that I could get my vice grips on them. After heating with a torch, I managed to get them to break loose. However... that leads me to a new point of discussion. I don't know how much anyone knows how the oil flows in this motor, but do you think there would be any adverse effects to plugging those holes until I can find suitable replacement fittings?? Lowes sells auto drain plugs with the correct thread and I'm planning to get a pair to use. I can't imagine it would be any worse than running a standard QMJ motor with a BBK, but I'm not sure if it would lead to oil flow problems. The thread in the crankcase is a M12x1.25. I'm having trouble finding a hose barb with that thread. I've managed to find some banjo bolts from specialty shops, but not the banjo fitting. I'd love to find a banjo fitting with a hose barb, otherwise I may to get some new hoses made with the proper fittings. Meh. |
|
|
|
Post by runningslow on Oct 4, 2011 17:48:17 GMT -6
Here are the long awaited pictures. This is what started the whole episode: 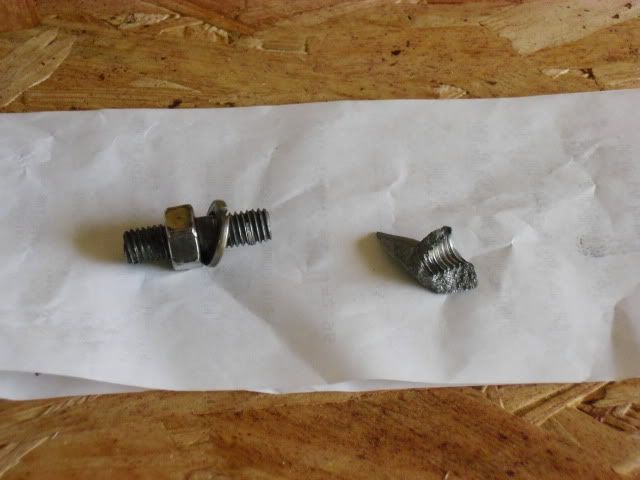 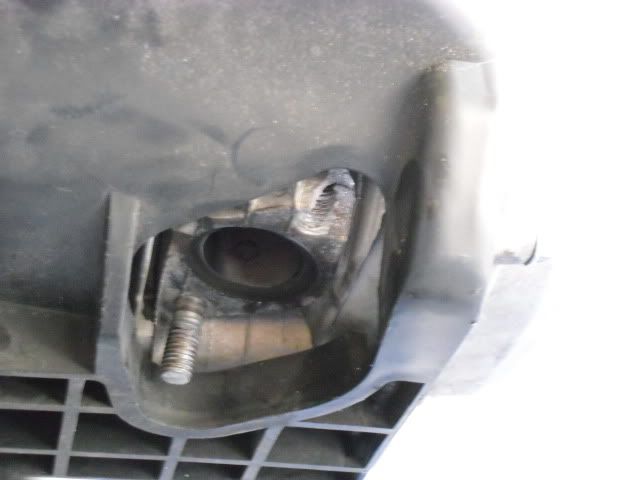 A better look after I pulled the head: 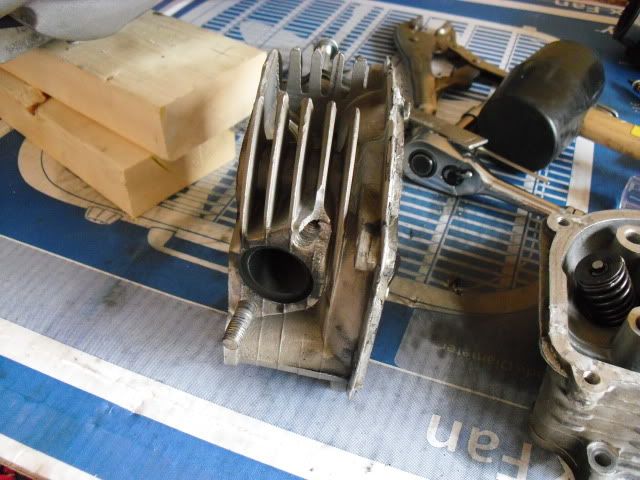 What I've decided to do with my air filter, after the side airbox didn't pan out. Its using a bit of the original snorkel to the factory airbox. There was a glued joint that I was able to seperate in the rubber hose, so I can easily reverse this if I don't like it. I'm probably going to put a container around it, like Rich did: 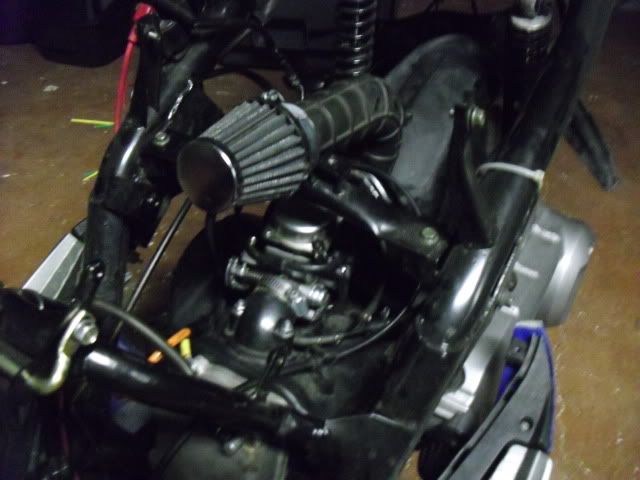 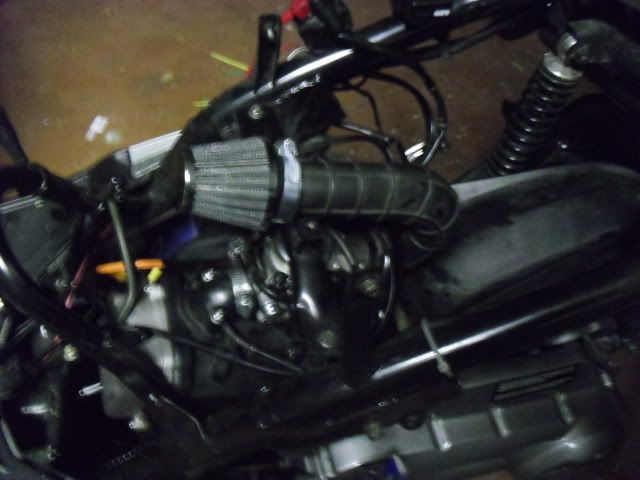 |
|
|
|
Post by runningslow on Oct 20, 2011 13:02:15 GMT -6
*** Just to play around with the seldom used list function. *** Checklist for my weekend: - Double check timing
- Install new battery
- Reinstall old exhaust (as a temporary fix)
- Try starting!!
- Install catch can
- Begin body work...
Then, for the hell of it: - Dissect the short case motor that I have sitting around to satisfy my own curiousity.
- Report back with my results, if I think anybody would care.
Also, not scooter related: - Install new front shocks in my Ranger.
Perhaps not in that order. |
|
Scooter Doc
   
Currently Offline
Posts: 1,936
Likes: 7
Joined: Jun 18, 2010 22:25:14 GMT -6
|
Post by sprocket on Oct 20, 2011 14:35:18 GMT -6
running slow... those snorkel tubes are a problem... they split. On my scooter I just ran a length of vacuum cleaner hose, it is high quality vinyl with wire running in it... also you need to put a bracket on the front of the carb, or you will start to flex and crack the intake elbow when the throttle pulls...
|
|
|
|
Post by runningslow on Oct 21, 2011 13:05:09 GMT -6
running slow... those snorkel tubes are a problem... they split. On my scooter I just ran a length of vacuum cleaner hose, it is high quality vinyl with wire running in it... also you need to put a bracket on the front of the carb, or you will start to flex and crack the intake elbow when the throttle pulls... Yeah, I'm not entirely sure I'll stick with that setup. Until I get the bike running, I may revert to the original airbox. And as far as my checklist goes... I think the Ranger is getting more attention this weekend. ***WARNING*** Non-Scooter related tangent below: I'm probably going to head over to a junkyard in the morning to find a pair of lower mileage Ranger front coil springs and a pair of Explorer leaf springs. My Ranger has the infamous "Ranger Lean" and I want to try and fix that, while I'm installing the new shocks. The "Ranger Lean," for those that don't know, is a common problem with older Rangers that the drivers side springs begin to sag, supposedly due to the gas tank, driver and battery all being on that side. Since this truck has somewhere in the neighborhood of 240K miles, it qualifies as "older." |
|
|
|
Post by Bashan on Oct 22, 2011 5:23:48 GMT -6
I suspect the oil cooling system on that engine doesn't do that much. I just can't believe the Chinese went through a complete revamping of the oil pump on that engine. I'd try it without the system and use a probe thermometer after a 30 minute ride and see what the temp is, if it's over 250 then you might have to get the system back online. I don't think there's enough pressure involved with these systems to have to use banjo fittings. I used hose barb and clamp on an electric pump system and it doesn't leak a bit. I know it's not ideal but it's not brake lines on an SUV either. Anyway, I had to use a auto meter adapter to fit in the M12 X 1.25 female on my crankcase (click image):
Then I used a NPT to hose barb (click image):
And there's always Fitting and Adapters.com. I'm not saying use any of these guys I just wanted you to know this stuff is out there. Good luck with the Ranger. Rich
|
|
|
|
Post by runningslow on Oct 22, 2011 6:00:23 GMT -6
That's the route I'm planning to go. I've talked to a few fitting suppliers, one of them had recommend using a union with the 12x1.25 thread on one end, then use a barb with a female thread. I'm going to try running without first. I've actually already installed a pair of plugs into the holes in the crankcase. Looks like it'll cost me about $40 to get all the fittings I need.
|
|
|
|
Post by runningslow on Oct 26, 2011 6:57:06 GMT -6
*** Just to play around with the seldom used list function. *** Checklist for my weekend: - Double check timing
- Install new battery
- Reinstall old exhaust (as a temporary fix)
- Try starting!!
- Install catch can
- Begin body work...
Then, for the hell of it: - Dissect the short case motor that I have sitting around to satisfy my own curiousity.
- Report back with my results, if I think anybody would care.
Also, not scooter related: - Install new front shocks in my Ranger.
Perhaps not in that order. An update on the checklist: - Double check timing
- Install new battery
- Reinstall old exhaust (as a temporary fix)
- Try starting!!
- Install catch can
- Begin body work...
Reinstall original airbox. Added to the list, so I could cross it off. I decided to go ahead with this, at least until I have the scooter running. I am going to need to order a new paper filter though.
-
Dissect the short case motor that I have sitting around to satisfy my own curiousity. I had some trouble removing the clutch nut, even with my new Harbor Freight electric impact. So, I cut it off with my Dremel. I was looking to see what gears it had. I also checked to see what gears my old 161QMK motor had.
Report back with my results, if I think anybody would care. As it turns out, both motors had 13/40 gears. I took apart my old QMK, assuming it would have the same gears as my newer QML. That being said, I think I'm going to order myself a set 15/38 gears for the QML after everything else has been squared away.
Install new front shocks in my Ranger. This went fine and was much easier than I anticipated. However, the trip to the junkyard was not fruitful. For whatever reason, this particular junkyard decided that all the trucks in the yard must be sitting on the leaf springs, thus making it impossible to safely remove a leaf spring. So, I was unable to do anything for the "Ranger Lean."
|
|

