Senior Clinician
  
Currently Offline
Posts: 103  Likes: 1
Joined: Mar 26, 2014 11:49:43 GMT -6
|
Post by sabotendar on Mar 30, 2014 19:40:24 GMT -6
Hey if JR says he knows what he talk ;-)
|
|
Senior Clinician
  
Currently Offline
Posts: 103  Likes: 1
Joined: Mar 26, 2014 11:49:43 GMT -6
|
Post by sabotendar on Mar 30, 2014 15:55:57 GMT -6
OK guys I've got it all figured out. First of all I just put in a image resize plugin and you will see all photos reduced in size, this helps the page load faster especially for slower computers. Now if you put your cursor/hand over the photo and click it will go back to the original size, nice when you need to view a diagram in full view.
OK point blank this "is" a Hyosung scooter and here is the service manual for it:
www.jr-richscooterdoc.com/Hyosung_SF50_prima_service_manual.pdf
Second of all this is "not" a Dc type CDI but a AC type, here is the wiring diagram:
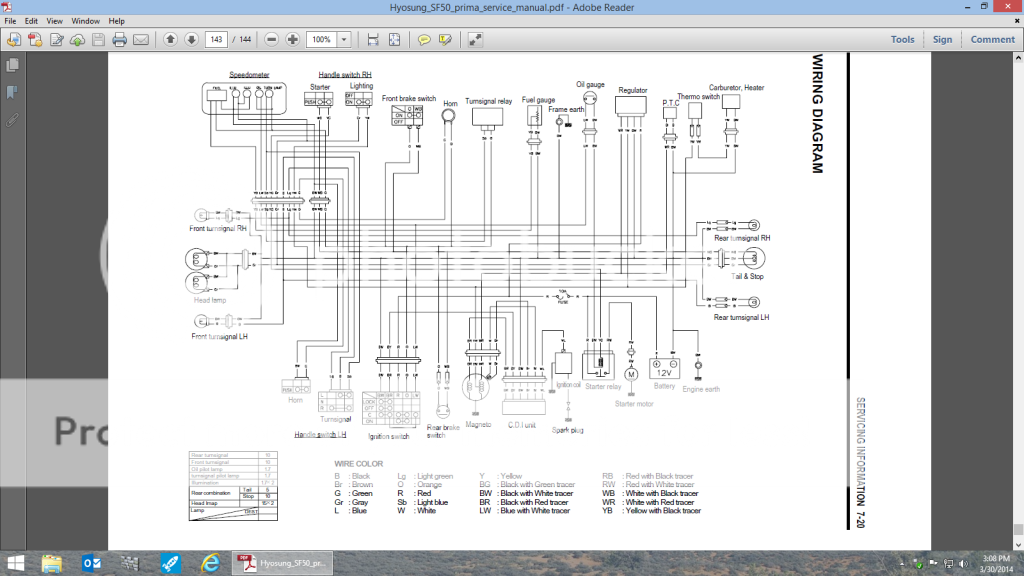
CDI = 6-wire and the colors and where they go are as follows and this scooter "does" not have a engine kill switch on the handle bars, it is stopped through ignition key switch.
B/W (black/white) = ground B/R (black/red) = AC feed from stator to CDI Br (brown) = pulse coil W (white) = pulse coil B/Y (black/yellow) = CDI kill wire from key switch W/L (white/blue) = feed to spark plug coil
Here is the CDI pin layout and color scheme from the manual:

Also in his photo he posted the R/R and it is a 4-wire version and the colors are:
White/red = AC from stator to R/R Yellow/White = Ac from stator to R/R Red = DC charging voltage to battery Black/white = ground.
Now if he is to convert it to another CDI got to have a 6-wire type and know the pin layout on it also. Now here is something we need to know, do we have AC from the stator feed wire (B/R) and on the pulse coil wire and yes it is a 2-wire pulse coil version?
JR
I Love you JR! Now i can remake all the wires from this mess, but how to change for anoter CDI? A modern one? I have bad news i open the carb again and see that jet he is realy clogged so i "fabric" a tool to reach until he but, for my deception, he is outworn and can remove that someone before me "plays" with no limits with that carb i almost loose my hope about this carb guys and to be honest i have to adapt another model sold here in Brazil any sugestions?  |
|
Senior Clinician
  
Currently Offline
Posts: 103  Likes: 1
Joined: Mar 26, 2014 11:49:43 GMT -6
|
Post by sabotendar on Mar 30, 2014 14:49:39 GMT -6
I saw your VIDEO, now after doing that TAKE out the SPARK PLUG and see if it is WET from FUEL or DRY. IF DRY then no gas is getting into the motor IF WET then the SPARK PLUG IS NOT FIRING. If think your not getting any gas THAT JET that is in the hole dip THAT IS your PILOT JET which is the one that FEEDS FUEL for starting and IDLING and about up to 20mph. SO if at all possible get that JET OUT so you can CLEAN IT and THE PASSAGE as well. What you can try is GET A SPRAY CAN OF CARB CLEANER they come with a THIN LONG STRAW and STICK it in that hole in the PILOT JET HOLE ITSELF and SPRAY and see if you see SPRAY COMING OUT inside the carb. If it does then it is clear if not it is CLOGGED. Alleyoop Ok i will remove the carb. again and find a way to remove that jet and about that spark i remove the and is dry so no gas on there the gas dont came out from carb i will see again. |
|
Senior Clinician
  
Currently Offline
Posts: 103  Likes: 1
Joined: Mar 26, 2014 11:49:43 GMT -6
|
Post by sabotendar on Mar 30, 2014 13:52:11 GMT -6
AHHA, so that bigger square box IS the CDI and you have a 4 wire R/R. That is why PICTURES are worth a thousand words. Now that carb WOW!! in the picture WHERE IS The MAIN JET it looks like there is just a HOLE. I think you need a new CARB that thing looks like it has seen better days. Alleyoop In the open hole IS THAT WHERE THE NEEDLE your holding in your hands falls into?  Sorry the hole without a jet i remove to clean this is because he is ausent on pic the other jet i cannot have a screw to remove besides he look faulty but i can't remove this guy. Did you see that video i send? |
|
Senior Clinician
  
Currently Offline
Posts: 103  Likes: 1
Joined: Mar 26, 2014 11:49:43 GMT -6
|
Post by sabotendar on Mar 30, 2014 8:59:45 GMT -6
I have a video for you about the scoot is when i turn on. Click here --> My scooter
The air filter is hollow (nothing inside) so i place this i try to buy something to place inside of old one but the selers dont have nothing so i have to buy this filter. 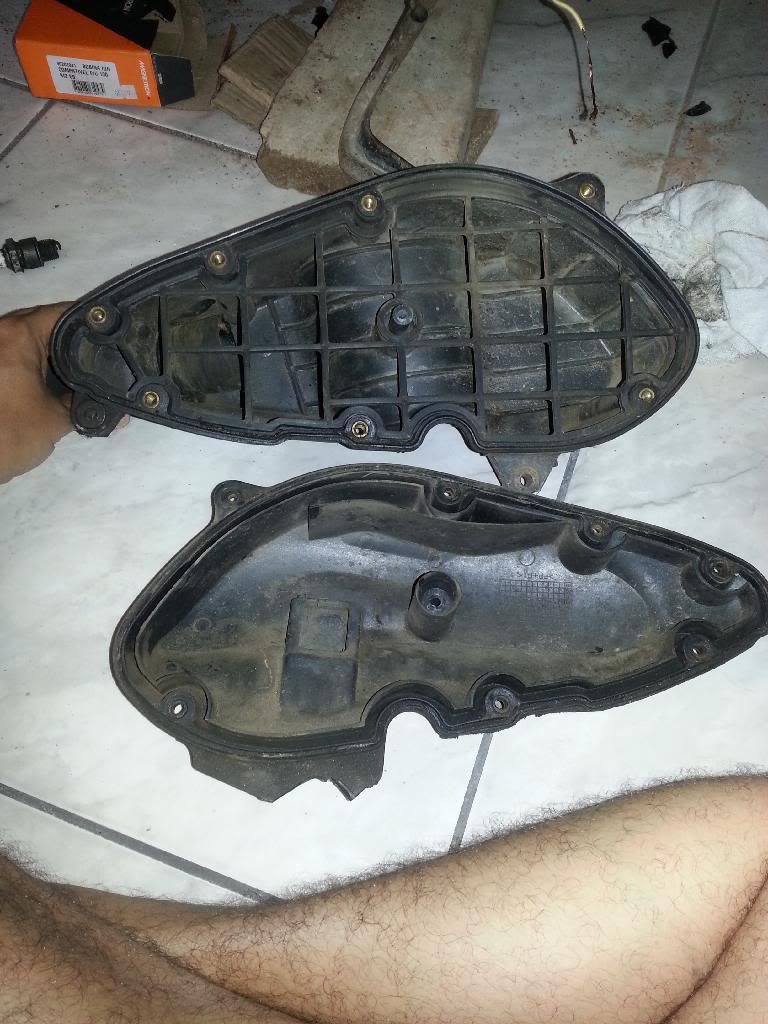 my air filter and my hairy legs! my air filter and my hairy legs!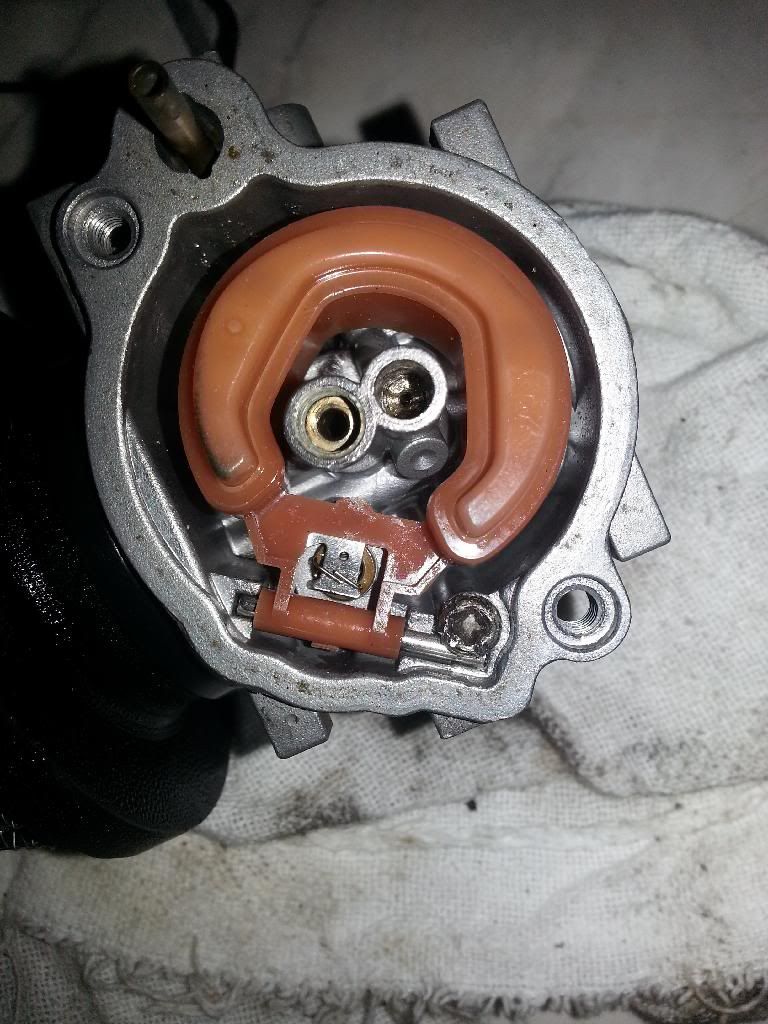 inside my carb.  Needle of acelerator |
|
Senior Clinician
  
Currently Offline
Posts: 103  Likes: 1
Joined: Mar 26, 2014 11:49:43 GMT -6
|
Post by sabotendar on Mar 30, 2014 8:06:12 GMT -6
Hey this is good im wait here!
Now I will tell about "my sad story" this scoot I got from a friend, he told me that she only worked drowned and taught me how connected I had to stifle the duct air of the carburetor and turn the bike and it worked well during 2 months until I buy new fuel she walked over one day and I hung up, on the other day when I tried to turn on she no longer worked anymore, even with a full tank. this 2 months i change the baterry and have looking for guy to paint and clean her.
|
|
Senior Clinician
  
Currently Offline
Posts: 103  Likes: 1
Joined: Mar 26, 2014 11:49:43 GMT -6
|
Post by sabotendar on Mar 30, 2014 7:15:37 GMT -6
SABA, look for another BOX like the CDI BOX one is your CDI and one is the Regulator/Rectifier to charge the battery and take a picture of it and the wires going in and out. Don't worry the guys will figure how to replace the CDI. Just need to make sure that pic you put it IS THE CDI, because JR thinks it is the R/R and NOT the CDI. Alleyoop Yeah! i find it here the picture: 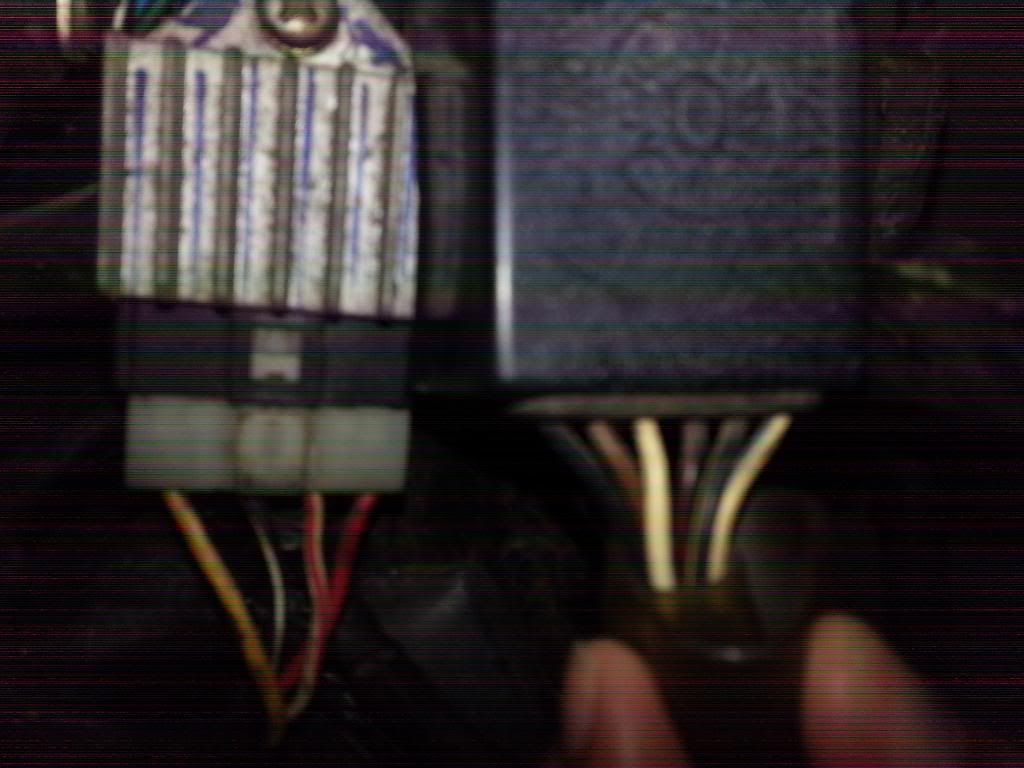  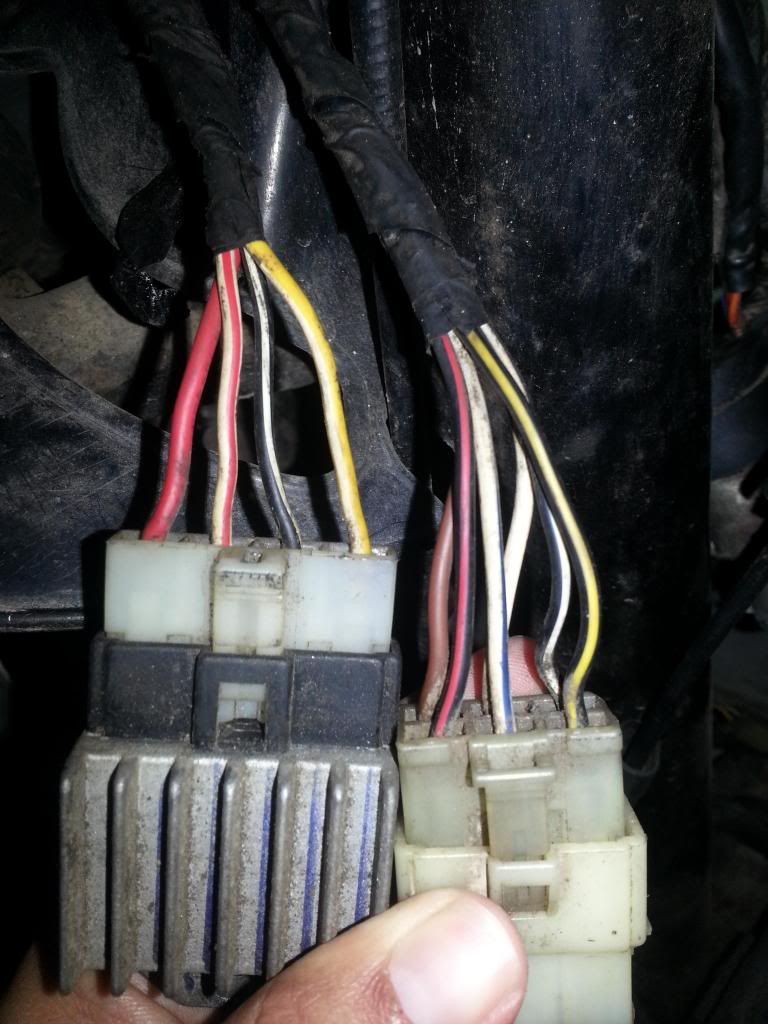 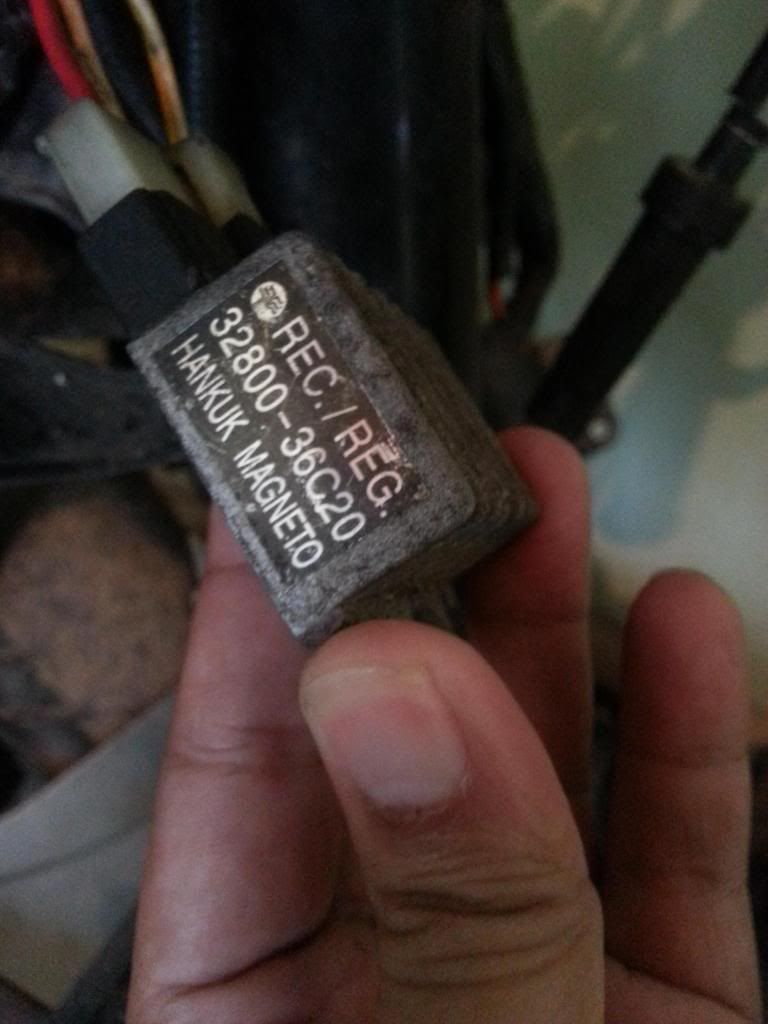 Yes I have "played" with the screws of the carb and there is a setting that the engine seems to work but nothing happens and as it loses strength after i kick the crank it works and for a matter of seconds and stops again. Just to const the new battery discharged after trying to use inumerous times the automatic start so i have to charge again. Ok! I count on you guys  |
|
Senior Clinician
  
Currently Offline
Posts: 103  Likes: 1
Joined: Mar 26, 2014 11:49:43 GMT -6
|
Post by sabotendar on Mar 30, 2014 6:36:34 GMT -6
Helo guys im here again i will post some photos soon.
|
|
Senior Clinician
  
Currently Offline
Posts: 103  Likes: 1
Joined: Mar 26, 2014 11:49:43 GMT -6
|
Post by sabotendar on Mar 29, 2014 21:11:39 GMT -6
Hey guys i have to go to bed here in my country is 00:02 and the pics i post before was with my mother's PC she lives here at side of my home my neighbor and i talk to you with my phone but is horrible to post photos with this so soon i wakeup i will post the photos about the retificator and CDI.
|
|
Senior Clinician
  
Currently Offline
Posts: 103  Likes: 1
Joined: Mar 26, 2014 11:49:43 GMT -6
|
Post by sabotendar on Mar 29, 2014 20:28:59 GMT -6
Yeah, I see what you're saying, here's the macro...I'll see if I can zoom in on that part, it's definitely DC as Alley nailed. So no electronic guru eh big fella..? Yeah, har.
I'll need a few minutes. Hey man you find a clue? This is good but how adapt to a new CDI? This is the question.... |
|
Senior Clinician
  
Currently Offline
Posts: 103  Likes: 1
Joined: Mar 26, 2014 11:49:43 GMT -6
|
Post by sabotendar on Mar 29, 2014 20:26:44 GMT -6
Ok You have a Fuel pump the fuel has to be pumped up to the carb. The fuel hose coming from the tank has a sharp curve going to the pump. Take that and put it OVER the bar so it has a nice curve to the pump. I showed it with the YELLOW CURVE. But everything else looks good. ON the ENRICHER TAPE the place where it is bar, if it touchs metal it will ground out. Alleyoop  The Enricher wire is BARE TAPE IT UP:  I tape there but man i dont think the enricher is working well because i not read a 12v on his wires and the bolt holds he in the carb. is rusty dificult to remove (a Philips hole), one more thing if i remove the carb. and replace for a compatible new one whitout enricher i have some kind of problem? To be honest all the parts for this scoot is a pain in head to find here i see a carb. similar and he was a honda biz 100 but all the commands and ducts are on tire side and he was little biger, the admission colector has a hole biger than i have on this motor anyway i have some hope whit this carb or i have to invest on a new compatible one? |
|
Senior Clinician
  
Currently Offline
Posts: 103  Likes: 1
Joined: Mar 26, 2014 11:49:43 GMT -6
|
Post by sabotendar on Mar 29, 2014 19:30:51 GMT -6
OK, Jack, I'll go look at that. OK guys, is that a vacuum fuel pump? And Sabo, you do not have an electronic throttle control, it is manual via a throttle cable. That is an auto coke...I think...that is one weird arse system bud. We'll get there. Don't worry, we'll get this together by your wife's birthday. Did he tell you guy's that? We're doing this for his present to his wife in a month...it's a surprise too, very sweet! She's not reading this is she Sabo? NO? Well then.... winky winky winky winky Ha! She is in my back now but she not understand what i write ;-)...thanks for the help guys. |
|
Senior Clinician
  
Currently Offline
Posts: 103  Likes: 1
Joined: Mar 26, 2014 11:49:43 GMT -6
|
Post by sabotendar on Mar 29, 2014 17:56:25 GMT -6
Do you have a PETCOCK on it or just a fuel hose from the gas tank to the Fuel Filter and to the carb? If you have a petcock on it it needs VACUUM to open and allow fuel to flow to the carb and fill it up. Can you take some pictures of the fuel hose from the tank and all the way to the carb. Alleyoop Here some more pics and a "panoramic" shot for Alleyoop don´t be afraid of this mess on wires i will remake when the scoot work  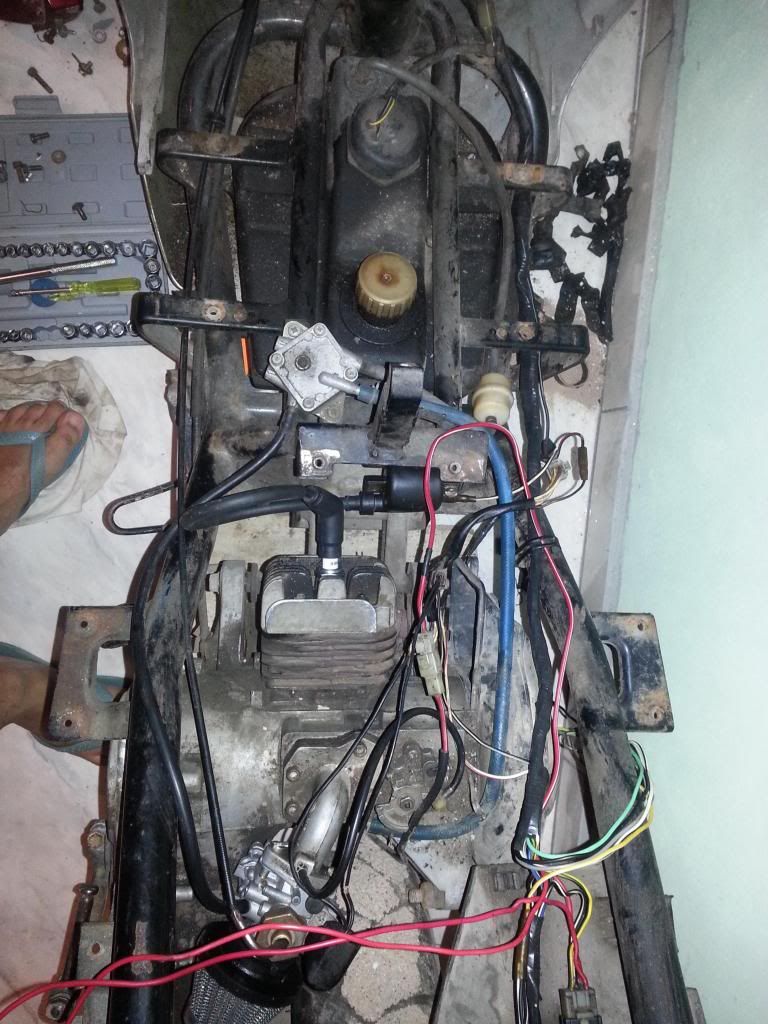 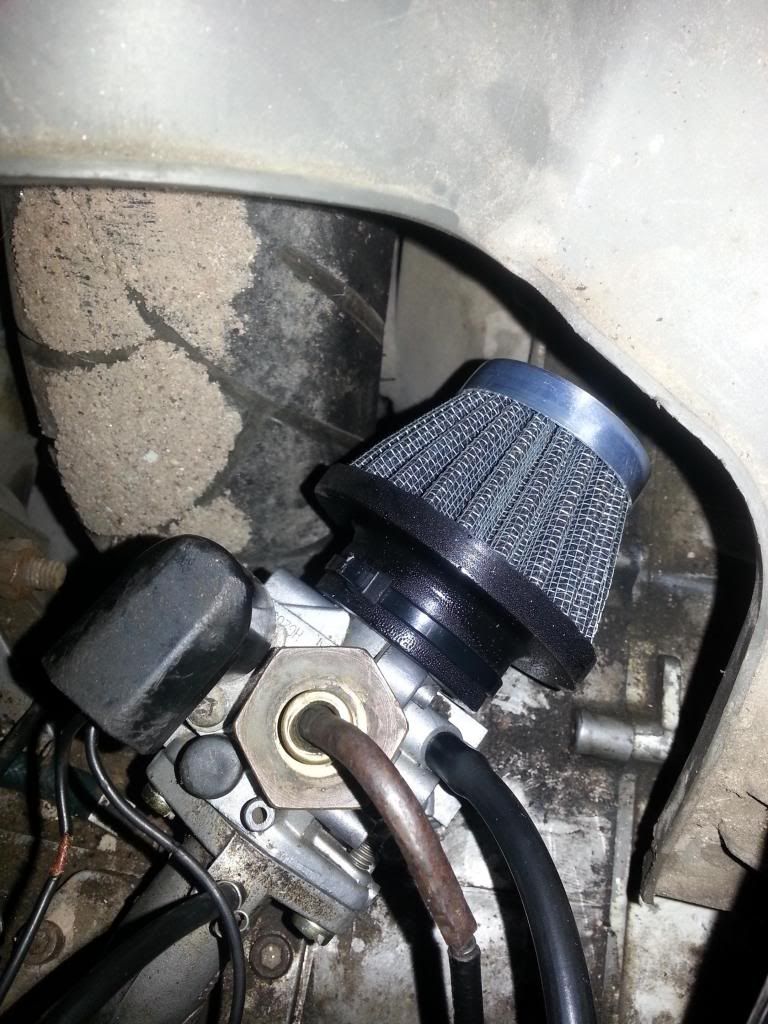 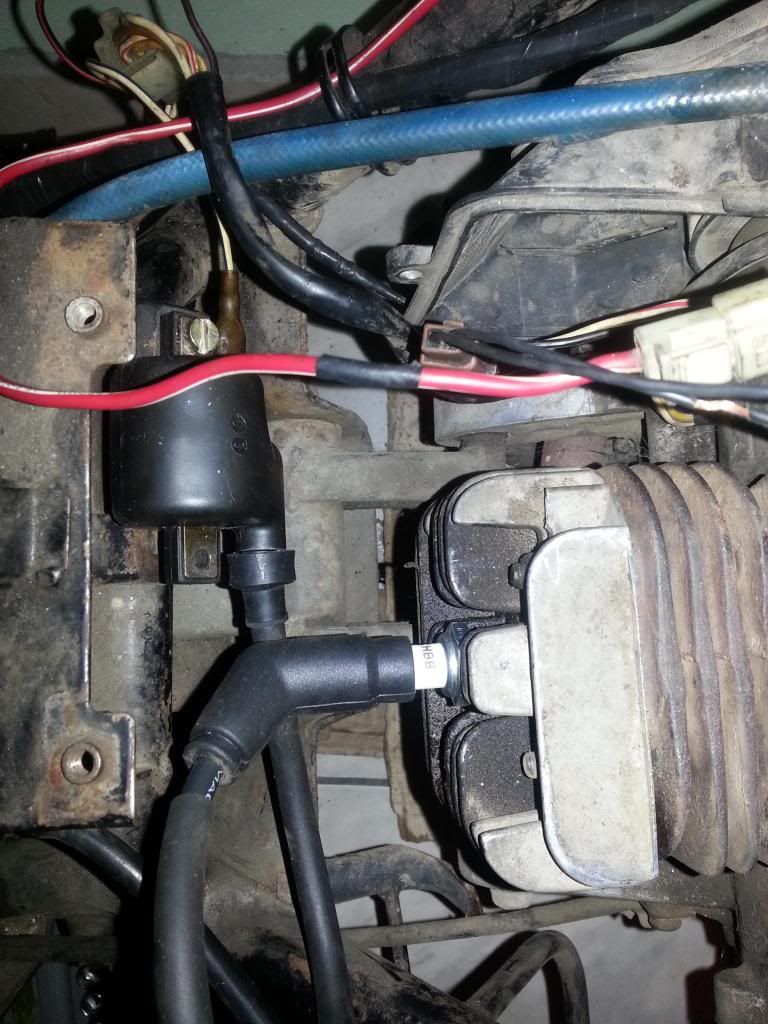 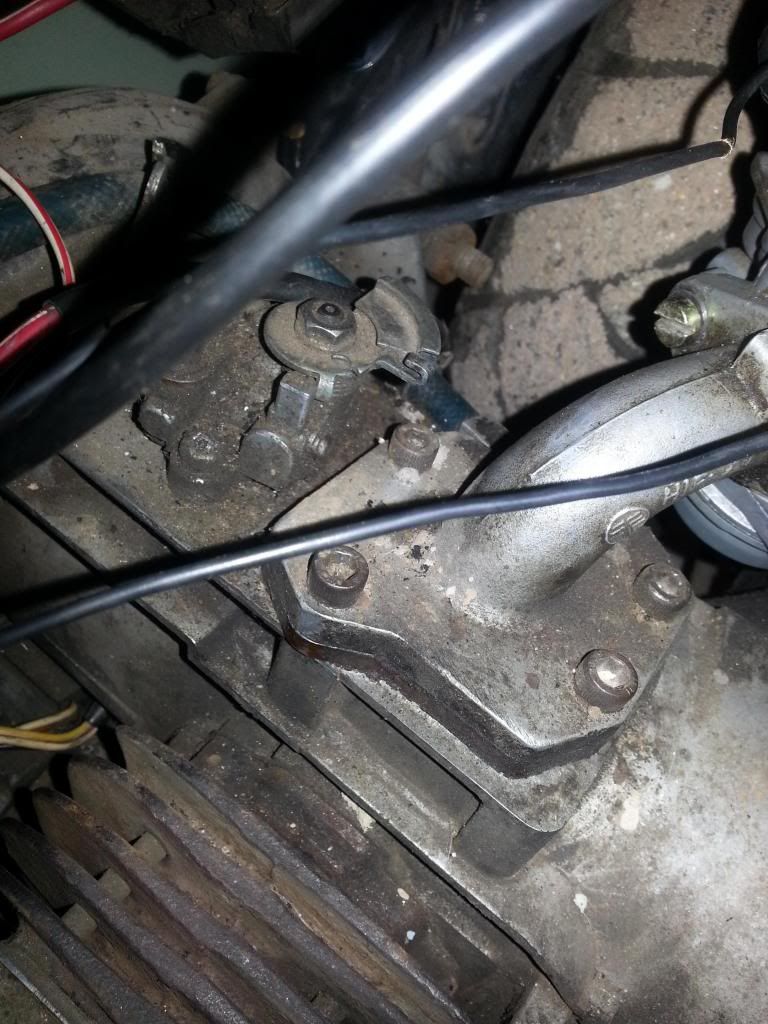 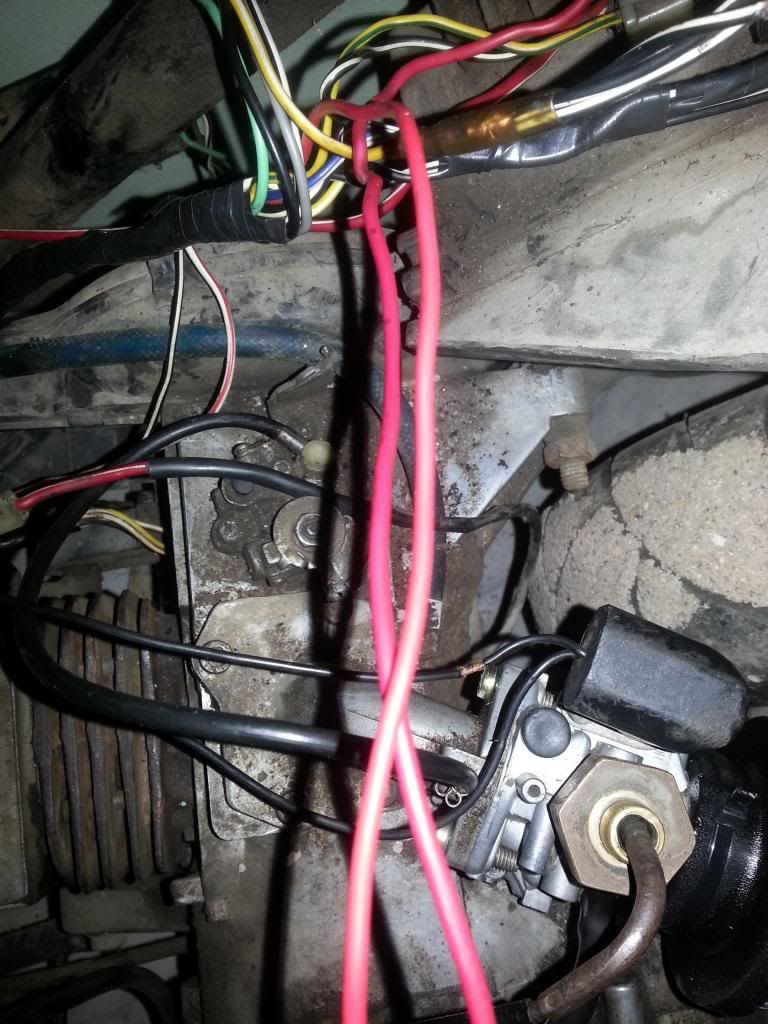 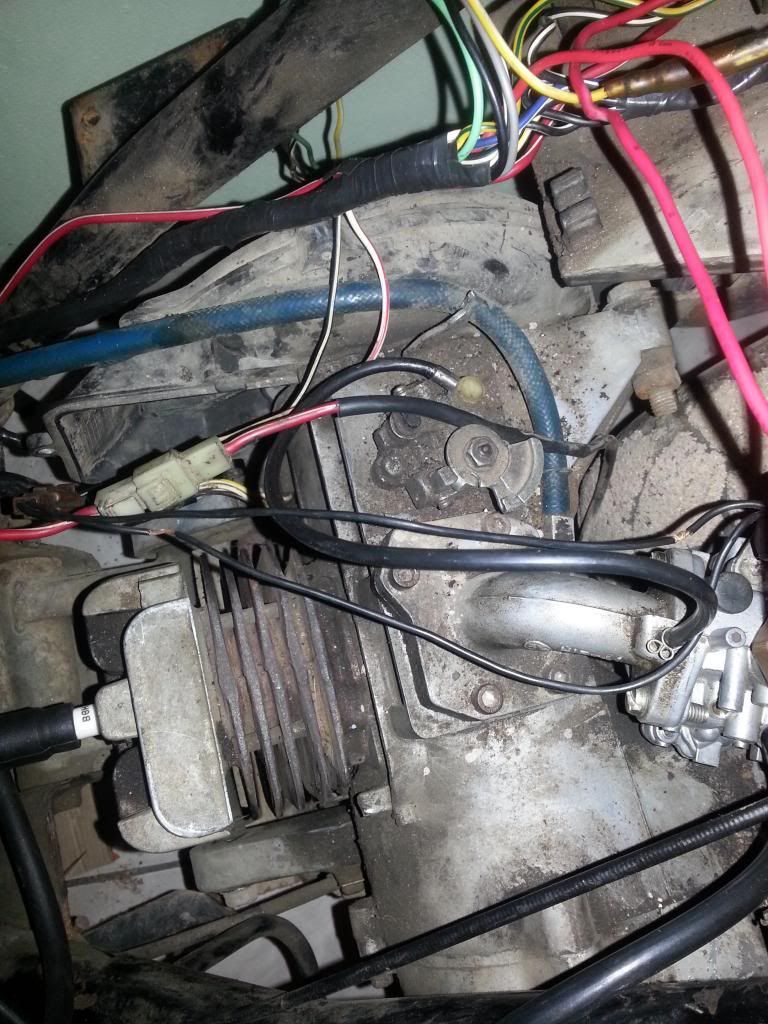 |
|
Senior Clinician
  
Currently Offline
Posts: 103  Likes: 1
Joined: Mar 26, 2014 11:49:43 GMT -6
|
Post by sabotendar on Mar 29, 2014 17:14:10 GMT -6
Ok here the news: I do what Alley and Jhon says and test Black/Yellow wire turn on the key and start the engine and guess what? 12.5V~16.0V on that wire and multimeter set to DC so i test that fuse and he is good but the wires from fuse do not connect with CDI i not able to find continuit on any wire came from CDI with the key on or off position. On the great google i find a tutorial on how to test the ignition coil and more surprise! The ign. coil is broken too so i replace with one from Honda Biz 100 and test again now i have spark (a yellow spark) came from the new ign. coil so i think that damn CDI is good like lanternscooter say. All the tests i make with my old and broken carburator here some pics above, ok the engine has a strong smell of gas so i think the engine may be drowned by the faulty carburator, i open the air filter and guess what? NO FILTER inside this mess is become interesting ;-) So about the CDI, i have litle hope he has like the JOG 50´s but is the same problem to find a new one here in Brazil and the colors of wires has diferent. Here the link for one of that: produto.mercadolivre.com.br/MLB-546065648-m151-peca-yamaha-cy-50-jog-e-bws-cdi-original-_JM I can not be able to open the fan case because i arrive too late on my home but if your guys want i will open today when i come back to home. I not mention one thing! This scoot IS a Kasinski Prima 50cc here in Brazil but on the CVT case is marked whit HYOSUNG this helps whit anything? Here some pics:  "Maybe" a faulty carburator?  I open all the pices of he and clean but nothing happens here is the picture he after the cleanup process. 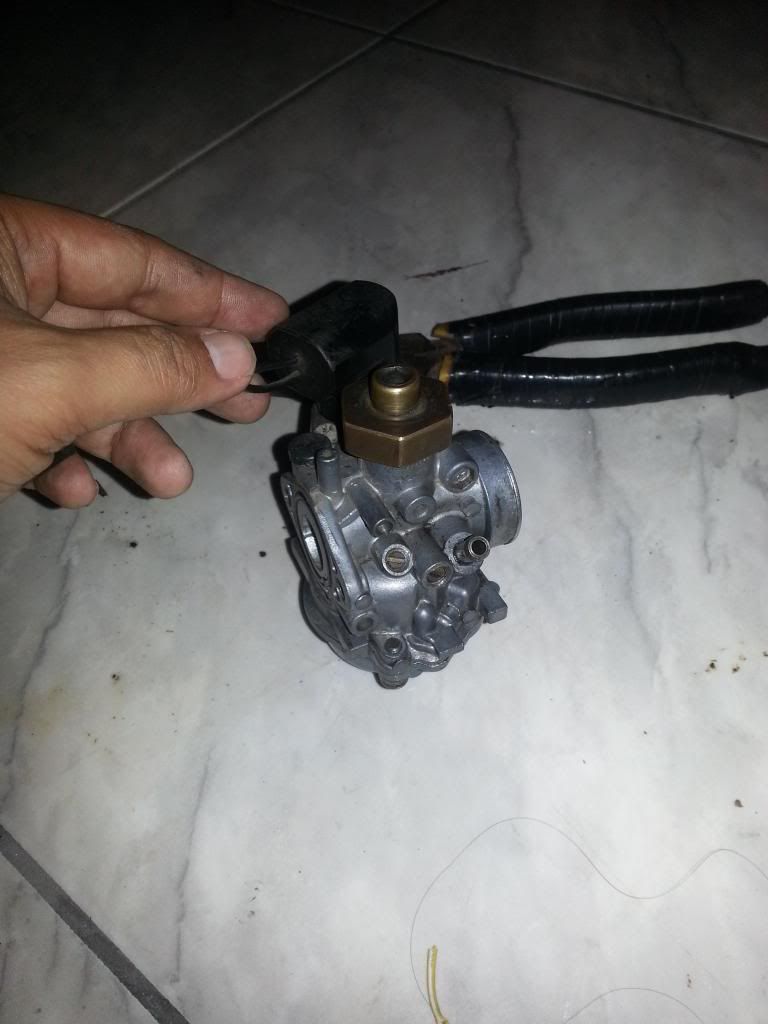 This is the faulty ign. coil and a faul spark plug too. 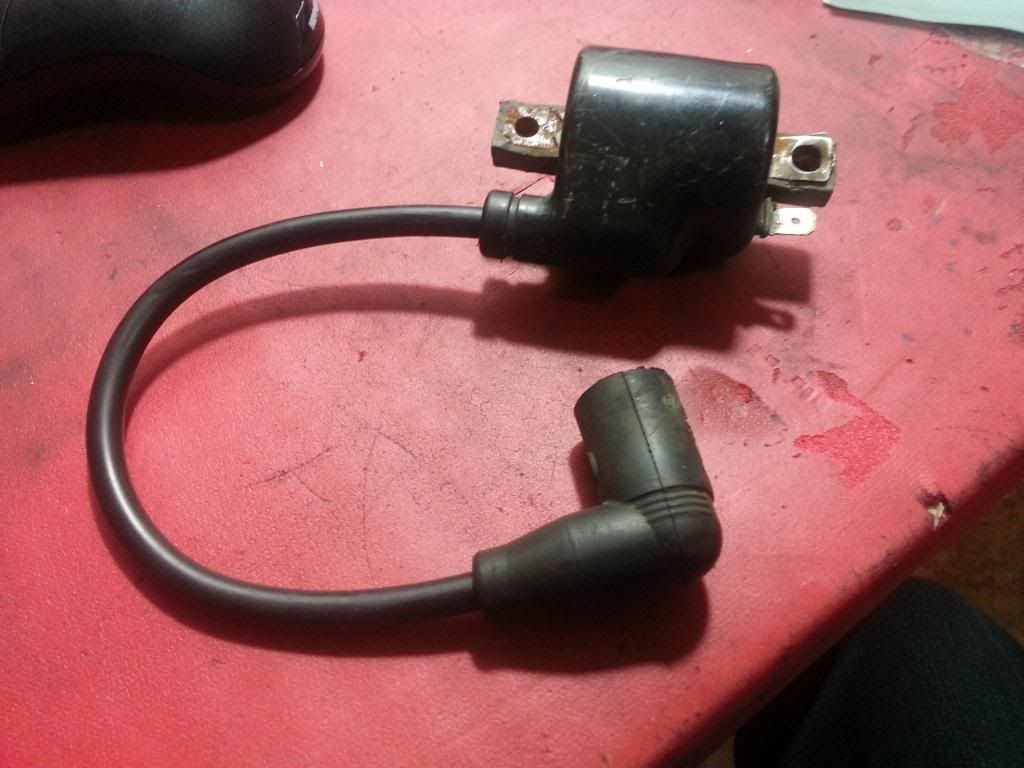 Just to complement: i put A new NGK spark, a new Ign. Coil and and a new battery but i want to change the CDI for a modern one anyway... Hey you are a funny man but my comunication with you guys is limited to my work, because my home PC is broken this end of week i will fix this :-) Today i will stay here until 16:00 PM. Guys do not now what to say to you about all support and antention that you give me on this journey...so i like say thanks one more time S2 They are a dime a dozen on Ebay. The problem here in Brasil is the imported products when he arrives here the price i pay for he will be sixty or seventy more of the price sold in USA. This is the politics of my beaultifull country. |
|
Senior Clinician
  
Currently Offline
Posts: 103  Likes: 1
Joined: Mar 26, 2014 11:49:43 GMT -6
|
Post by sabotendar on Mar 29, 2014 17:07:20 GMT -6
Here is your carb: Alleyoop To adjust the carb start the motor and then Turn the FUEL RATIO SCREW CLOCKWISE 1/4 at a time to cut off some fuel. What you want is to get the HIGHEST IDLE when you adjust that screw. IF after you adjust it to get the highest idle it is idleing to HIGH then turn the IDLE SPEED screw COUNTER CLOCKWISE to lower the IDLE.  This IS the great problem the motor not start for nothing in this world the gás tank is full and some times apear that motor will start but dont the fuel reach on the carburador but nothing before this i put a new filter and nothing. Hey what happens if i shut off the enricher? |
|

