Article on my 3d printer
by: glavey - Aug 28, 2014 13:11:00 GMT -6
icedscooters and kiewie like this
Post by glavey on Aug 28, 2014 13:11:00 GMT -6
I was asked by richardv to make a write-up/article on my 3d printer, so here it goes!
Do please keep in mind that I'm not very good at organizing my thoughts or turning ideas into words. I may (will) jump around on subjects, but I'll try my best to keep everything legible.
I guess I'll start by telling you what I have, what it is, and what it does. I have a Printrbot Jr V1

which is discontinued. It is a FDM; fused deposition modeler. From Wikipedia:
"Fused deposition modeling (FDM) is an additive manufacturing technology commonly used for modeling, prototyping, and production applications.
FDM works on an "additive" principle by laying down material in layers; a plastic filament or metal wire is unwound from a coil and supplies material to produce a part."
What it does: basically, the printer prints a single layer on plastic at a time and then prints another layer on top of that previous layer, and continues to do so until the object being printed is finished.
I'm going to go all over the place now, explaining various parts related to the printer before I get to the actual work flow from idea to tangible object.
Most 3d printers use nema stepper motors to control the x,y,z, and e axes (e in this case stands for extruder). My printer uses either nema 14 or 17 motors; I forget which one and I'm too lazy to search and find out.
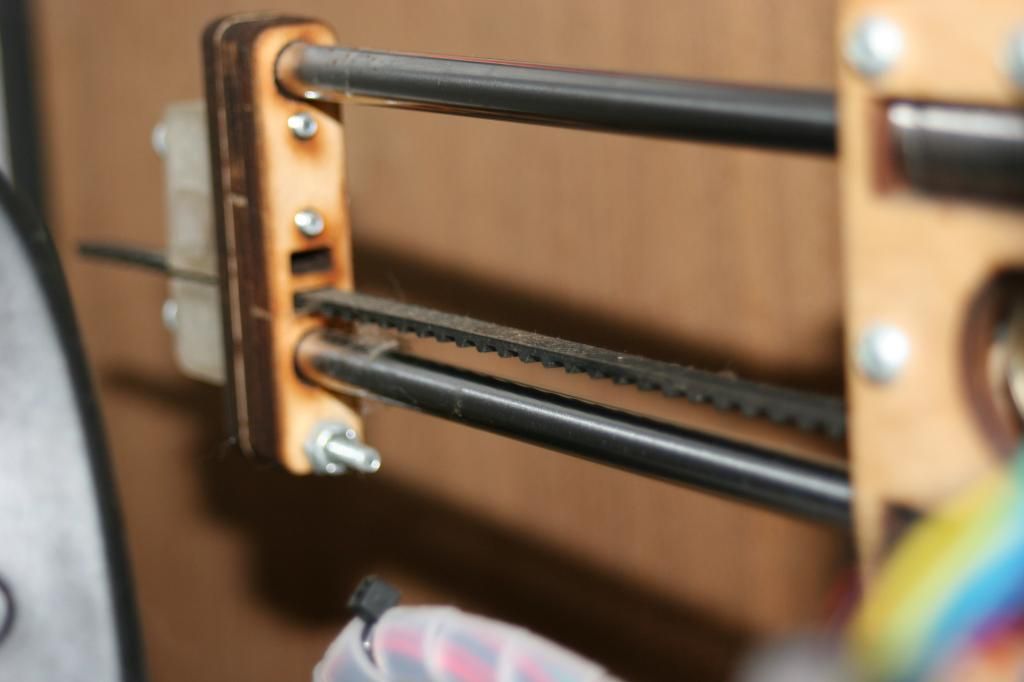
To control the x and y axes, the printer uses XL type belts (GT2 type belts are much more suited for linear actuation as they have more teeth per inch and much less backlash, and are in fact a very popular upgrade for any printer that uses XL belts).
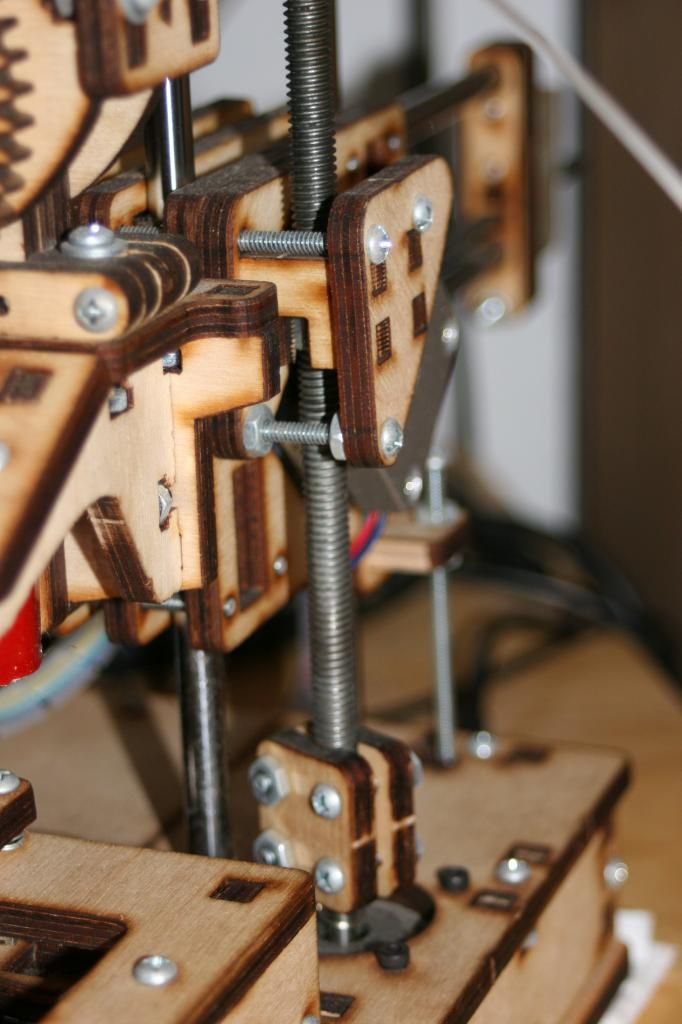
For the z axis there is, in my case, a single stepper motor that is slightly loosely attached to a threaded rod (I don't know the thread type, just that it is in inches) which, when rotated, moves a nut which is attached to the upper portion of the printer up and down. Threaded rods really aren't make for this type of use, It would be much better to use an acme lead rod, which is designed for linear actuation and movement and is, again, a popular upgrade for printers that have threaded rods.
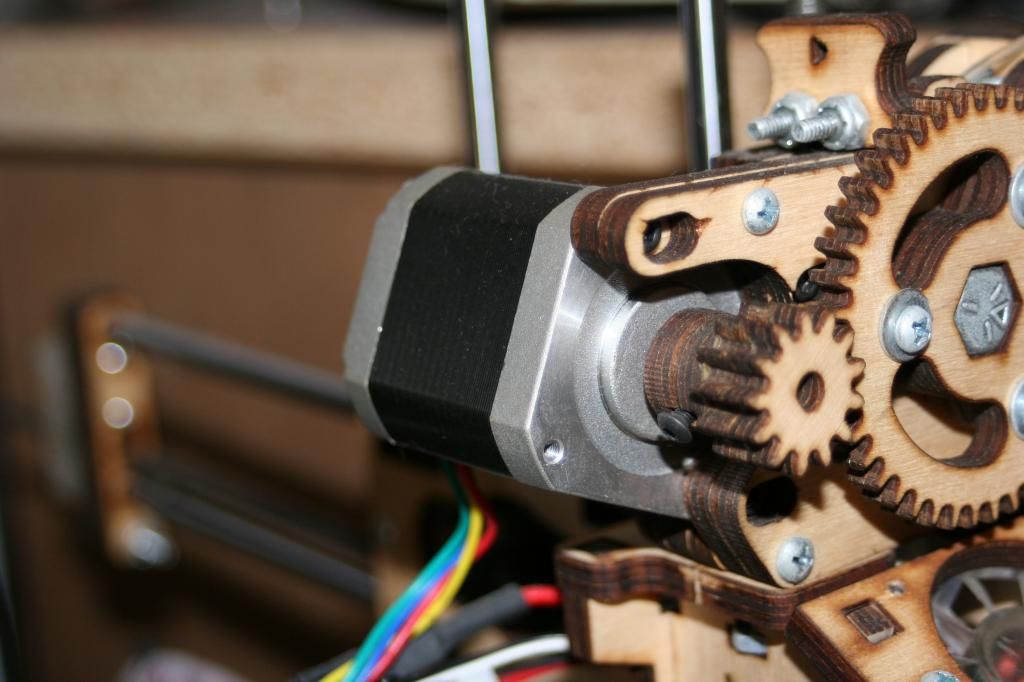
Controlling the extrusion is a stepper motor mounted on the end of the y axis that has external gear reductions.
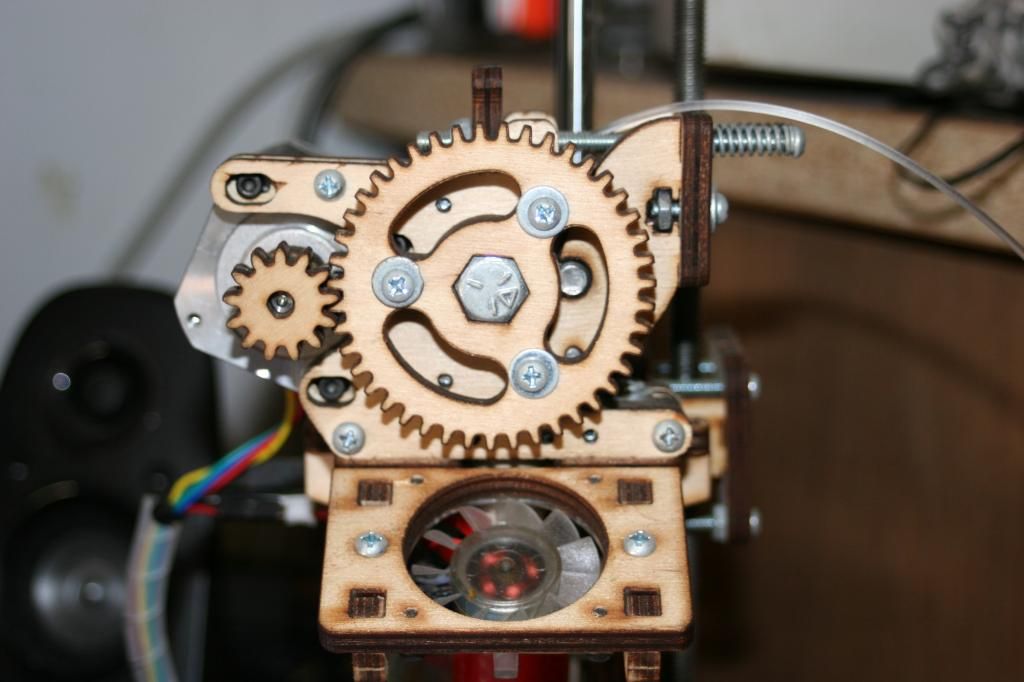
The large gear turns a bolt that the filament gets pressed into via a ball bearing. The filament gets pushed into a "hot end", basically a hot glue gun, but with a VERY small nozzle. Nozzle sizes can range from 0.1mm to .5mm or bigger. My printer has a .4mm nozzle.
The hot end can get up to about 275C. Based on the type of plastic you are using, you will want to set your temperature to somewhere between 185-220C for PLA, and 230-260C for ABS (the stuff legos are made from).
PLA, when heated emits a rather sweet odor and I have heard it described a cream corn. ABS on the other hand had a very noxious, foul odor. There are other plastics you can print with, such as nylon and a new rubbery filament that will bend and not break.
The filament (PLA in my case) needs a specific surface to adhere to during the first layer being printed. PLA sticks very well to clean painters tape #2090 wiped with alcohol. ABS sticks to kapton tape sprayed with hairspray and heated with a print bed heater.
Many printers, including mine have a small fan attached near the hot end's nozzle to cool down the just-extruded plastic. When you are printing small parts and the hot end is always in the same general area, the plastic won't cool enough between layers and will wilt, bend, buckle, and just look crappy.
Onto the work flow!
First, you can start with either and idea of an object you want to create and the software to create it, or you
can go to a site like thingiverse and download something someone else has already made.
I'm going to continue under the assumption that you have an idea that you want to turn it to a tangible object.
First you are going to open up your choice of modeling software. There are many out there ranging in price from free to may thousands of dollars. A few of the popular choices are:
autodesk 123d
sketchup
free cad
blender
rhino 3d
autodesk inventor (what I use)
Now you need to turn what you have in your head into a model in your chosen program. Since there are so many programs available and they are all different in the way they create models, I am going to skip the actual making the object.
Now that you have something modeled that you want to save and print, you are going to need to save it as a .STL (stereolithography) file. I think all of the programs listed above will export to .stl in one way or another. Again, every program is different and I only know how to use my program, so I will skip explaining how to export a model into a .stl file.
One important thing to remember when modeling parts; most printers use mm as their basic unit of measurement, so be sure to use mm as your unit of measurement when modeling your idea.
Once you have your .stl file saved, you need to open up a "slicer" program. A slicer program... slices the model in your .stl file into layers (remember how I mentioned previously that printers print in layers). There are quite a few choices in slicer programs, a few of them being:
Slic3r (I use this one mainly)
Kisslicer (I this one too, but not as much)
Cura
Skeinforge
I'll be using Sli3r as my example here; explaining what you have to set up and just how many things there are to set up. Here are some screen shots and explanations of what some of the settings do (even I don't know that all of them do or how to use them and some of the settings are just to complicated to explain):
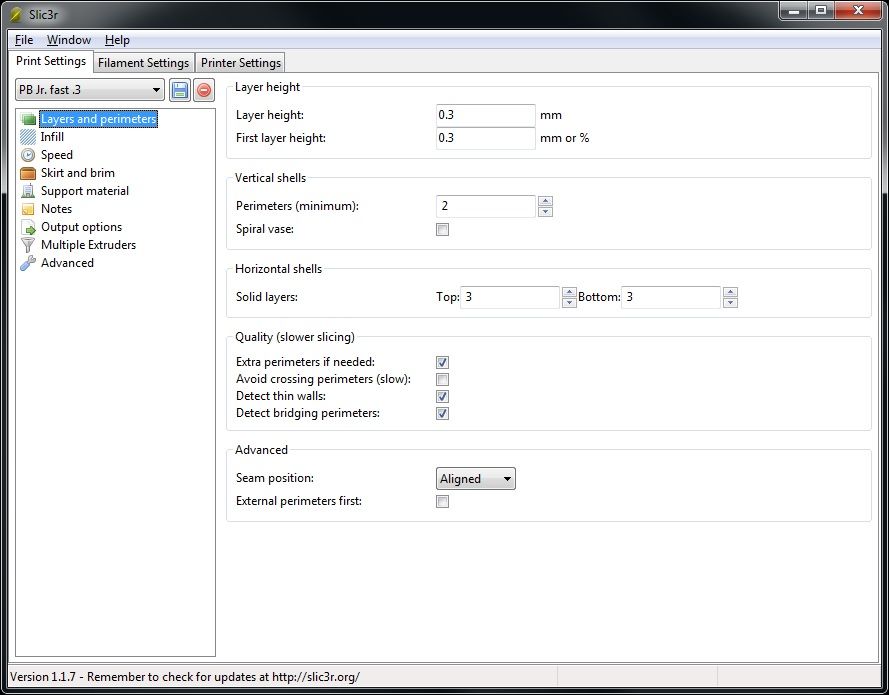
layer height is the height of the layers the printer will lay down. First layer height is useful if you are printing very small layer heights (these printers can go down to 0.1mm layer height or smaller) because less height means less extruded plastic to stick to the base. One of the continuous struggles you will have with a 3d printer is getting prints to stick to the base.
Perimeters and lines of plastic that go around all external parts of the object to be printed. Usually 1-3 is a good bet.
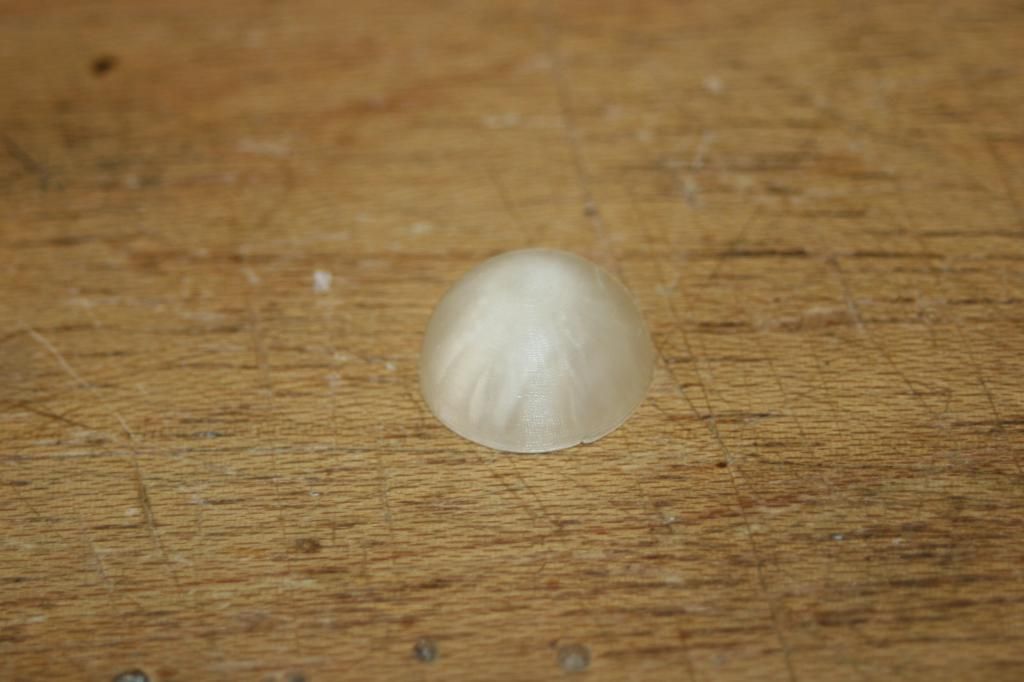
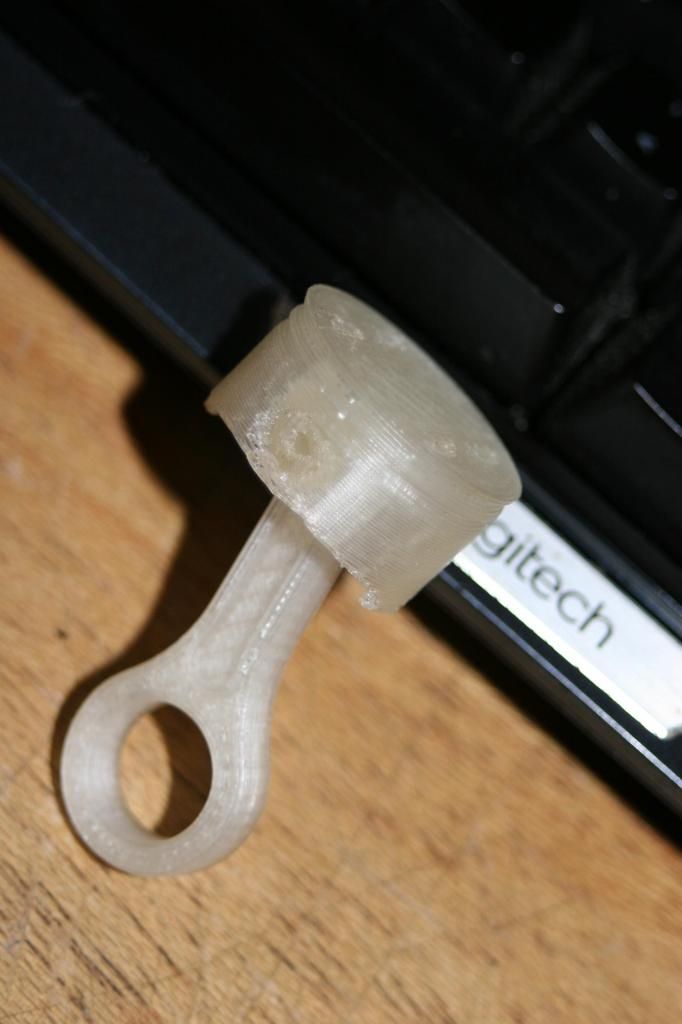
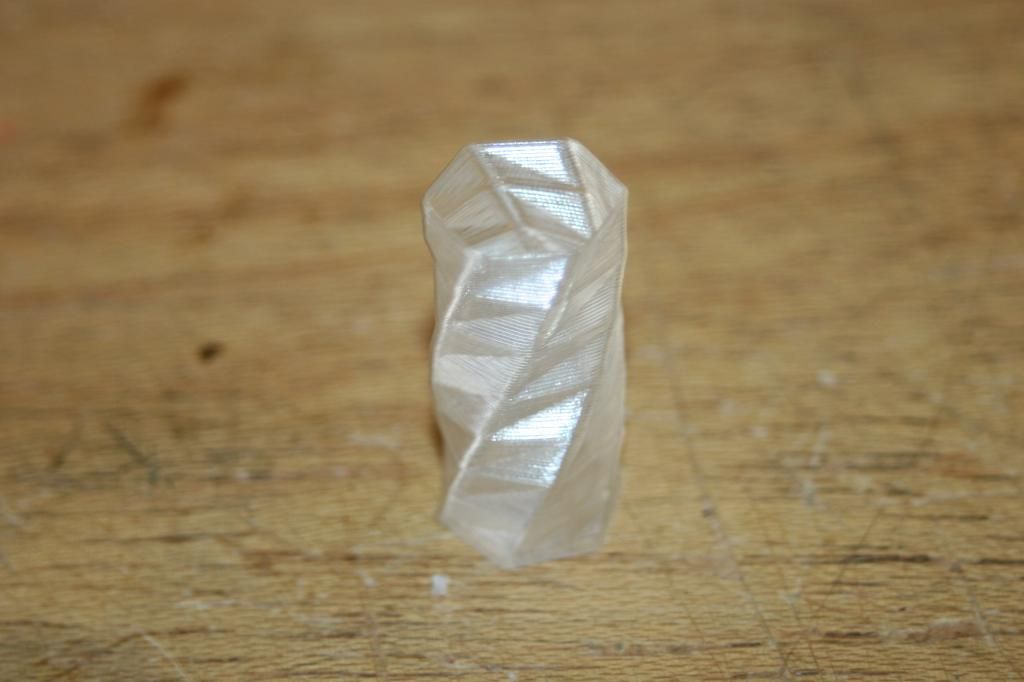
Spiral vase is a very specialized option. Usually printer lay down one layer and then turn the z axis motor to raise the hot end up and then print the next layer and so on. Spiral vase continuously raises the z axis motor during the print so there are no discrete layers, just one long spiral. Only useful if you are printing a very thin vase. I tried it once, Here is the result:
Solid layers are the number of layers on any top or bottom layers that will be printed with 100% infill (I will explain what infill is later)
The options is the Quality table are a bit too difficult to explain. Plus my ADD is starting to get to me.
Seam position. When a printer is printing an object is can start every layer at exactly the same location, the location the hot end is nearest to, or use a random location. If you use the same location the print will have a distinct "seam" where all of the layers start. If you use the location nearest to the hot end, there will be more than one seam, but each of them will be less pronounced and noticeable. Random will, obviously, choose a random location to start each layer, eliminating the seam entirely.
External perimeters first. As mentioned above, there are usually 1-3 perimeters in an object. if you print the interior perimeters first, the external perimeters will have something to stick to; very useful if you are printing something with lots of overhangs. If you print the exterior perimeters first, then you will get better final dimensions because the interior perimeter won't be "pushing" out the external perimeter.
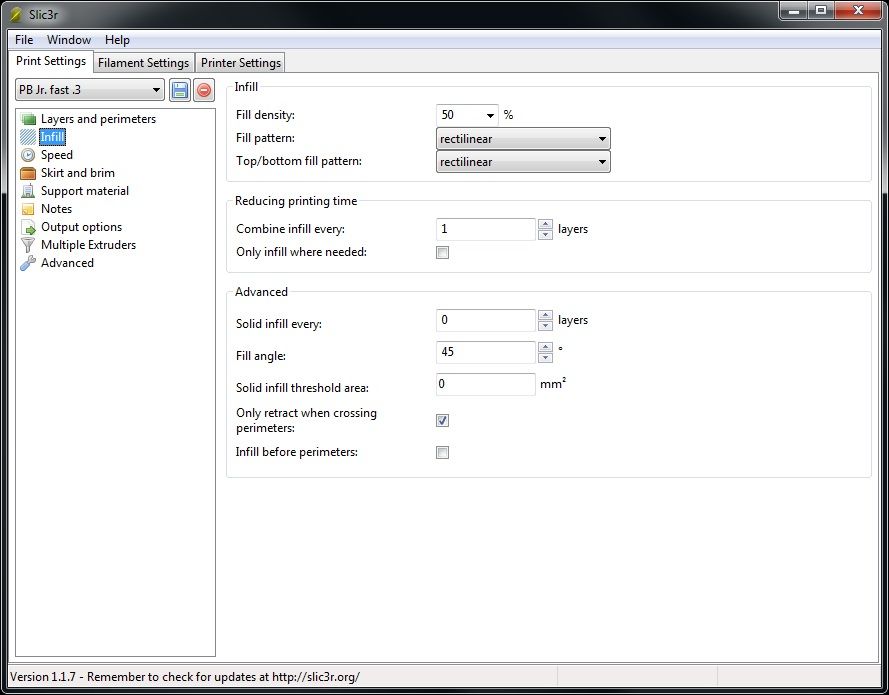
Fill density. Infill is the part of the model being printed that you wont ever see once it is done being printed. If you were printing a 1 inch cube, the four sides would be printed as perimeter and everything in the middle would be printed as infill. To continue with the cube example, the first 3 layers printed would be perimeters on the outside with 100% infill on the inside. Why 3 layers? So when the cube is finished printing, no matter which side you choose, it will be covered by 3 thicknesses of the extruded plastic. If one of those sides was on the top of the bottom white being printed, it will be 100% infill for 3 layers (or thicknesses of plastic). If one of those sides was on the side while being printed, it will have 3 thicknesses of plastic from the 3 perimeters that were printed on all the exterior surfaces.
Fill pattern. There are quite a few choices to choose from as far as how the printer fills in the inside of the object being printed. rectilinear is just lines parallel to each other on one layer and rotated at a 90 degree angle the next layer, forming a crosshatch. There are a few others, but I won't explain what they are like: Line, concentric, honeycomb, Hilbert curve, archimedianchord, and octagramspiral.
The options in the reducing printing time table aren't worth talking about, neither are the options in the advanced table. If really you want to know what they do go to slic3r's website and read their manual.
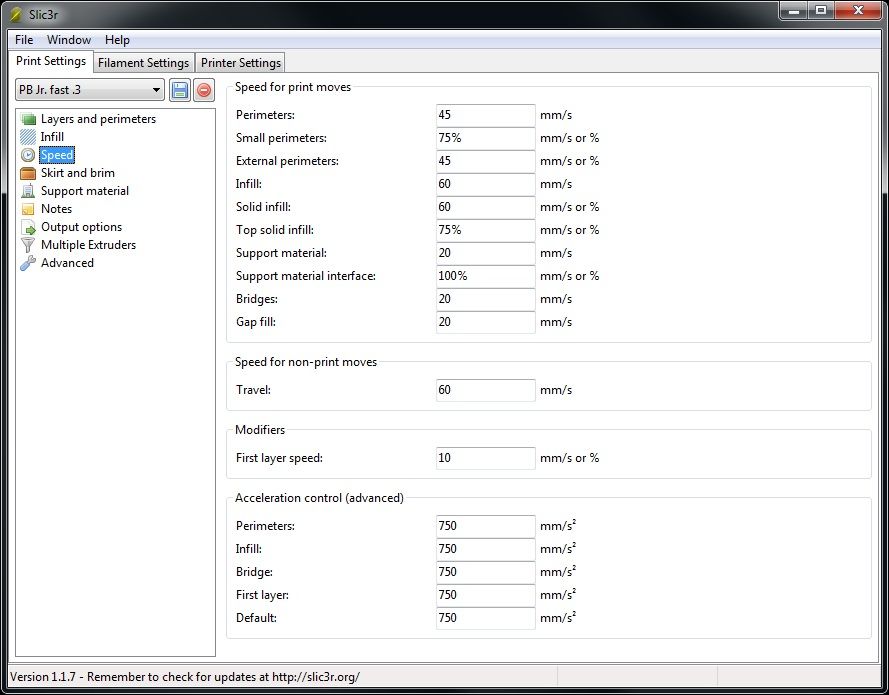
Every setting in the speed for print moves table has to do with how fast the printer will move when It is extruding plastic. I wont go into detail about everyone of them.
Travel speed is the speed the printer moves when it isn't extruding anything and it just has to get from one coordinate to another.
All settings in acceleration control table are how much (fast) the printer will accelerate and decelerate when doing specific types of printing moves. Lower numbers mean slower acceleration and vice versa.
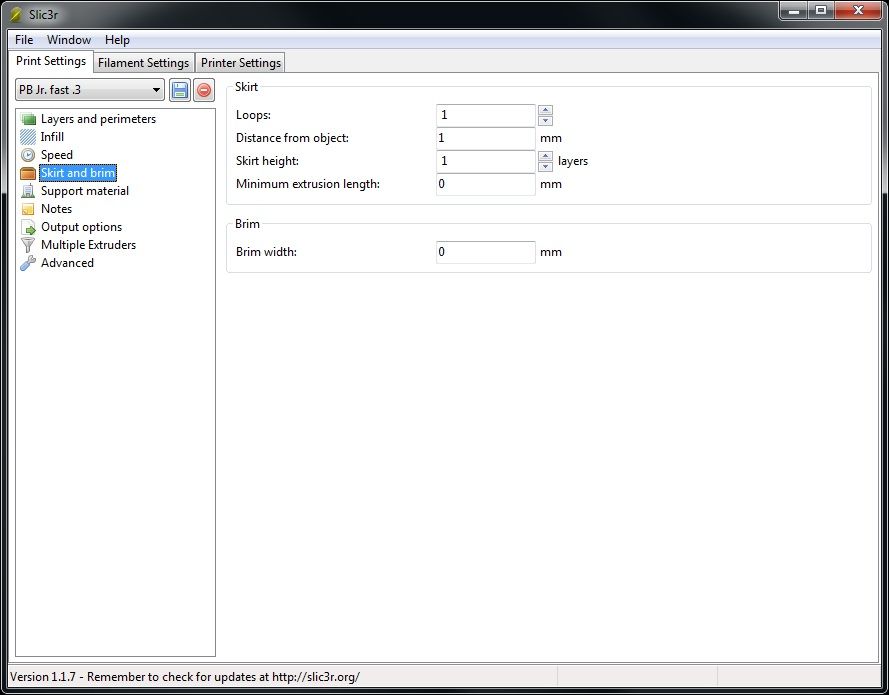
Loops are a loop of extruded filament that goes around the object being printed in order to prime the hot end. The molten plastic in the hot end can and does seep out if just left to be.
Brim is a few skirts attached to the base of the object being printed that can be removed once printing is done. The brim helps keep small or narrow objects stuck to the base.
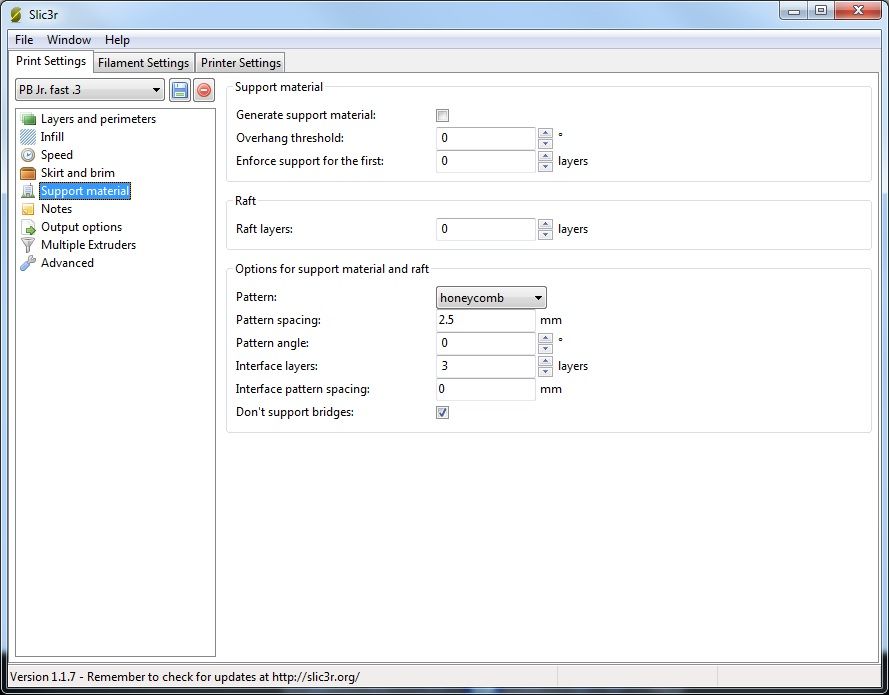
Generate support material. These types of 3d printers cannot print anything with an overhang greater than 45 degrees. If your model that you want to print has such an over hang, you will need to print supports for those overhangs. I won't go into detail about all of the options on this page.
I hope this is self-explanatory
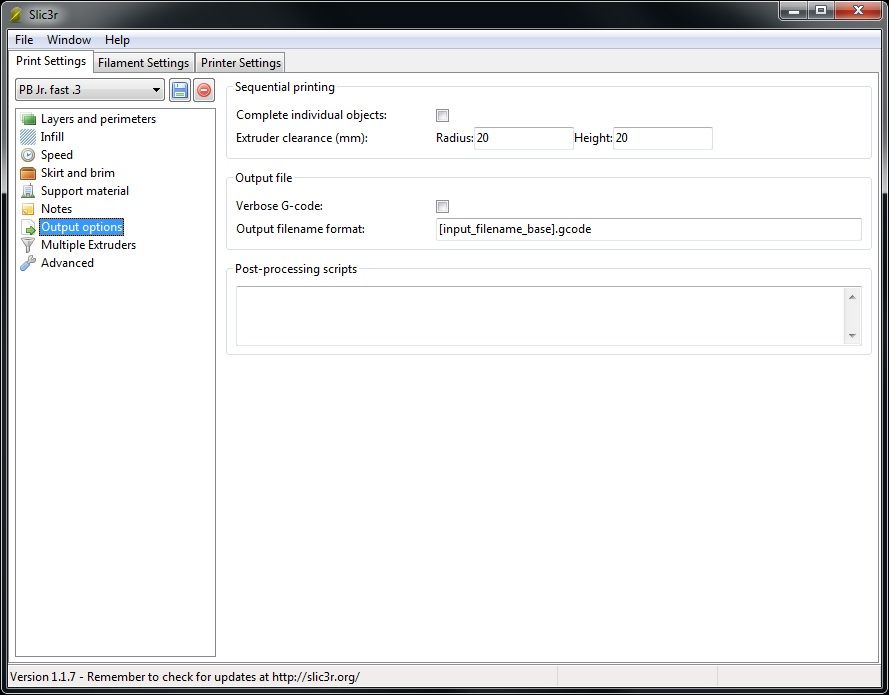
In the sequential printing table you can choose to, if you are printing more than one object, to print them all at the same time or one after the other. I won't go into detail about the other options because I don't know what they do.
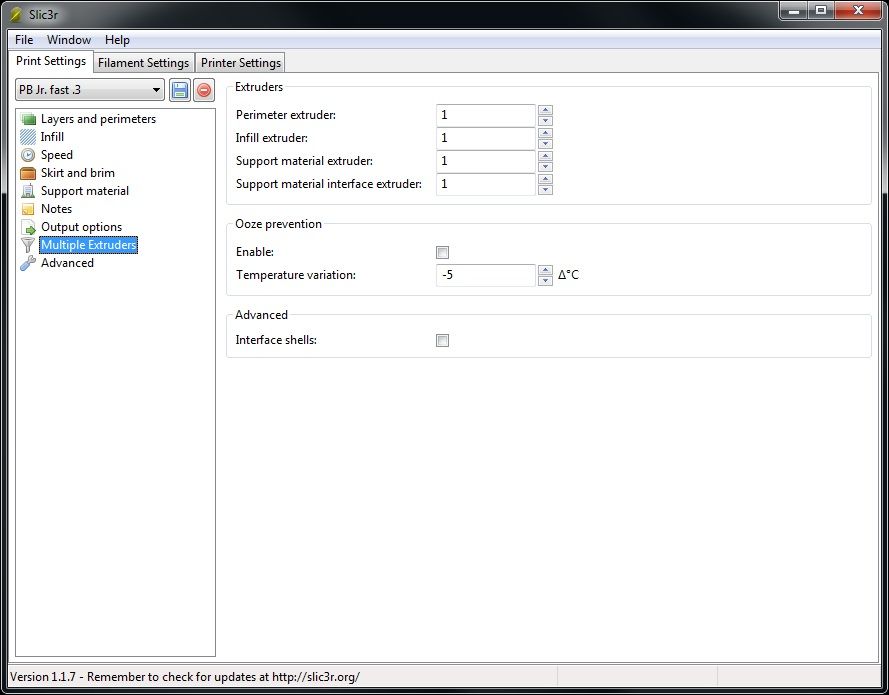
Some printers have more than one extruder so you can print in more than one color or type of material. I only have one extruder, so I've never messed with this page.
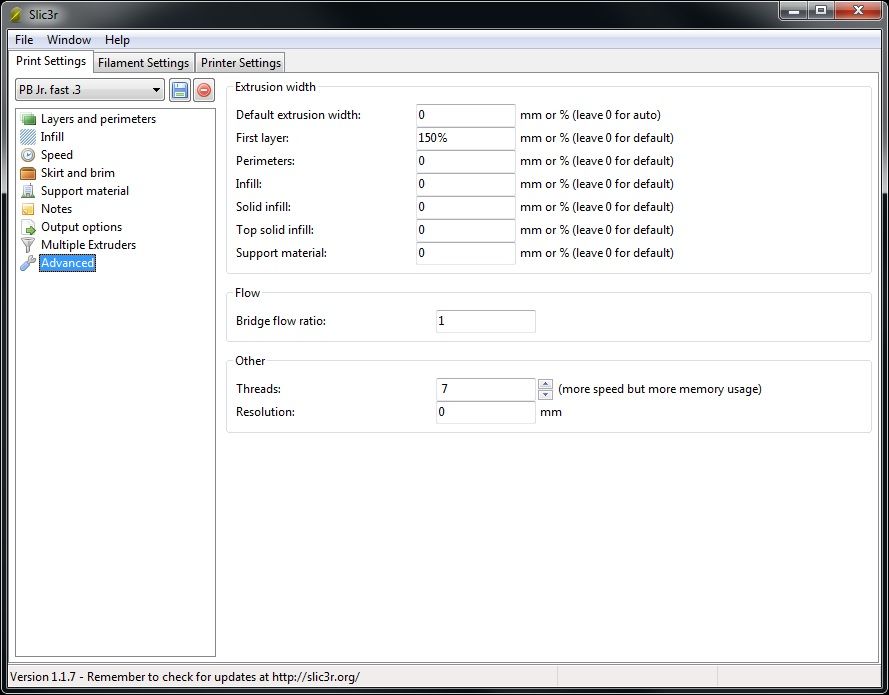
All of the settings in the extrusion width table determine how wide the extruded line of filament is. You can see if the first layer I have it set at 150%. That is so there is more filament to stick to the base.
The bridge flow ratio determines what % of calculated filament is extruded over bridges. Bridges are when the printer extrudes filament from one place over open air to another place. Imagine you were printing a hollow cube; at the end of the print the printer would have to extrude filament over the hollow middle of the cube to make the top of it. Printers can do this quite well actually.
Threads refers to how many processing threads the software uses when computing the layers of your model.
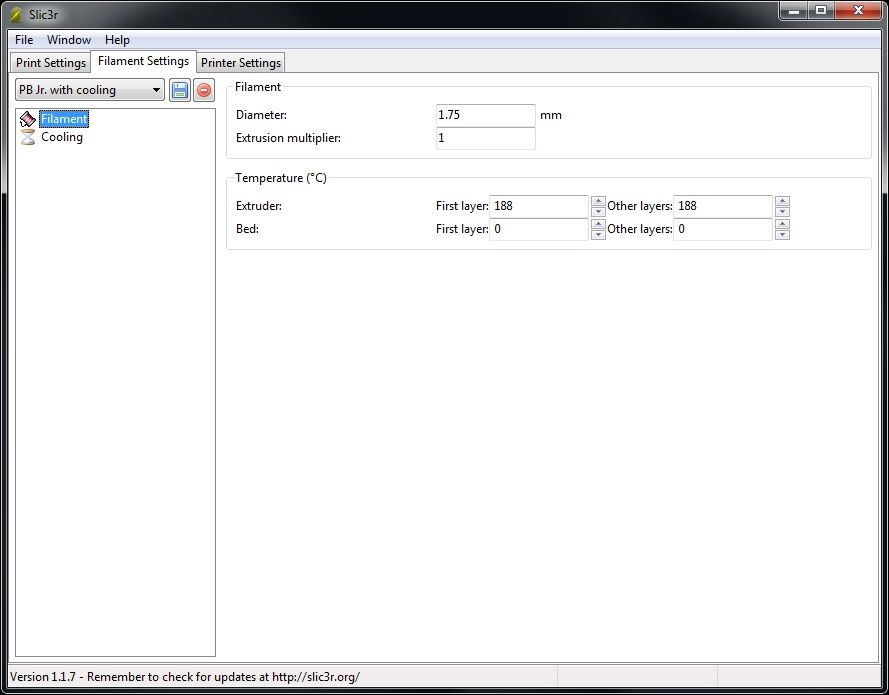
Filament comes is two main sizes; 3mm and 1.75mm. I use 1.75mm. Of course the actual diameter of your filament will probably vary; it is made in china after all.
Temperature is how hot the extruder will stay when extruding the filament. You can increase the temperature for the first layer to increase the filaments adhesion to the base. Some printers have a heated bed or base. Mine doesn't so I never messed with that setting.
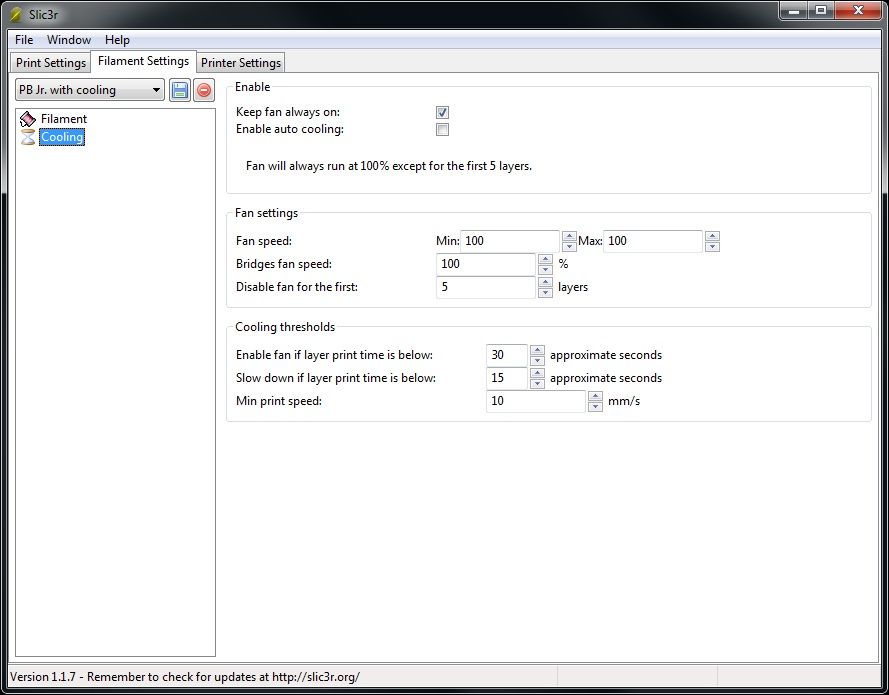
This whole page controls when and how fast the fan near the hot end spins. It can also slow down the print if a layer's printing time was going to be too fast.
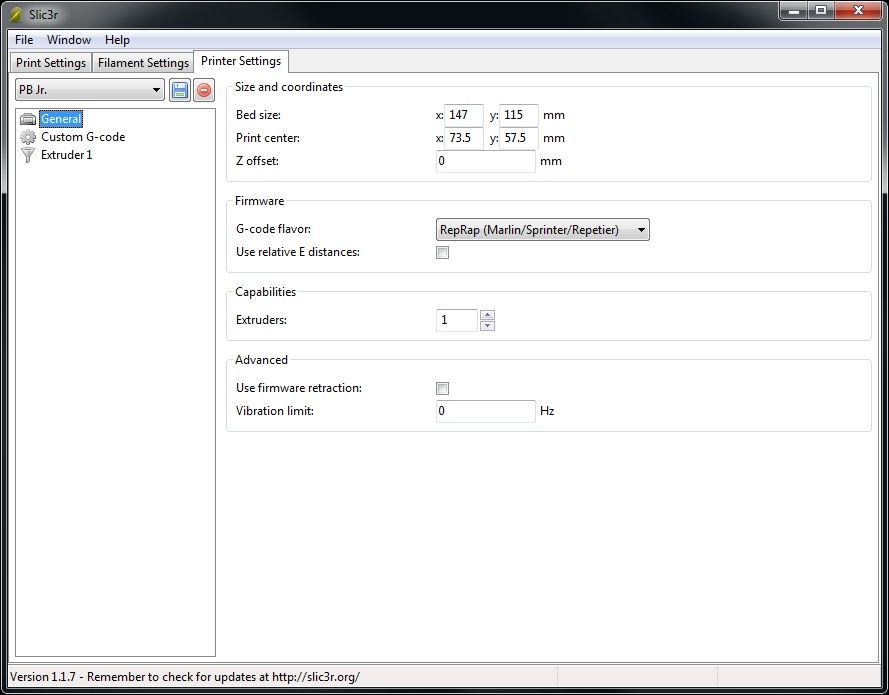
On this page you set the physical size of your print bed and options according to what type of electronics are on it.
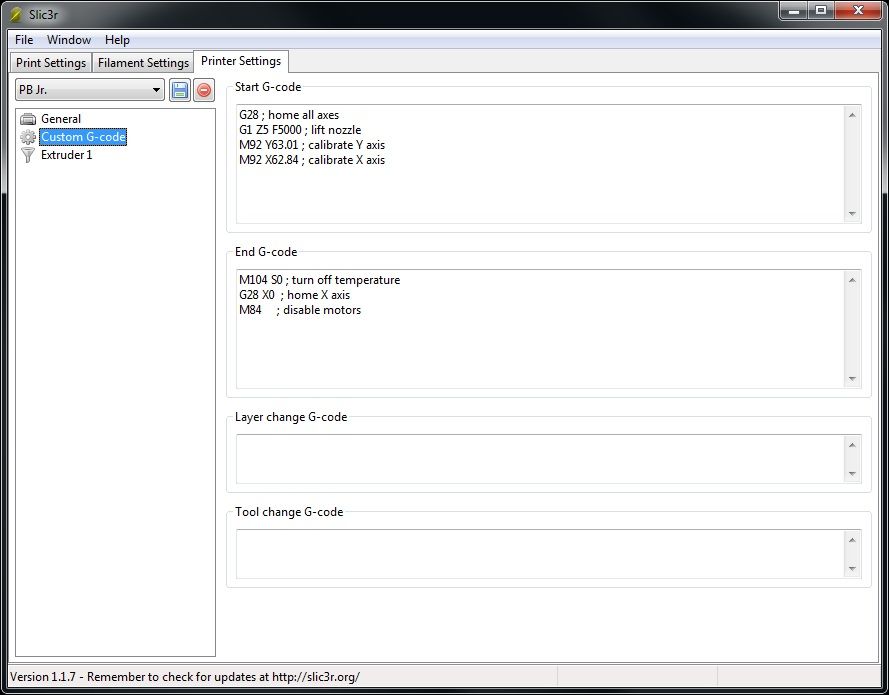
Here you can type some code that will be run every time before and after a print is finished, when the printer changed layers, and when (if it can) change tool tips (start using a different extruder).
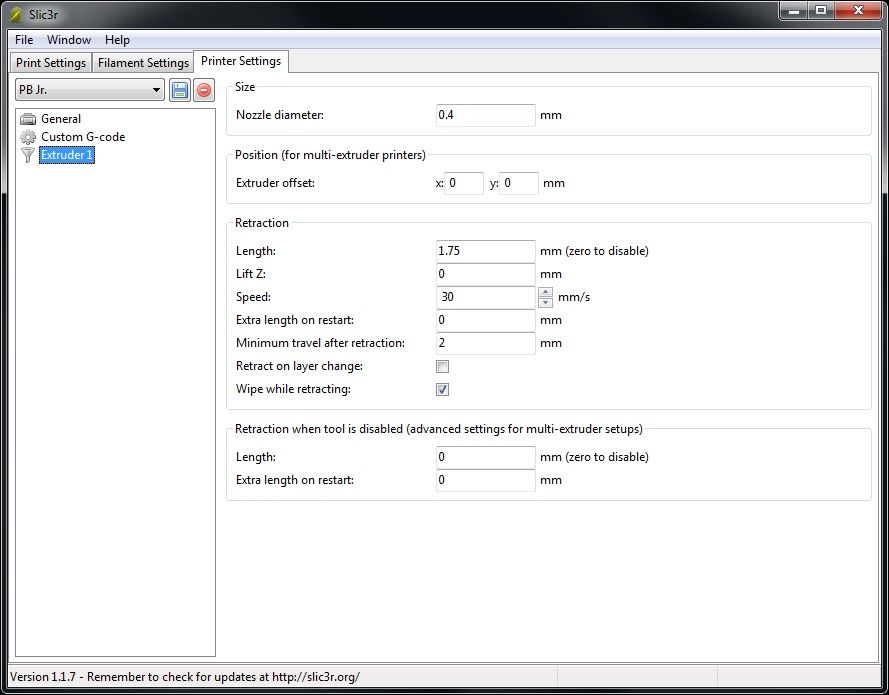
Here you set all of the details about the extruder you have. I won't go into detail about them.
Once you have all of the options set and you slice your .stl file, you will be prompted to save a .gcode file. A gcode file is a file that the controller in the printer can read and use to move all of the axes and extrude the plastic.
My printer has a micro-sd card slot so I can save gcode files to a sd card and load it into the printer.
The printer (at least my printer) can't print just by it self. It has to be told to start printing via a usb connection (which is really a usb to serial connection) to a computer.There are a few programs you can use to start printing, some of them are:
repetier-host (what I use)
Pronterface
With these programs you can manually control every part of the printer to make sure it works and to get the printer ready to create your model. There is much that you have to do (some of it debatable) to get the printer ready, but a few of the agreed things are: clean the base/bed with alcohol and spray with hairspray if using ABS, extrude a few mm's of filament to make sure the hot end isn't clogged and extruding smoothly, home the x, y, and z axes(there is a limit switch on the extremities of each of those axes so the printer knows where 0,0,0 is) and initialize the print.
With my printer, once the command to print has been sent to the printer, you can disconnect it from the computer; everything will be done by the controller in the printer.
Wow that was a lot of typing. If you have any questions feel free to ask.
Do please keep in mind that I'm not very good at organizing my thoughts or turning ideas into words. I may (will) jump around on subjects, but I'll try my best to keep everything legible.
I guess I'll start by telling you what I have, what it is, and what it does. I have a Printrbot Jr V1

which is discontinued. It is a FDM; fused deposition modeler. From Wikipedia:
"Fused deposition modeling (FDM) is an additive manufacturing technology commonly used for modeling, prototyping, and production applications.
FDM works on an "additive" principle by laying down material in layers; a plastic filament or metal wire is unwound from a coil and supplies material to produce a part."
What it does: basically, the printer prints a single layer on plastic at a time and then prints another layer on top of that previous layer, and continues to do so until the object being printed is finished.
I'm going to go all over the place now, explaining various parts related to the printer before I get to the actual work flow from idea to tangible object.
Most 3d printers use nema stepper motors to control the x,y,z, and e axes (e in this case stands for extruder). My printer uses either nema 14 or 17 motors; I forget which one and I'm too lazy to search and find out.

To control the x and y axes, the printer uses XL type belts (GT2 type belts are much more suited for linear actuation as they have more teeth per inch and much less backlash, and are in fact a very popular upgrade for any printer that uses XL belts).

For the z axis there is, in my case, a single stepper motor that is slightly loosely attached to a threaded rod (I don't know the thread type, just that it is in inches) which, when rotated, moves a nut which is attached to the upper portion of the printer up and down. Threaded rods really aren't make for this type of use, It would be much better to use an acme lead rod, which is designed for linear actuation and movement and is, again, a popular upgrade for printers that have threaded rods.

Controlling the extrusion is a stepper motor mounted on the end of the y axis that has external gear reductions.

The large gear turns a bolt that the filament gets pressed into via a ball bearing. The filament gets pushed into a "hot end", basically a hot glue gun, but with a VERY small nozzle. Nozzle sizes can range from 0.1mm to .5mm or bigger. My printer has a .4mm nozzle.
The hot end can get up to about 275C. Based on the type of plastic you are using, you will want to set your temperature to somewhere between 185-220C for PLA, and 230-260C for ABS (the stuff legos are made from).
PLA, when heated emits a rather sweet odor and I have heard it described a cream corn. ABS on the other hand had a very noxious, foul odor. There are other plastics you can print with, such as nylon and a new rubbery filament that will bend and not break.
The filament (PLA in my case) needs a specific surface to adhere to during the first layer being printed. PLA sticks very well to clean painters tape #2090 wiped with alcohol. ABS sticks to kapton tape sprayed with hairspray and heated with a print bed heater.
Many printers, including mine have a small fan attached near the hot end's nozzle to cool down the just-extruded plastic. When you are printing small parts and the hot end is always in the same general area, the plastic won't cool enough between layers and will wilt, bend, buckle, and just look crappy.
Onto the work flow!
First, you can start with either and idea of an object you want to create and the software to create it, or you
can go to a site like thingiverse and download something someone else has already made.
I'm going to continue under the assumption that you have an idea that you want to turn it to a tangible object.
First you are going to open up your choice of modeling software. There are many out there ranging in price from free to may thousands of dollars. A few of the popular choices are:
autodesk 123d
sketchup
free cad
blender
rhino 3d
autodesk inventor (what I use)
Now you need to turn what you have in your head into a model in your chosen program. Since there are so many programs available and they are all different in the way they create models, I am going to skip the actual making the object.
Now that you have something modeled that you want to save and print, you are going to need to save it as a .STL (stereolithography) file. I think all of the programs listed above will export to .stl in one way or another. Again, every program is different and I only know how to use my program, so I will skip explaining how to export a model into a .stl file.
One important thing to remember when modeling parts; most printers use mm as their basic unit of measurement, so be sure to use mm as your unit of measurement when modeling your idea.
Once you have your .stl file saved, you need to open up a "slicer" program. A slicer program... slices the model in your .stl file into layers (remember how I mentioned previously that printers print in layers). There are quite a few choices in slicer programs, a few of them being:
Slic3r (I use this one mainly)
Kisslicer (I this one too, but not as much)
Cura
Skeinforge
I'll be using Sli3r as my example here; explaining what you have to set up and just how many things there are to set up. Here are some screen shots and explanations of what some of the settings do (even I don't know that all of them do or how to use them and some of the settings are just to complicated to explain):

layer height is the height of the layers the printer will lay down. First layer height is useful if you are printing very small layer heights (these printers can go down to 0.1mm layer height or smaller) because less height means less extruded plastic to stick to the base. One of the continuous struggles you will have with a 3d printer is getting prints to stick to the base.
Perimeters and lines of plastic that go around all external parts of the object to be printed. Usually 1-3 is a good bet.
Spiral vase is a very specialized option. Usually printer lay down one layer and then turn the z axis motor to raise the hot end up and then print the next layer and so on. Spiral vase continuously raises the z axis motor during the print so there are no discrete layers, just one long spiral. Only useful if you are printing a very thin vase. I tried it once, Here is the result:

Solid layers are the number of layers on any top or bottom layers that will be printed with 100% infill (I will explain what infill is later)
The options is the Quality table are a bit too difficult to explain. Plus my ADD is starting to get to me.
Seam position. When a printer is printing an object is can start every layer at exactly the same location, the location the hot end is nearest to, or use a random location. If you use the same location the print will have a distinct "seam" where all of the layers start. If you use the location nearest to the hot end, there will be more than one seam, but each of them will be less pronounced and noticeable. Random will, obviously, choose a random location to start each layer, eliminating the seam entirely.
External perimeters first. As mentioned above, there are usually 1-3 perimeters in an object. if you print the interior perimeters first, the external perimeters will have something to stick to; very useful if you are printing something with lots of overhangs. If you print the exterior perimeters first, then you will get better final dimensions because the interior perimeter won't be "pushing" out the external perimeter.

Fill density. Infill is the part of the model being printed that you wont ever see once it is done being printed. If you were printing a 1 inch cube, the four sides would be printed as perimeter and everything in the middle would be printed as infill. To continue with the cube example, the first 3 layers printed would be perimeters on the outside with 100% infill on the inside. Why 3 layers? So when the cube is finished printing, no matter which side you choose, it will be covered by 3 thicknesses of the extruded plastic. If one of those sides was on the top of the bottom white being printed, it will be 100% infill for 3 layers (or thicknesses of plastic). If one of those sides was on the side while being printed, it will have 3 thicknesses of plastic from the 3 perimeters that were printed on all the exterior surfaces.
Fill pattern. There are quite a few choices to choose from as far as how the printer fills in the inside of the object being printed. rectilinear is just lines parallel to each other on one layer and rotated at a 90 degree angle the next layer, forming a crosshatch. There are a few others, but I won't explain what they are like: Line, concentric, honeycomb, Hilbert curve, archimedianchord, and octagramspiral.
The options in the reducing printing time table aren't worth talking about, neither are the options in the advanced table. If really you want to know what they do go to slic3r's website and read their manual.

Every setting in the speed for print moves table has to do with how fast the printer will move when It is extruding plastic. I wont go into detail about everyone of them.
Travel speed is the speed the printer moves when it isn't extruding anything and it just has to get from one coordinate to another.
All settings in acceleration control table are how much (fast) the printer will accelerate and decelerate when doing specific types of printing moves. Lower numbers mean slower acceleration and vice versa.

Loops are a loop of extruded filament that goes around the object being printed in order to prime the hot end. The molten plastic in the hot end can and does seep out if just left to be.
Brim is a few skirts attached to the base of the object being printed that can be removed once printing is done. The brim helps keep small or narrow objects stuck to the base.

Generate support material. These types of 3d printers cannot print anything with an overhang greater than 45 degrees. If your model that you want to print has such an over hang, you will need to print supports for those overhangs. I won't go into detail about all of the options on this page.

I hope this is self-explanatory

In the sequential printing table you can choose to, if you are printing more than one object, to print them all at the same time or one after the other. I won't go into detail about the other options because I don't know what they do.

Some printers have more than one extruder so you can print in more than one color or type of material. I only have one extruder, so I've never messed with this page.

All of the settings in the extrusion width table determine how wide the extruded line of filament is. You can see if the first layer I have it set at 150%. That is so there is more filament to stick to the base.
The bridge flow ratio determines what % of calculated filament is extruded over bridges. Bridges are when the printer extrudes filament from one place over open air to another place. Imagine you were printing a hollow cube; at the end of the print the printer would have to extrude filament over the hollow middle of the cube to make the top of it. Printers can do this quite well actually.
Threads refers to how many processing threads the software uses when computing the layers of your model.

Filament comes is two main sizes; 3mm and 1.75mm. I use 1.75mm. Of course the actual diameter of your filament will probably vary; it is made in china after all.
Temperature is how hot the extruder will stay when extruding the filament. You can increase the temperature for the first layer to increase the filaments adhesion to the base. Some printers have a heated bed or base. Mine doesn't so I never messed with that setting.

This whole page controls when and how fast the fan near the hot end spins. It can also slow down the print if a layer's printing time was going to be too fast.

On this page you set the physical size of your print bed and options according to what type of electronics are on it.

Here you can type some code that will be run every time before and after a print is finished, when the printer changed layers, and when (if it can) change tool tips (start using a different extruder).

Here you set all of the details about the extruder you have. I won't go into detail about them.
Once you have all of the options set and you slice your .stl file, you will be prompted to save a .gcode file. A gcode file is a file that the controller in the printer can read and use to move all of the axes and extrude the plastic.
My printer has a micro-sd card slot so I can save gcode files to a sd card and load it into the printer.
The printer (at least my printer) can't print just by it self. It has to be told to start printing via a usb connection (which is really a usb to serial connection) to a computer.There are a few programs you can use to start printing, some of them are:
repetier-host (what I use)
Pronterface
With these programs you can manually control every part of the printer to make sure it works and to get the printer ready to create your model. There is much that you have to do (some of it debatable) to get the printer ready, but a few of the agreed things are: clean the base/bed with alcohol and spray with hairspray if using ABS, extrude a few mm's of filament to make sure the hot end isn't clogged and extruding smoothly, home the x, y, and z axes(there is a limit switch on the extremities of each of those axes so the printer knows where 0,0,0 is) and initialize the print.
With my printer, once the command to print has been sent to the printer, you can disconnect it from the computer; everything will be done by the controller in the printer.
Wow that was a lot of typing. If you have any questions feel free to ask.

