Senior Clinician
  
Currently Offline
Posts: 189
Likes: 0
Joined: Feb 5, 2011 22:54:09 GMT -6
|
Post by benellibob on Mar 5, 2011 14:17:12 GMT -6
As promised I have started a build thread here for my newest creation the moto-scooteR. I started with a badly wrecked 2008 Jonway scooter. Talked them down from 300 dollars to 100. 4000 miles on the odo. none of the front body panels survived, the front tube is bent, the fork tree is bent, motor mount is bent, bumper arm is bent and other various bits needed mending. 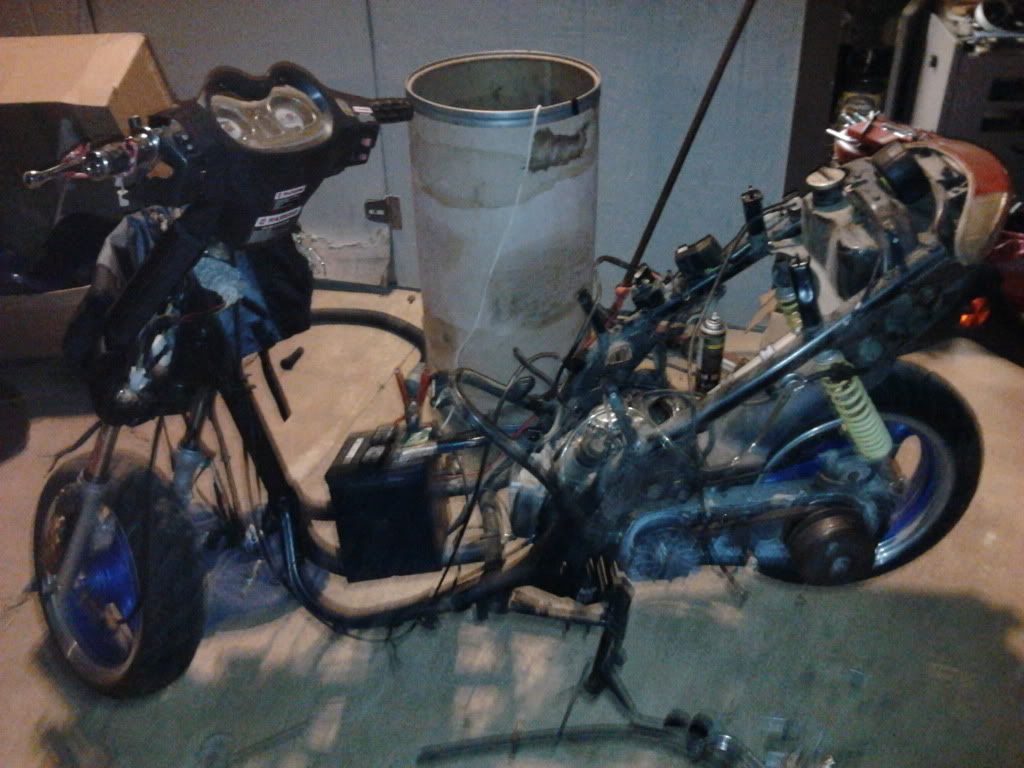 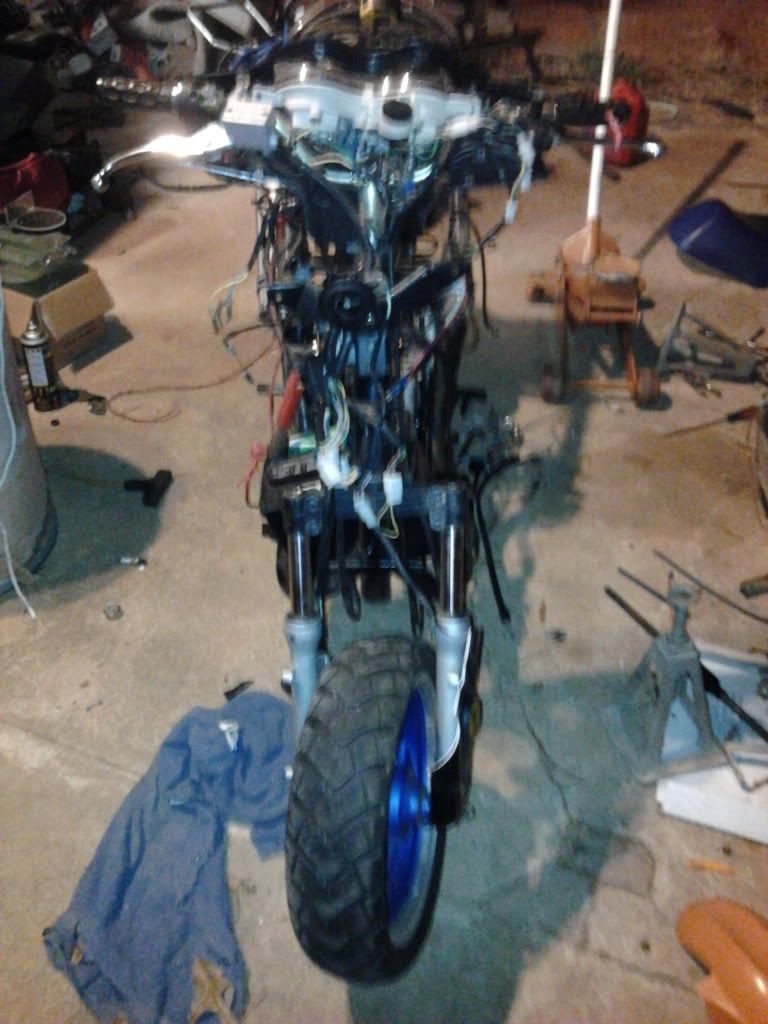 hope you are going left... what did survive makes a perfect donor for my next project, what i like to call the Moto-scooteR. yes thats a big R like type R BITCHES! here is a list of bits that are good and i get to re-use. back tire 13 inch back wheel (front wheel bent) brakes (had to buy new front caliper) taillight tag mount/light shocks (front and rear) gauges hand controls switches inner headlight pods wire harness rear fairings (possibly) center stand and a 4k mile 150cc gy6! i just recently got it running, the lady i picked it up from said it did start right up. the gas line was somehow too short and yanked off, starter switch was rigged, the ign switch on the back of the lock cyl destroyed, i think the coil MIGHT be fried (borrowed a friend's) and small clog in the jet of the carb. after all that was fixed, she starts right up! seems to run pretty strong, CVT works with new-ish gates belt and clutch engages well. i started looking around for some sort of forks, but ended up with the best freebee i could get. my best buddy donated one of his little 50cc pocket bike frames. 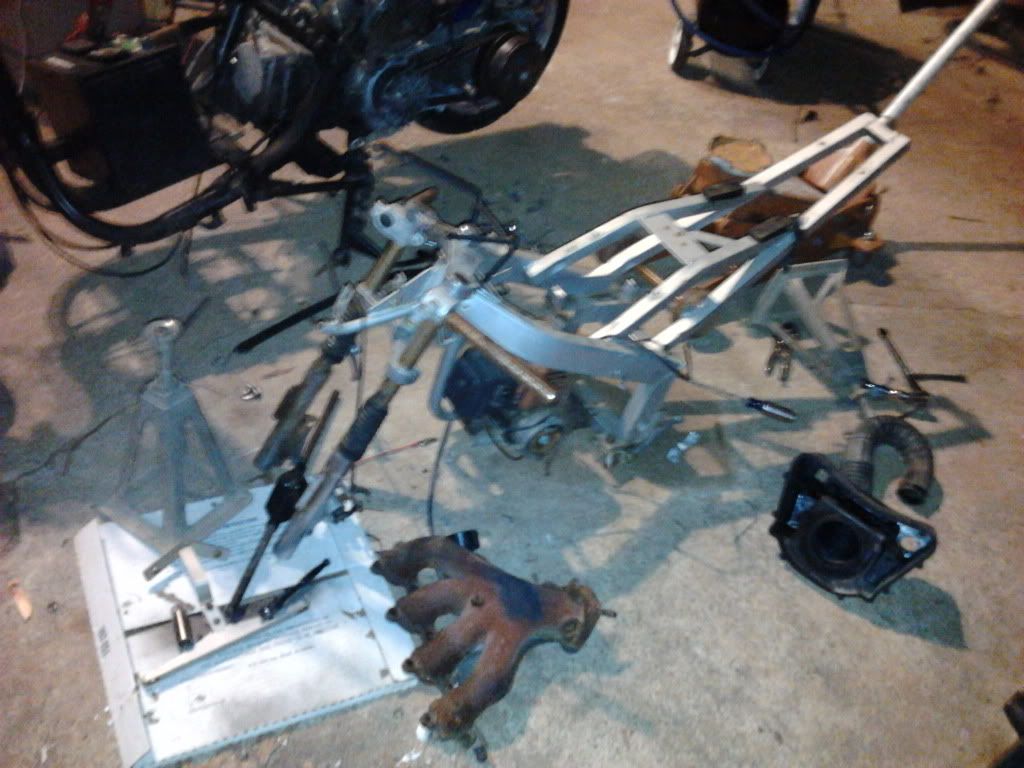 since the motor mount looks like this: 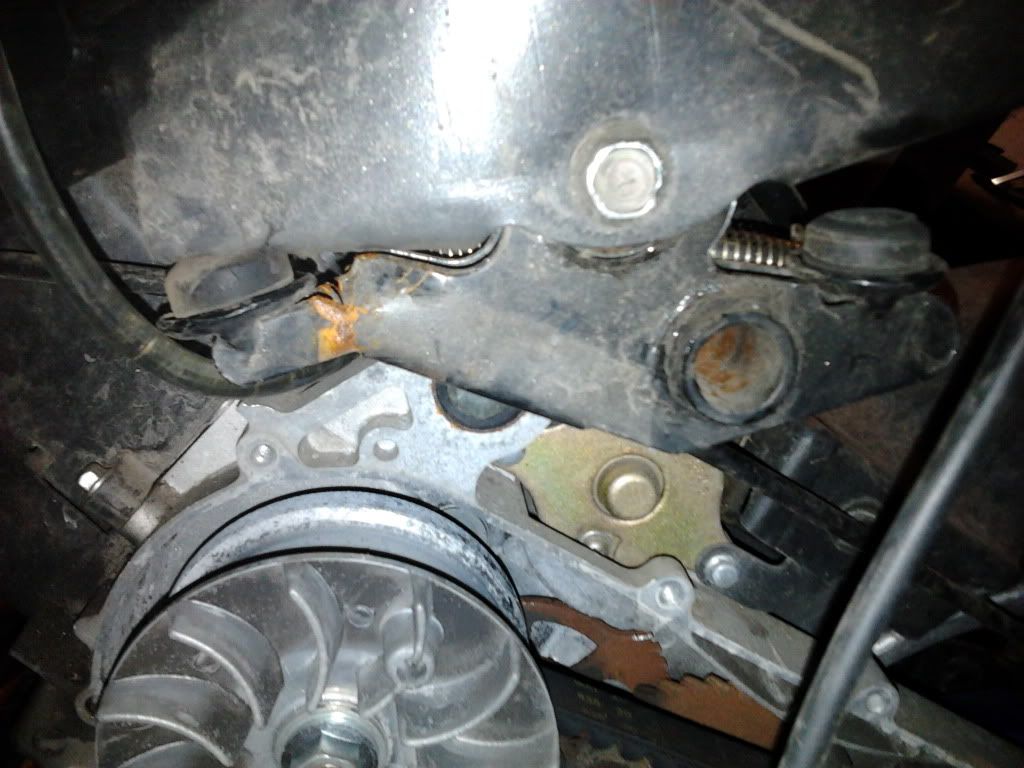 i decided it would be easiest to just redesign a whole new mount. I've chopped up the old mount and am in the process of building the new one. I have the design in my head, but building it and getting it welded straight is going to be the trick. i have confidence i can do it tho. I also have confidence in my mount design which uses four poly sway bar bushings for mounts. here is the preview shot of what the moto-scooteR is to become: 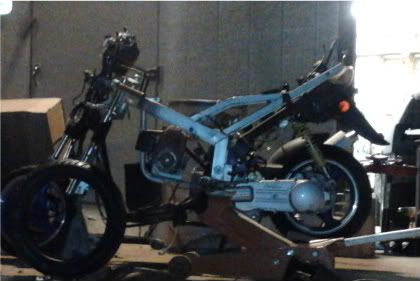 |
|
Senior Clinician
  
Currently Offline
Posts: 189
Likes: 0
Joined: Feb 5, 2011 22:54:09 GMT -6
|
Post by benellibob on Mar 5, 2011 14:40:26 GMT -6
And here are pics of what it has become. First up are some frame shots, after i cut out the old engine, cut off the random brackets, and found a gas tank for free:    next we have the motor mock up, and ride height mock up. you can see here i used the stock 50cc swing arm as the rear shock mounts, and can also see my groovy gauge placement. simply look straight down to see how fast you arent going!  and yes my forks here are currently made of the kitchen broom...   and after trying two different times to find straight fork clamps (i bought and cut up one to find out its bent, seen in the previous photo) i found some that had a long AND skinny enough stalk to mount my 50cc bearings to. reuses the nut and thread from the donor scoot.   the triple tree will be about an inch shorter than the pic, its simply mock up at this point still. handlebars will be mounted to where they will just clear underneath the frame. a small ring of radiator hose will be used on either triple tree bar for steering stops  and once i got the frame welded up i moved it to my own garage. i plan on using two long pieces of strut to clamp the wheels straight while mocking the motor mount, this should help me get things... well straight.  and here is a nice size comparison so you can see just how short this little bugger is going to be. i can easily put both feet flat on the floor (cant on the benelli) my kick start is turned around to make a foot peg, and once i figure out exactly how my exhaust will be routed then I will make something for the other side as well. i am currently working on finding something to make a seat pan with, as well as making bars to clear the gas tank and mount some sort of chest pad to. i will be laying across this thing so i need to make it comfortable. for the seat pan i am actually considering finding a large plastic serving bowl and cutting an arse-appropriate shape from it, then adding foam and some sort of seat material. i am very tempted to use faux silver snakeskin from a women's jacket i picked up at the salvation army. i got it specifically to cover a seat or something similar... there may even be enough to do more than just the seat... look out for gaudyness!  |
|
Senior Clinician
  
Currently Offline
Posts: 189
Likes: 0
Joined: Feb 5, 2011 22:54:09 GMT -6
|
Post by benellibob on Apr 10, 2011 17:18:50 GMT -6
well its been a while so i better update.  quick shot of the carb mockup and motor mount as well. ive got the bike clamped up and motor angle where i like it. once i get the motor mount welded up then i can move on to adding the center stand section of the old frame to this new frame, and add 3 down tubes from the front to match up with the center stand and kickstand section. they will be made from fairly small tubing, but there will be some bracing for strength. i am very pleased with the way this bike is coming together. there are a few small details that are bugging me, but i always find a way to make things work. i started cleaning out the rusty old gas tank. if anyone has an extra tank that looks like this one that isnt rusty. please sell it to me. started with gravel and rust-eating penetrant, which got a good bit of the rust out... but there is still some to go. going to try BB's next, and if that doesnt get most of it then i will use the naval jelly. once i get the frame done, i will start rebuilding the wire harness. since the bike is now half its original size, i have a feeling that i will have lots of extra wire so the plan is to rebuild it with appropriate lengths and tuck and loom everywhere possible. got a simple 12v tractor accessory light from northern tool to use for a headlight. it doesnt have low and high beams, but hopefully will do the trick. i will change my low high lights to off and on. i planned on using a modified stock exhaust to keep things quiet, but i was mocking up a dirtbike pipe and discovered i could do a rear center exit pipe IF my springs are stiff enough to keep the suspension from compressing much, if at all. i am hoping since my frame is 1000 lbs less than the stock frame, and i only weigh 140, then these stock springs should not move very much. i will need to put baffles in the dirtbike pipe though as the last dirtbike pipe got me pulled over twice in one day. |
|
Clinician

Currently Offline
Posts: 43
Likes: 0
Joined: Mar 25, 2011 8:45:09 GMT -6
|
Post by bohman731 on Apr 11, 2011 13:23:07 GMT -6
This bike is killer man! Nicely done! is it just going to be a skeleton bike or are you going to make some custom panels?
|
|
Senior Clinician
  
Currently Offline
Posts: 189
Likes: 0
Joined: Feb 5, 2011 22:54:09 GMT -6
|
Post by benellibob on Apr 11, 2011 18:43:08 GMT -6
im tempted to go skeleton look because of the way everything is coming together. it almost looks as if everything was meant to be the way it is... which i would like to show off. probably end up with some panels tho. i have a tank thing, and a tail piece... but im unsure about how its going to work with the gauges. i am probably going to end up building custom gauges since they currently are too big for the hole they need to go in.
|
|
Senior Clinician
  
Currently Offline
Posts: 112
Likes: 1
Joined: Mar 11, 2011 7:04:27 GMT -6
|
Post by 13lky2 on Apr 11, 2011 18:52:53 GMT -6
I'm really liking the progress so far! Can't wait to see some pics of you screaming down the track on it!
|
|
Senior Clinician
  
Currently Offline
Posts: 189
Likes: 0
Joined: Feb 5, 2011 22:54:09 GMT -6
|
Post by benellibob on Apr 12, 2011 3:01:19 GMT -6
i am officially putting wheelie bars on this thing. i am convinced due to its light weight frame that it will have a tendency to buck up. plus who else can say they have wheelie bars on their scooter  |
|
Clinician

Currently Offline
Posts: 43
Likes: 0
Joined: Mar 25, 2011 8:45:09 GMT -6
|
Post by bohman731 on Apr 12, 2011 8:11:47 GMT -6
haha do it!!! I love the skeleton look of it.
|
|
Senior Clinician
  
Currently Offline
Posts: 189
Likes: 0
Joined: Feb 5, 2011 22:54:09 GMT -6
|
Post by benellibob on Apr 12, 2011 19:37:15 GMT -6
what do you mean "these bars?"
if you mean the two main square tubes that go up to the triple tree... then im sure they probably wouldnt. thats why i'm not done with the frame. i still need to add the center stand section liberated from the original frame.
if you mean the wheelie bars that i havent made yet, then im sure they will be strong enough because i will build them strong enough. they will unbolt and be only for kicks. dont know if it will even pop a wheelie yet (i believe it would) and i dont know if i have the balls to try, as im no stuntman.
|
|
Senior Clinician
  
Currently Offline
Posts: 189
Likes: 0
Joined: Feb 5, 2011 22:54:09 GMT -6
|
Post by benellibob on Apr 14, 2011 1:04:42 GMT -6
small update. got a few things worked on. put the thumb throttle on hold and rigged up the old jonway twist throttle with a broken cable, a small bolt n some washers, and a vacuum cap for a cable boot. flipped the throttle bracket on the carb and used a cable brake adjuster as well. actually works pretty well and will do till i can get all the parts for my thumb throttle. i even had the same style grip for the twist throttle as my non-twist grips i will be using this also fixes my immediate need for a left hand hydraulic brake, as i can use the factory jonway setup for now. no idea how my angled handlebars will effect the brake fluid "level" as they are not level. i kind of wanted a remote reservoir, but couldn't think of a cheap way to do this other than find some other 7/8 handlebar motorcycle to rob stuff from. perhaps i could actually put a fitting into the lid of the current master cyl? who knows just a thought also beginning to think about some sort of key start. it would eliminate a button from my handlebars and would offer some small bit of security. was considering using a stock honda civic ignition mounted somewhere and putting a bump switch on the "deadbolt" for the steering lock that would act as an ignition kill that would mimic the run switch being off. got the intake manifold, carb, intake piping and filter almost done. it will have to be tweaked slightly once the frame is done as it actually goes around the center down tube (very cool design IMO) and i figure out a way to mount the air filter pod. ended up using bits of the stock U tube as well as a bit of intake tube cut from my 99 saturn. dont worry it was from before the air filter. i also switched the brake pads from the broken caliper to the new caliper. i got tired before i could grease the pins and reassemble but i will do that tomorrow. then i plan on figuring out where the best place to splice my rear brake cable will be and splicing it. when i go to the thumb throttle i will be switching the brakes left to right, because the thumb throttle is from an ATV and had dual brake cables. i will then lose my brake switch on that side, so i planned on using a bump switch on the splice block (couple of plates n bolts clamping the cables). this means i need to think ahead about where to place this. also just to note i am splicing the brake cable because its a million times too long and im too cheap to get a custom cable made right now. i will get one made if my splice ever fails but i doubt it. i am almost 100% sure i am going to use the stock jonway taillight and turn signals. looking too "altezza" looking, i ended up blacking out the housing which came out really good, and really cleaned the lenses. gotta get pics of that. while wanting to go custom at first, i must keep in mind i am trying to stay under the radar... DOT approved lighting is probably a good way to go in this instance. still in search of appropriate looking front turn signals... nothing catching my eye yet. using the stock taillight also means i am building a mount to attach the factory luggage rack which is occasionally handy, also considering this bike has little to no storage otherwise. it also hides the top of the light that is fairly ugly. also something to build wheelie bars off of  pics to come. gnight |
|
Senior Clinician
  
Currently Offline
Posts: 189
Likes: 0
Joined: Feb 5, 2011 22:54:09 GMT -6
|
Post by benellibob on Apr 15, 2011 9:45:41 GMT -6
that is a good point about the crosswind, but i am not technically supposed to go over 35 on it. while i doubt i will keep to that speed limit at all times, i think high speed testing will have to determine how bad a crosswind will really effect riding. being so low, and practically laying down riding position will minimize my cross-section. while the frame is very light, the motor and wheels do have some weight to them. i have also yet to weld in the rest of the structure. originally i was planning on using small tubing for the rest of the frame, but i think i might go a bit bigger for a little extra weight but mainly for looks.
i figure if i need to add weight, i can do that in the tube frame wherever i need to. i can simply cut the tube, insert a metal disc, weld it up, go further up the frame and fill with lead shot, and then cap it off in the same way.
i think it will be fine for scooting around. if its less stable at high speed then it will maybe keep me in my 35mph limit and probably yield me much better fuel economy.
anyone have the stock weight of an 08 jonway 150 adventure?
|
|
Senior Clinician
  
Currently Offline
Posts: 189
Likes: 0
Joined: Feb 5, 2011 22:54:09 GMT -6
|
Post by benellibob on Apr 15, 2011 9:46:54 GMT -6
earthman, you still did not answer my question. what did you mean about the weight load? were you asking if the frame is strong enough?
|
|
Senior Clinician
  
Currently Offline
Posts: 189
Likes: 0
Joined: Feb 5, 2011 22:54:09 GMT -6
|
Post by benellibob on Apr 18, 2011 0:12:10 GMT -6
actually earthman, the only welds of mine that are visible in the pics is directly below the yellow spring in the last pic. not easy to see, but they are pretty decent welds thanks. that frame was already welded, i did not make it. its from a 50cc pocket bike as seen here:  i simply welded the old swing arm to the tail to make shock mounts. the real tricky welding will be soon. to answer your question, i took a welding class in college for automotive but had already been doing a little welding before that. i can stack dimes pretty well if the metal is prepped well, and i remember to turn the gas on  the frame is not actually as straight as i would like it to be. if i built it from scratch it would have been straighter bc im so damn picky. i can see places here and there that its not perfect. the previous owner told me that someone had jumped the minibike... but its not off enough to truly matter functionality wise. its a one off bike now and by the time im done it will look so cool that no one will notice a few milimeters here and there on the frame. i found my front turn signals, they were some rear signals off some old bike that i only found the cargo rack for. the only identifying marks are a scary thought, hopefully i dont break them and let the magic smoke they run on out... because they are LUCAS made in good ole england mate! they are kinda big but i think they will fit ok and be nice and visible as well as DOT legal. the only thing that is questionable at this point is my tractor implement headlight... it looks good but no high beam. sealed glass unit tho... glad its not plastic. might end up getting changed, but the bracket will be fairly simple and universal if i need to change it. |
|
Senior Clinician
  
Currently Offline
Posts: 189
Likes: 0
Joined: Feb 5, 2011 22:54:09 GMT -6
|
Post by benellibob on Jul 3, 2011 23:31:24 GMT -6
the front triple trees are pretty much done as far as design, i have all the lighting i am using and only need to make the headlights/ turn signal bracket which will be one piece of angle aluminum with a few small pieces to mount the turn signals on. the frame pieces are almost ready and will be mocked up as soon as i weld this damn motor mount also i think i have come to a conclusion on what taillight to use. i have found a low cost yamaha zuma tailight. it not only mimics the shape of the bike, but it has actual metal reflectors inside the housing VS the cheap chinese plasti-chrome that quickly flakes off... this is a huge issue for me as i am picky about small things that are wrong, like flaking plastichrome. i will change a whole light assembly because of such things. any noticeable reduced light output is unacceptable... and if i know a cause is there without a symptom i will still attack! anyway i also have a friend with a zuma, so i can use his bike to make body parts from. i will fiberglass over the sections of his bike that i need, and build the rear panels from there the top will have two metal tubes running from where my nuts sit to the neck of the bike that will have mounts for the fuel tank, and possibly a speaker. i am considering attempting to run a single high power 4 inch speaker on a small single amp hooked to my cell phone that i will play mp3s from. this idea may get scrapped, but i like to go big when i build things and i think that i can make it work as long as i have the output i need. i actually started with a much bigger battery in this, and decided instead to go with a stock scooter battery and my discarded benelli battery box, that fit neatly inside the frame. the larger battery will start a car, and will actually also fit snugly inside the frame, but obviously take up much more space, i think one of the earlier pics has it in there. the gauge cluster will either be: A:full customized chinese gauges i take apart the factory clusters and use their insides to build a new gauge cluster using chopped up pieces of PVC piping of different diameters to fit the needles. this is my favorite, but it will be a lot of work. i will be able to calibrate the speedo because i will have to make the gauges faces myself... but i want to retain my factory functions... like fuel gauge!!! B: vapor gauge i love these digital gauges and it will fit right into my bike and take up soooo much less room. they are only a little over 100 dollars now, and are obviously programmable to the nth degree. altho no fuel gauge... c: simply use my cell phone i have a speedo in my cell phone with the GPS. i will be making a spot for my cell phone anyway since i will be using it for other functions but i could actually use it by itself for the speedo. OMG MY BIKE FELL AAPRTTTT!!  |
|
Senior Clinician
  
Currently Offline
Posts: 112
Likes: 1
Joined: Mar 11, 2011 7:04:27 GMT -6
|
Post by 13lky2 on Jul 5, 2011 19:20:07 GMT -6
|
|

