Scooter Doc
   
Currently Offline
Posts: 1,936
Likes: 7
Joined: Jun 18, 2010 22:25:14 GMT -6
|
Post by sprocket on Jun 20, 2012 12:05:24 GMT -6
Glad it is vented... it is a CFMoto, better build quality too.....but most units aren't vented and that housing is superior to the average Chinese GY6..it is also considerably larger.
I'm just recommend that people need to consider heat and venting , or you will have a melt down...
|
|
Clinician

Currently Offline
Posts: 40
Likes: 2
Joined: Apr 11, 2012 10:25:11 GMT -6
|
Post by rurc on Jun 21, 2012 15:11:13 GMT -6
OK I did a longer bench test today. I did it for 50 minutes but the battery died on my camera at just over 30 minutes and I did not realize that. In any event this thing ran flawless. The temperatures were a little hotter. The hottest place I could find on the lamp was 138 0 F. The housing right where the bulb mounted was seeing 131 0F. At no place have I found any melting or deformation. The front lens got as hot as 122 0F. I know that these temperatures are rather hot as just a temperature but I dont see this being a problem for the housing. Remember this is sitting stationary on a shelf with NO moving air of any kind. Well here is the time lapse video. I charged the little battery fully and the start voltage with NO load was 13.1 VDC. If you look on the right side of the video you will see a voltage meter (yellow) and a amp meter (gray). You will see the amp draw go from over 5 to under 4 at the end. It is really hard to see the volts and amps but I swear that they are there.  I am sorry that the camera did not record the entire hour but what can I say. |
|
Clinician

Currently Offline
Posts: 40
Likes: 2
Joined: Apr 11, 2012 10:25:11 GMT -6
|
Post by rurc on Jun 21, 2012 15:12:49 GMT -6
Glad it is vented... it is a CFMoto, better build quality too.....but most units aren't vented and that housing is superior to the average Chinese GY6..it is also considerably larger. I'm just recommend that people need to consider heat and venting , or you will have a melt down... You are 100% correct. Better safe than sorry. I did do a longer test just look above.  |
|
Scooter Doc
   
Currently Offline
Posts: 1,936
Likes: 7
Joined: Jun 18, 2010 22:25:14 GMT -6
|
Post by sprocket on Jun 22, 2012 14:05:50 GMT -6
You are well within the heat deflection temperture or HDT of acrylic, which if I recall was 190F. For practical purposes you need to keep 30 to 40 deg F below that so, I see no problems... Chinese acrylic...who knows...
|
|
Clinician

Currently Offline
Posts: 40
Likes: 2
Joined: Apr 11, 2012 10:25:11 GMT -6
|
Post by rurc on Jun 26, 2012 14:47:35 GMT -6
OK here I am again. Now I am testing the harness I modded. In the beginning I said that I had bought a second light fixture to experiment with. Well this second light fixture came with a full wire harness also. So I can modify it and not mess up my old harness so I can easily put this back to original if the need should arise. This first image is of the front of my scooter (CF Moto E-Charm) with the front radiator cover and front handle bar cover removed. I have labeled the 5 electrical hook ups that were connected to those body panels. Also before you unplug be sure you mark any similar plugs so they don't get put together backwards. These panels are not the easiest thing to remove (the handlebar cover) and you do not want to do it more than needed. 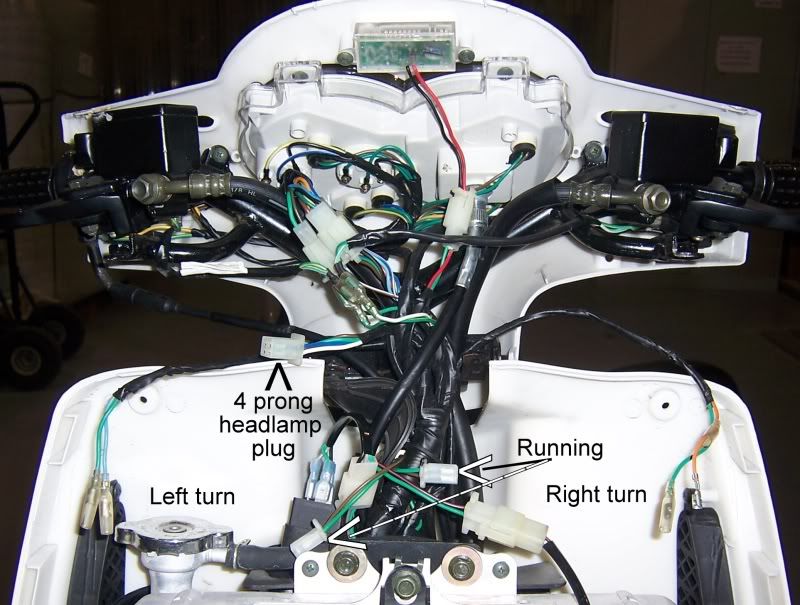 The next image shows the new harness plugged into the factory plug. Then this is hooked up to the HID wire harness. Nothing pretty here, just doing what it takes to get the test running. 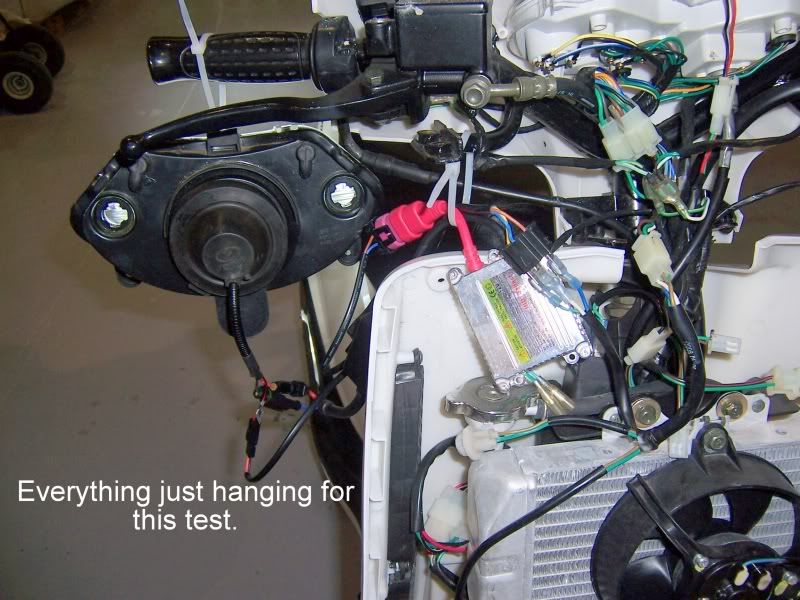 Here is the modded end of the headlight harness. Not much to it really. However I will have to find proper fitting connectors. I think I saw a H4 pigtail socket at Advance Auto parts. I will check on that after this damn almost hurricane is gone. 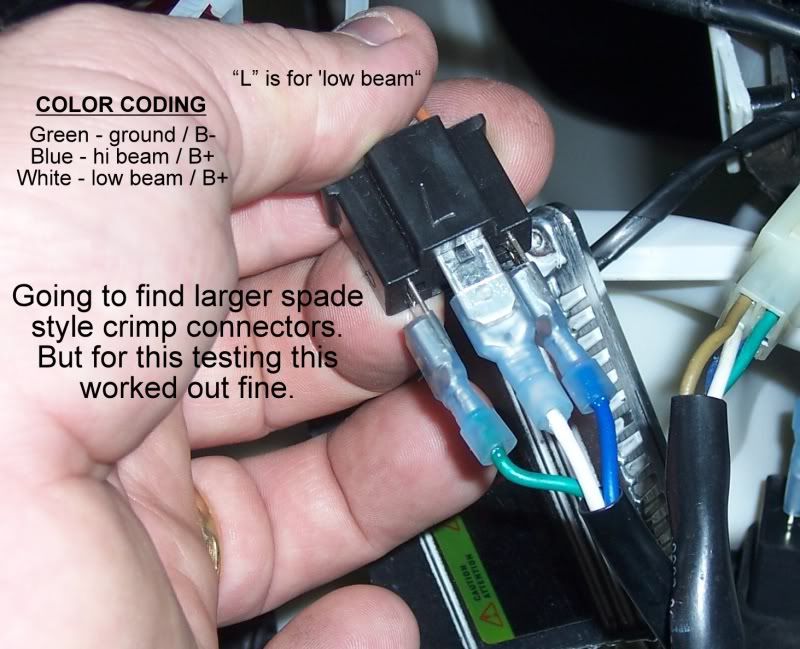 I also told you that I was going to change all the lights on the scooter to LED's. Well this is the first step. I have pulled the factory flasher unit (turning signals) and tossed it. I got a digital flasher unit that will run LED's or regular bulbs and replaced the factory one. I took the unit and sealed it up with RTV silicone. For some reason the only way you can install this is with the connector end up, right where it can collect water. So what ever you buy for yours make sure it is sealed from the elements. 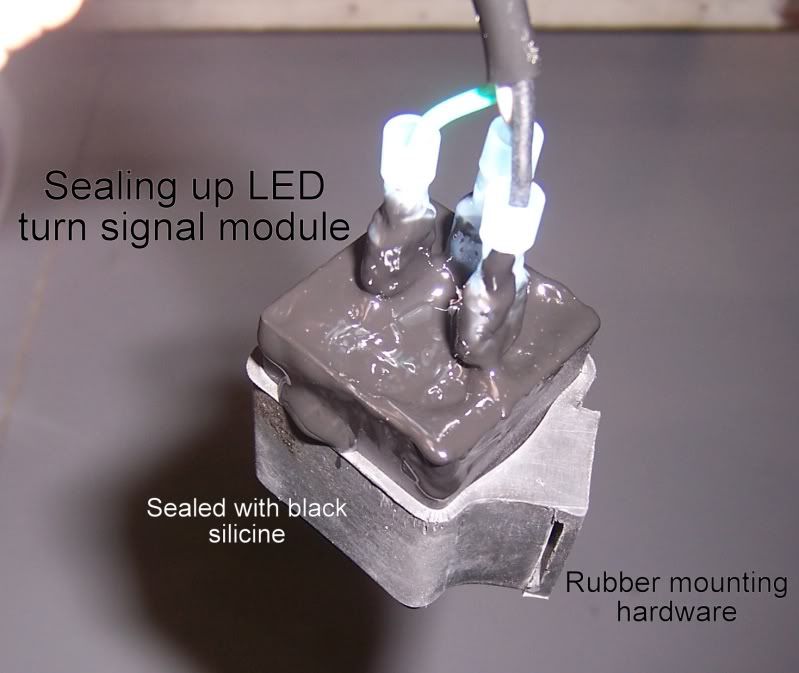 Here is the flasher module in the factory location. I was able to use the factory mount. 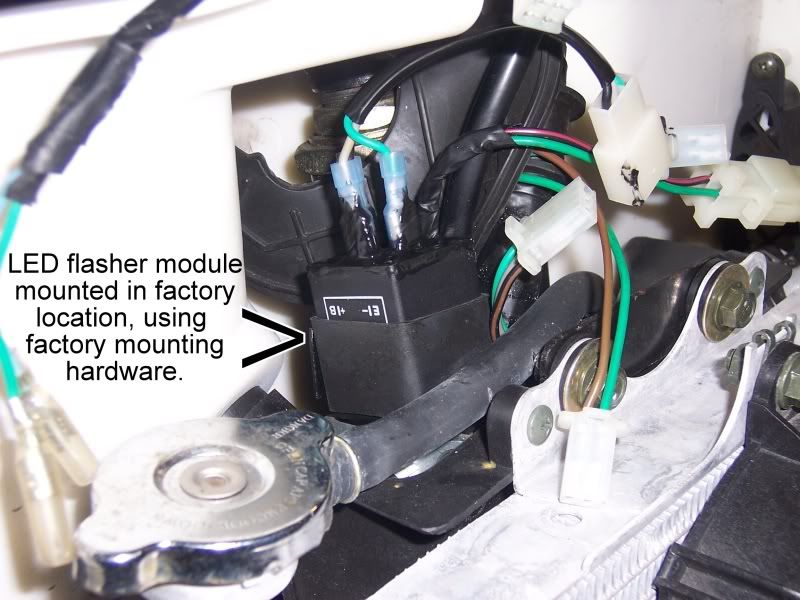 Finally here is a short video of the scooter running and the light working just perfectly. The next installment should be the full modification of the switches and then the installation of the light. Thanks for watching and talk to you soon. |
|

