|
|
Post by mxmatt on Jun 8, 2014 9:47:05 GMT -6
Thanks boys. Good to know cause it showed signs of having been ridden. Must have a light rain that day. Sorry not much updating lately. Been real busy, I'm taking photos to share. So far I have stripped the scoot naked, removed every nut an bolt and applied blue loctite and then smeared clear silicone all over it creating a thin light liquid barrier coat, removed each scew and speed nut, pinched and replace speed nuts, injected silicone into the space gap hole and replaced screw and then smeared more silicone, disconnected each electrical connection and applied dielectric grease to fittings after inspecting for loose or damaged wiring and then sealed each wire connected end of the plug with silicone, let it dry and then connected plug and zip tied to frame in an advantageous place. I removed each light bulb and applied dielectric grease. While reassembling I used silicone to seal any plastic spots that could rub or that needed a buffer without going overboard. It has been slow and tedious, but I am patient and want this to be the first Chinese Honda Reflex! Lol
Next up, drain and replace fluids.
|
|
|
|
Post by mxmatt on Jun 9, 2014 17:06:51 GMT -6
Start of tear down: Front panel removed. 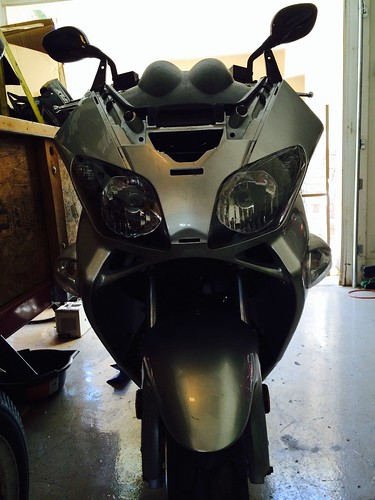 Untitled Untitled by mxmattaz, on Flickr Seat bolts removed. 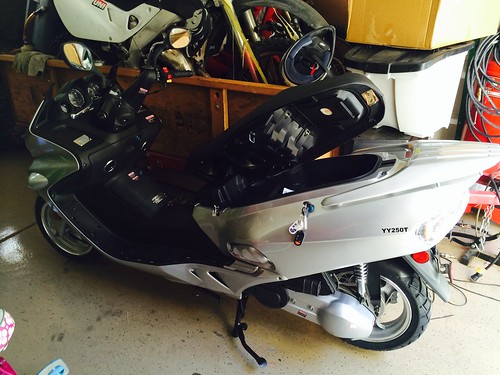 Untitled Untitled by mxmattaz, on Flickr Rear panels removed. 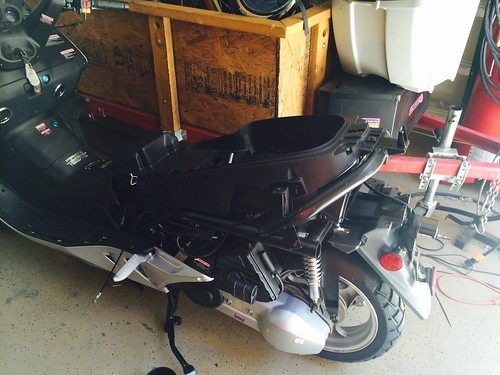 Untitled Untitled by mxmattaz, on Flickr Battery compartment. 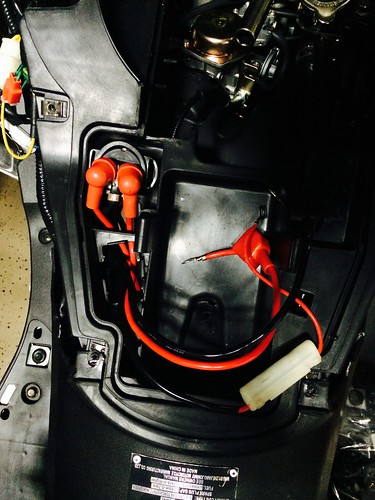 Untitled Untitled by mxmattaz, on Flickr Fuel Pump. 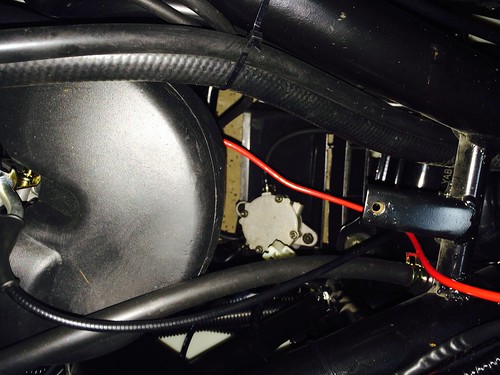 Untitled Untitled by mxmattaz, on Flickr Exhaust. 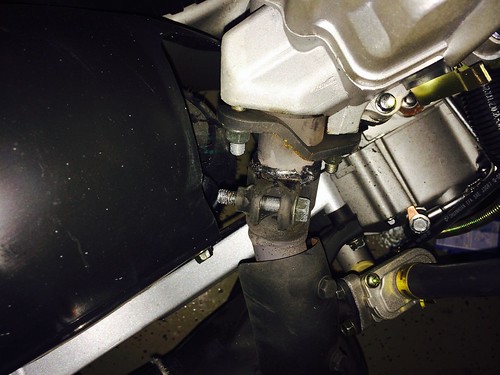 Untitled Untitled by mxmattaz, on Flickr Top shot of engine compartment. 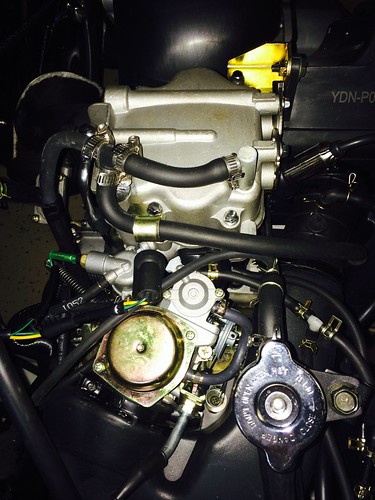 Untitled Untitled by mxmattaz, on Flickr Electric connectors. Notice grease and silicone. 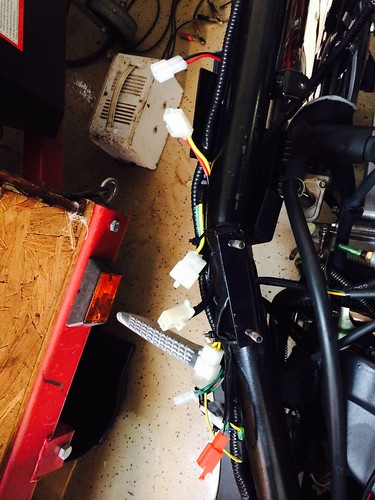 Untitled Untitled by mxmattaz, on Flickr Is this a second regulator/rectifier? I need to secure it to the frame. Can someone tell me if it needs to be grounded or not? 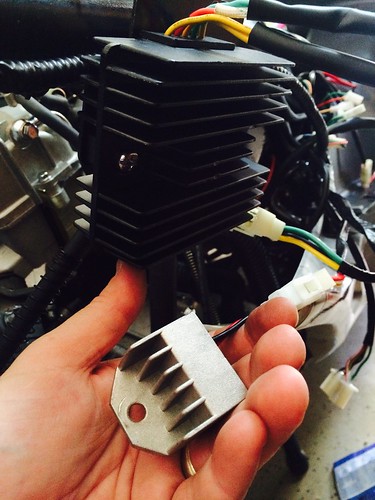 Untitled Untitled by mxmattaz, on Flickr This connector had a zip tie on it already. Not sure why. Removed, greased and reassembled with new zip tie. 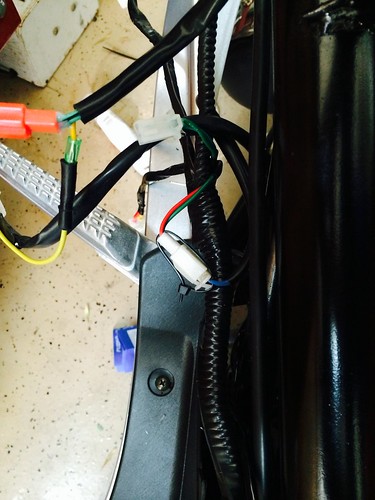 Untitled Untitled by mxmattaz, on Flickr Fuel line was unattached. I suspect that this is normal. 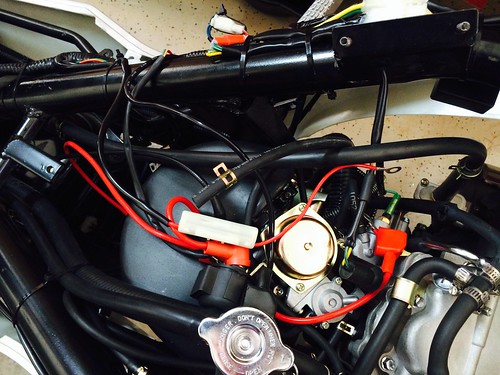 by mxmattaz, on Flickr Working my way forward. 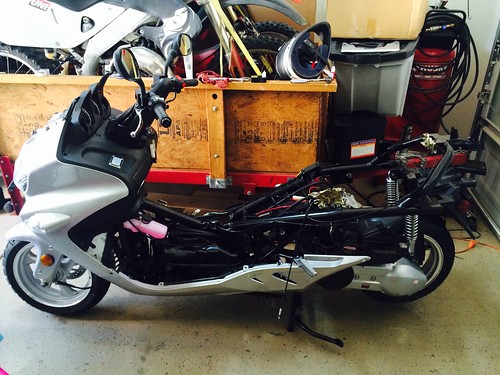 by mxmattaz, on Flickr The pink stink. JR says get rid of this coolant ASAP! 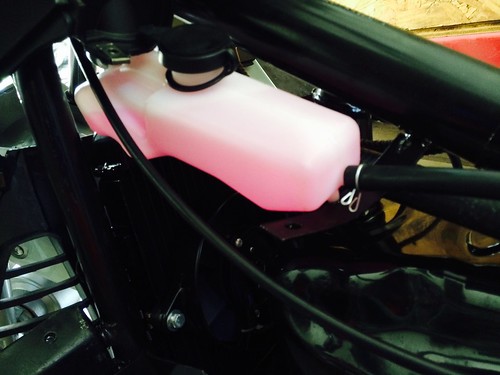 by mxmattaz, on Flickr Center console removed. 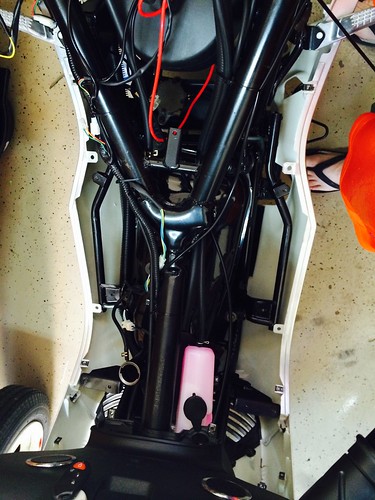 by mxmattaz, on Flickr Dashboard removed, electrical exposed. 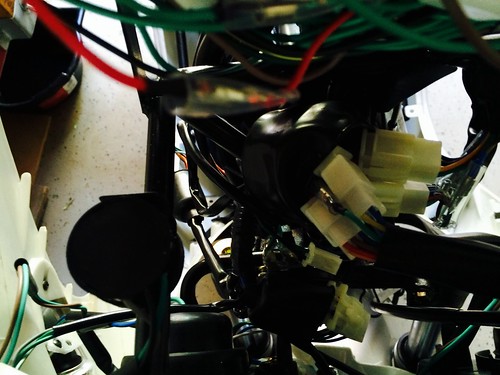 by mxmattaz, on Flickr The reverse side. 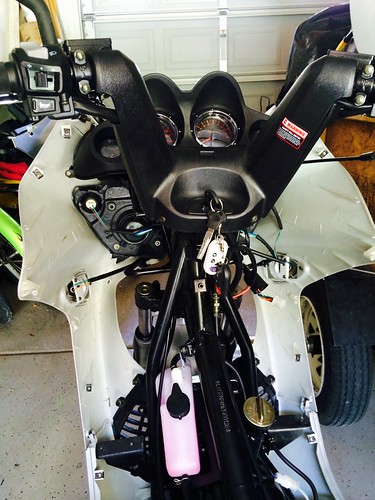 by mxmattaz, on Flickr Dashboard back in.  by mxmattaz, on Flickr Windshield in, putting it back together.  by mxmattaz, on Flickr More later. |
|
Clinician

Currently Offline
Posts: 49  Likes: 2
Joined: May 12, 2014 13:18:43 GMT -6
|
Post by roketa250 on Jun 9, 2014 22:34:44 GMT -6
Looking great! I've done the teardown part but I can do the reassemble part till I get my head fixed! Thanks for the detailed photos. Will help anyone doing the same. I'm liking I can compare the way it goes back together! Thanks for the info!  |
|
Ad Free Donut
   
Currently Offline
A bike is music to my ears.
Posts: 1,655
Likes: 93
Joined: Oct 22, 2013 4:11:04 GMT -6
|
Post by Guitarman on Jun 9, 2014 22:52:38 GMT -6
Very nice. You're saving yourself a ton of trouble later on by doing this now. I wish it had been done to mine, but I've been doing it in bits and pieces as I fix stuff.
|
|
|
|
Post by Bashan on Jun 10, 2014 19:08:14 GMT -6
That is the diode. It keeps current directed towards the battery. It's a one way electrical gate. It shouldn't need a ground, it just directs electricity in one direction. It's probably got a red and black wire? It lets current flow down the red to the battery but not the other way. Current runs from negative to positive. So it goes TOWARDS the red terminal, not away from the red as most people think. That's why your inline fuse is just before the battery in the red cable. It catches the aberrant burst of energy just before it hits the circuit terminus at the battery. If it bolts right to the frame it's for static control around a radio, not because it needs a ground for current flow. Rich
|
|
Administrator
Currently Offline
Posts: 1,565  Likes: 51
Joined: Jan 27, 2014 13:58:53 GMT -6
|
Post by JR on Jun 10, 2014 20:26:25 GMT -6
Good to zip tie it to something secure to keep it from rubbing and rattling down the road. Good job on the strip down. Yes the fuel line generally comes unattached and a lot of times they give you a little cup with a length of fuel line on it. Do NOT put gas in the tank but rather attach the little line and cup to the carb inlet, put a little gas in it and bump the starter to see if she fires. If so then run the engine until the cup is empty, remove, then attach the fuel line from the pump, put gas in tank and again fire her up to make sure the fuel pump is pumping well. Now on the coolant, drain, drain, drain. Flush with water, fill system, run engine until warm and flush again. Drain completely then the good 50/50 premix and burp. Got to burp it and even idling on the center stand the engine will heat up enough for the fan to kick on ........if all the air is out. With it stripped you can do all fluid changes easier and keep things off the plastics and test run the engine also. Looking good.  JR |
|
|
|
Post by mxmatt on Jun 10, 2014 23:06:00 GMT -6
Bashan, Thanks for the explanation. That makes sense. I'll zip tie it to bike tonight. JR, Thanks for the advice and kudos on the strip down. I am sorry I wasn't more efficient at taking pictures and posting them as I went along. I was literally working on this thing every spare minute I had in between work and family. I had much more lofty intentions than what I actually produced. BTW, my scooter did not come with that cup you referenced. And, I am going to drain the coolant tonight and follow your procedure before I ride it anymore. I have only driven it about a half a mile and it is aching for me to ride it.
|
|
Ad Free Donut
   
Currently Offline
A bike is music to my ears.
Posts: 1,655
Likes: 93
Joined: Oct 22, 2013 4:11:04 GMT -6
|
Post by Guitarman on Jun 11, 2014 0:15:57 GMT -6
If someone had done this to mine, I wouldn't have most of the problems I do now with it. Wanna trade? LOL  |
|
|
|
Post by mxmatt on Jun 11, 2014 9:37:48 GMT -6
Now on the coolant, drain, drain, drain. Flush with water, fill system, run engine until warm and flush again. Drain completely then the good 50/50 premix and burp. Got to burp it and even idling on the center stand the engine will heat up enough for the fan to kick on ........if all the air is out. With it stripped you can do all fluid changes easier and keep things off the plastics and test run the engine also. Looking good.  JR , Something isn't working right. I drained the coolant last night and flushed it twice. I still have Chinese coolant in the reservoir and the fan has still never turned on. Can you give me the Changing Coolat 101 on how to do this? Thanks. |
|
Administrator
Currently Offline
Posts: 1,565  Likes: 51
Joined: Jan 27, 2014 13:58:53 GMT -6
|
Post by JR on Jun 11, 2014 13:11:01 GMT -6
Now on the coolant, drain, drain, drain. Flush with water, fill system, run engine until warm and flush again. Drain completely then the good 50/50 premix and burp. Got to burp it and even idling on the center stand the engine will heat up enough for the fan to kick on ........if all the air is out. With it stripped you can do all fluid changes easier and keep things off the plastics and test run the engine also. Looking good.  JR , Something isn't working right. I drained the coolant last night and flushed it twice. I still have Chinese coolant in the reservoir and the fan has still never turned on. Can you give me the Changing Coolat 101 on how to do this? Thanks. This is my guide for the linhai 250B but it works the same for the vertical engine you have. Now the pink coolant in the reservoir tank, you will see it has a line that runs back to the top of the radiator cap. The system works just like an auto system, when running the cap will let extra coolant in from the reservoir tank and when the engine cools any excess goes back to the tank. Remove the line by the cap that goes to the tank and drain it, flush it with water.
If you have ran it and it hasn't moved at all then this tells me you got a lot of air in the system and I mean a lot. Any air in this cooling system will not only make the engine run hot but the fan will never kick on.
(1) Put scooter on center stand and remove carb/radiator plastic cover under the seat.
(2) Place catch pan under the drain bolt location, remove allen head bolt, then remove radiator cap. [DO NOT LOSE COPPER WASHER ON BOLT]
(3) After coolant is drained take water hose and flush radiator well with clean running water, can even do it two or three times. If you have an air compressor you can even blow out all water completely
(4) Replace allen head drain bolt with the copper washer , a little silicone gasket maker is good to use too, secure tightly.
(5) Fill radiator completely with coolant, a long funnel is nice and doesn't make a mess. [USE ONLY COOLANT FREE OF NITRATES, BORATES, SILICATES & SPECIFIED FOR ALUMINUM BLOCK ENGINES] One can mix their own coolant on a 50/50 ratio but it is a lot easier to use a 50/50 premix (I use Prestone)
(6) Start scooter and let run until thermostat opens and you see coolant start to circulate (this only takes a few minutes) Re-fill until full as the coolant will generally go down, immediately put on radiator cap securely after re-filling
(7) Fill radiator plastic reservoir tank to about 3/4 full with same coolant after putting on the radiator cap
(8) Let idle until the temp gauge comes up to about the 1/2 way mark and then shut off scooter (the fan may or may not come on, doesn't matter)
(9) Go watch TV, read a book, but let scooter sit until it's bone cold.
(10) Remove radiator cap and re-fill with coolant, start engine, let circulate, fill again if needed, put radiator cap back on.
(11) Fill plastic reservoir tank again to about 3/4 full, put on rubber cap and watch temp gauge and see if fan cycles on and off.
(12) DONE!
If for some reason it seems to want to get warm and fan not cycle on and off then repeat steps number 9,10 and 11 again.
You can even run the scooter around the block and see if the fan comes on and off and how the temp gauge reads.
This has always worked for me first time and every time.
When I say engine cold I mean cold as in same temp as the outside surroundings. When I say fill the radiator I mean do it with the engine off and the radiator cap off and then start the engine with the radiator cap off, when the thermostat opens you'll see the coolant level go down, immediately fill it up with it still running, put cap on, then fill reservoir tank to about 1/2 to 3/4 full NOT totally full. Watch temp gauge, when it gets about 1/2 way shut her down and go watch TV.
JR
|
|
|
|
Post by mxmatt on Jun 11, 2014 15:10:25 GMT -6
Thanks, JR. I have been following you procedure to a "T" and have added half a jug of Prestone 50/50 and still never heard the fan come on. The temp gauge has even gone slightly above half way. What is standard operating temperature? Or, where should my needle gauge be registering? I am wondering if I have a faulty fan. |
|
Administrator
Currently Offline
Posts: 1,565  Likes: 51
Joined: Jan 27, 2014 13:58:53 GMT -6
|
Post by JR on Jun 12, 2014 22:08:24 GMT -6
Thanks, JR. I have been following you procedure to a "T" and have added half a jug of Prestone 50/50 and still never heard the fan come on. The temp gauge has even gone slightly above half way. What is standard operating temperature? Or, where should my needle gauge be registering? I am wondering if I have a faulty fan. Question? When you removed the radiator cap after letting it cool off was it full or could you add more coolant? Was it full to the top of the cap? If not it still has air in the system. If it was full and the reservoir tank looked unchanged then it's properly burped and the fan should work. Temp gauge readings are in the range from 1/2 to a little over and when the fan comes on the gauge generally drops to a little below the 1/2 way mark depending on outside temperature?
When you started the scooter with the cap off and it warmed up a bit did the level go down a little? If so the thermostat did open and allowed the coolant to circulate.
These are the basic operating temperature ranges for the 250 scooter thermostat and radiator thermo switch:
Thermostat
Nominal temp. designation....165 deg F
Begins opening......................157-163 deg F
Fully open...............................176 deg F
Fan Thermo-switch
Starts to close (continuity)....... 208-216 deg F
Starts to open (no continuity).. 196-210 deg F
You can easily test the fan by unplugging the fan wire on the thermo-switch on the radiator and hooking it up to 12Vdc. If it comes on then we will know you still have air in the system or the thermo-switch is bad.
JR
|
|
|
|
Post by mxmatt on Jun 13, 2014 11:58:56 GMT -6
Thanks, JR. I have been following you procedure to a "T" and have added half a jug of Prestone 50/50 and still never heard the fan come on. The temp gauge has even gone slightly above half way. What is standard operating temperature? Or, where should my needle gauge be registering? I am wondering if I have a faulty fan. Question? When you removed the radiator cap after letting it cool off was it full or could you add more coolant? Was it full to the top of the cap? If not it still has air in the system. If it was full and the reservoir tank looked unchanged then it's properly burped and the fan should work. Temp gauge readings are in the range from 1/2 to a little over and when the fan comes on the gauge generally drops to a little below the 1/2 way mark depending on outside temperature?
When you started the scooter with the cap off and it warmed up a bit did the level go down a little? If so the thermostat did open and allowed the coolant to circulate.
These are the basic operating temperature ranges for the 250 scooter thermostat and radiator thermo switch:
Thermostat
Nominal temp. designation....165 deg F
Begins opening......................157-163 deg F
Fully open...............................176 deg F
Fan Thermo-switch
Starts to close (continuity)....... 208-216 deg F
Starts to open (no continuity).. 196-210 deg F
You can easily test the fan by unplugging the fan wire on the thermo-switch on the radiator and hooking it up to 12Vdc. If it comes on then we will know you still have air in the system or the thermo-switch is bad.
JR
When I removed the cap this morning and this is what I saw.  Untitled Untitled by mxmattaz, on Flickr I added about a cap full and that was all I could add and the reservoir was full. I've used approximation half a gallon of coolant so I think it is full. However, the fan has never turned on and I don't want to do damage to the engine as you suggest. Is there a way to access the thermo switch without removing all the body plastic? Also, can I use my jump box from Costco as the 12 volt source to test the fan? |
|
Administrator
Currently Offline
Posts: 1,565  Likes: 51
Joined: Jan 27, 2014 13:58:53 GMT -6
|
Post by JR on Jun 13, 2014 20:01:30 GMT -6
Question? Have you "properly" checked the fuses in the fuse box. Properly means with a multi-meter on the ohms setting. Just eye balling them isn't good enough. Could be a piss poor Chinese fuse? The fan is fused in the fuse box. Most guys just go buy quality American fuses and replace the Chinese ones, sorry I didn't mention that.
At one time on the early models of this scooter with the vertical engine they had the radiator behind the gas tank and the radiator thermo switch was only accessible by removing panels. Is the radiator up front right behind the front tire? If so then you may be able to access it by removing the little side panel that is right under the foot running boards? On the linahi the thermo switch is on the radiator on the bottom left side but on the vertical engine I don't know on the newer models?
Yes any 12Vdc source will work but again I would check the fuse box and all the fuses. The fuse box should come out easily and it is another source for electrical gremlins, that's why you do a PDI.
The radiator coolant level is A-OK.
JR |
|
Clinician

Currently Offline
Posts: 49  Likes: 2
Joined: May 12, 2014 13:18:43 GMT -6
|
Post by roketa250 on Jun 25, 2014 19:53:19 GMT -6
Haven't heard from you in a while mxmatt.... Hope all is well  Let us know how things are going??? Thanks! |
|

