Certified Clinician
 
Currently Offline
Posts: 81
Likes: 0
Joined: Mar 16, 2011 12:32:15 GMT -6
|
Post by philosophydoc on May 28, 2011 17:32:23 GMT -6
Does this require an 18mm spark plug socket? Neither my 13/16 (too big) nor 5/8 (too small) fit, and I can't find an 18mm one locally. Will 3/4 work?
|
|
Certified Clinician
 
Currently Offline
Posts: 81
Likes: 0
Joined: Mar 16, 2011 12:32:15 GMT -6
|
Post by philosophydoc on May 28, 2011 15:47:34 GMT -6
At last, graduation is over (daughter out of college, son almost out of high school), and I can get back to rebuilding my scoot.
Original thread here:http://scooterdoc.proboards.com/index.cgi?board=250cc&action=display&thread=3375
In brief, bike appears to be a 2008 Jonway YY250T-2. I am almost ready to return to tracing some cut electrical wires, but first I have replaced all vacuum lines, fuel lines, installed a new starter motor, and now at doing a cold valve adjustment (CF Moto), because the reason the original owner "abandoned" this bike was a broken rocker arm, which I have replaced but gather a new rocker means the valves must be adjusted.
Bike up on center stand; removed left crankcase cover, removed inspection cap from cylinder, and am trying to rotate drive pulley counterclockwise to get cylinder to TDC. Unfortunately, drive pulley goes about 1/4 turn then practically stops. Am wondering how hard I should push at this point...no index mark is visible through the inspection hole yet. I don't have a 19mm socket, so I am using a crescent to pull, and may not be generating sufficient force, but I sure don't want to slip a breaker bar over the crescent and snap something.
I know to expect resistance when one comes to the compression stroke, but how much is too much? Quite a bit (which is what I am experiencing) or less? How hard should I crank on it? And if I am getting too much resistance, what might be the cause?
I have never had the bike running (bought it two years ago in parts, kept in garage), so I cannot attest to it's being able to run.
Thanks in advance
|
|
Certified Clinician
 
Currently Offline
Posts: 81
Likes: 0
Joined: Mar 16, 2011 12:32:15 GMT -6
|
Post by philosophydoc on May 23, 2011 22:45:59 GMT -6
On difficult nuts, if you have a little room, once your ratchet is on the nut, find a piece of pipe about 12-18 inches long and slide it over the handle of your ratchet (effectively extending the length of the ratchet handle). You will be amazed at how much additional force this will generate at the nut, without having to push any harder than you have been pushing. Nuts that I have sweated and strained over come off easily this way. The longer the pipe, the more force you will be able to generate.
I have two college age daughters, and in each one of their cars I have place a two foot piece of pipe to slide over the lug nut wrench for just this reason, in case they need to change a flat.
Sometimes, physics is our friend...
|
|
Certified Clinician
 
Currently Offline
Posts: 81
Likes: 0
Joined: Mar 16, 2011 12:32:15 GMT -6
|
Post by philosophydoc on May 3, 2011 15:53:19 GMT -6
I have a question about what I should be aiming for here. In my first post, I uploaded a picture showing my fuse box and the flat blade connector attached to it: 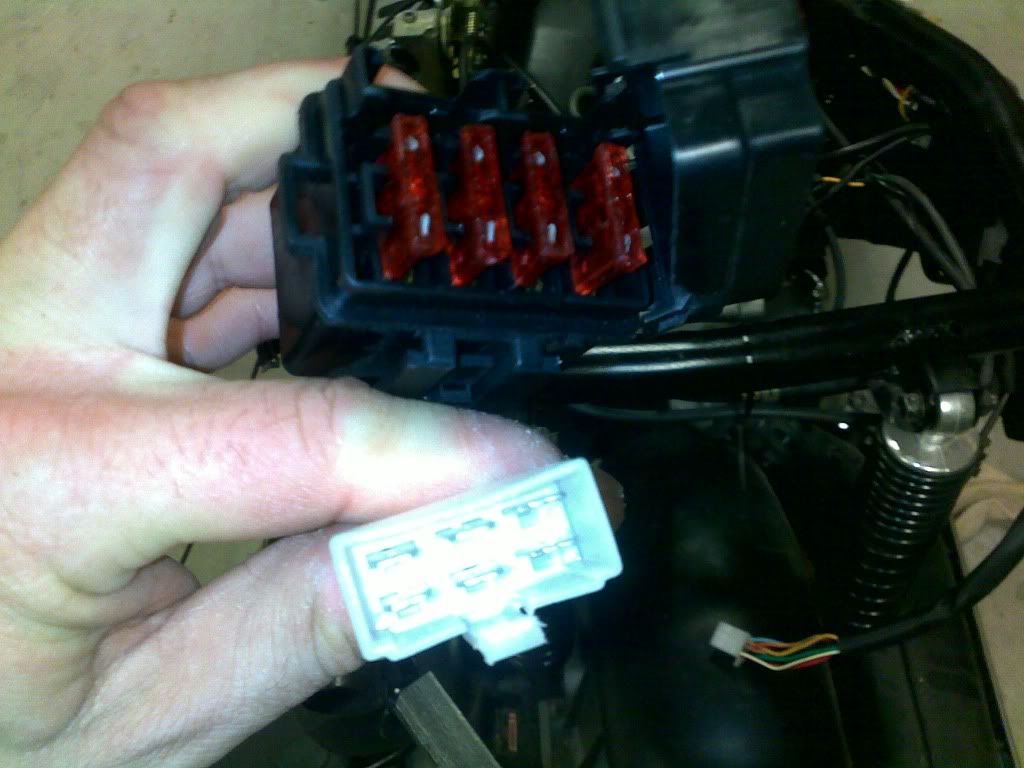 While reading another post, I stumbled across a vendor selling electrical connectors, one of which appears to be the "mate" to my fuse box male connector: 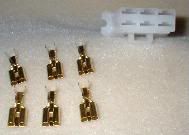 Am I right in assuming that my six connected wires will likely get connected to the fuse box? If so, does it make sense to order this connector, or am I getting ahead of myself? |
|
Certified Clinician
 
Currently Offline
Posts: 81
Likes: 0
Joined: Mar 16, 2011 12:32:15 GMT -6
|
Post by philosophydoc on Apr 23, 2011 10:20:16 GMT -6
Sorry to have been dormant so long, but the next few weeks will be even more hectic than that past two have been -- oldest daughter graduates from college in mid-May, (need to travel from Texas to Tennessee for that), I will have finals to grade, a two-day student retreat to run, then youngest son graduates from high school...oh, and the Mrs and I celebrate our 23rd anniversary.
Needless to say, the scoot must wait, but the starter has arrived, vac and gas lines changed out and hooked up, and I am ready to begin seriously electrical testing come the end of May. If I can find some time I may try to do a few things before then, but if you don't hear from me for a few weeks, know it is not because I have given up.
See you soon....
|
|
Certified Clinician
 
Currently Offline
Posts: 81
Likes: 0
Joined: Mar 16, 2011 12:32:15 GMT -6
|
Post by philosophydoc on Apr 13, 2011 8:48:34 GMT -6
I have hose clamps on all the water lines...I used one blue zip tie to connect the tube running from the radiator cap to the overflow tank.
|
|
Certified Clinician
 
Currently Offline
Posts: 81
Likes: 0
Joined: Mar 16, 2011 12:32:15 GMT -6
|
Post by philosophydoc on Apr 12, 2011 21:24:52 GMT -6
Okay, an update and a few pictures. I have replaced all the vacuum lines and replaced the wire clips with zip ties -- green for vacuum lines, red for fuel, blue for water/coolant. Only green ties visible here. Question: any reason to replace the crankcase breather tube hose-clamps with zip ties? 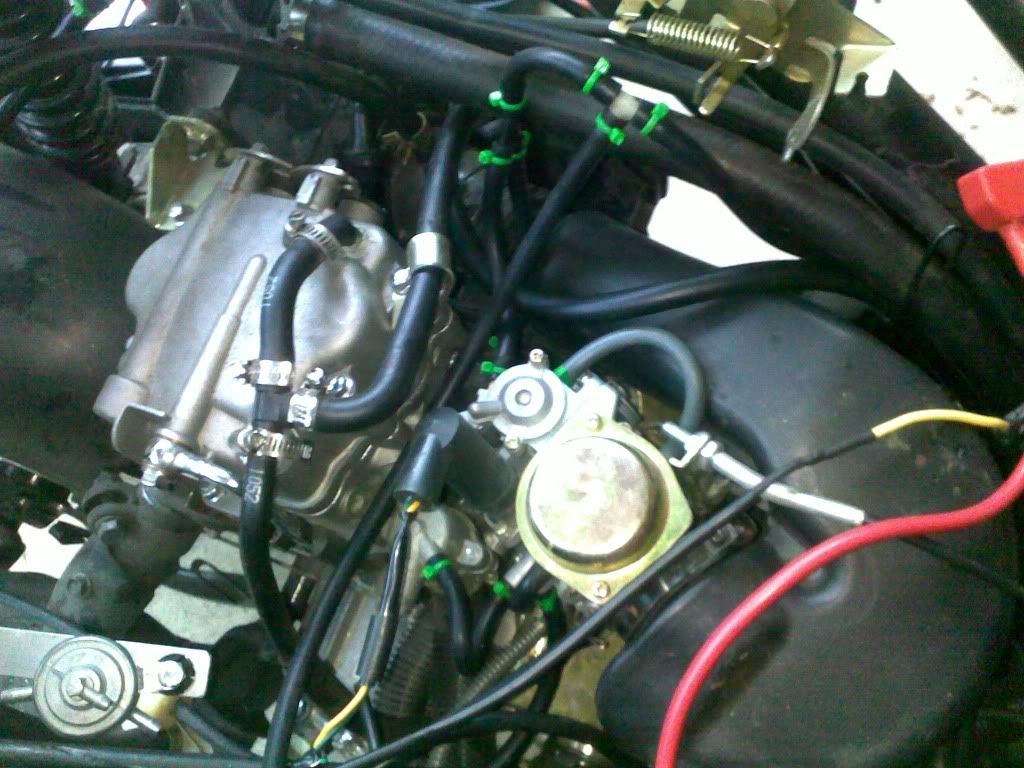 Needed to install a vacuum fuel petcock, but could find no point of attachment. So with a small piece of 1/8 in. x 1 inch aluminum, a drill and a vise, I crafted the following: 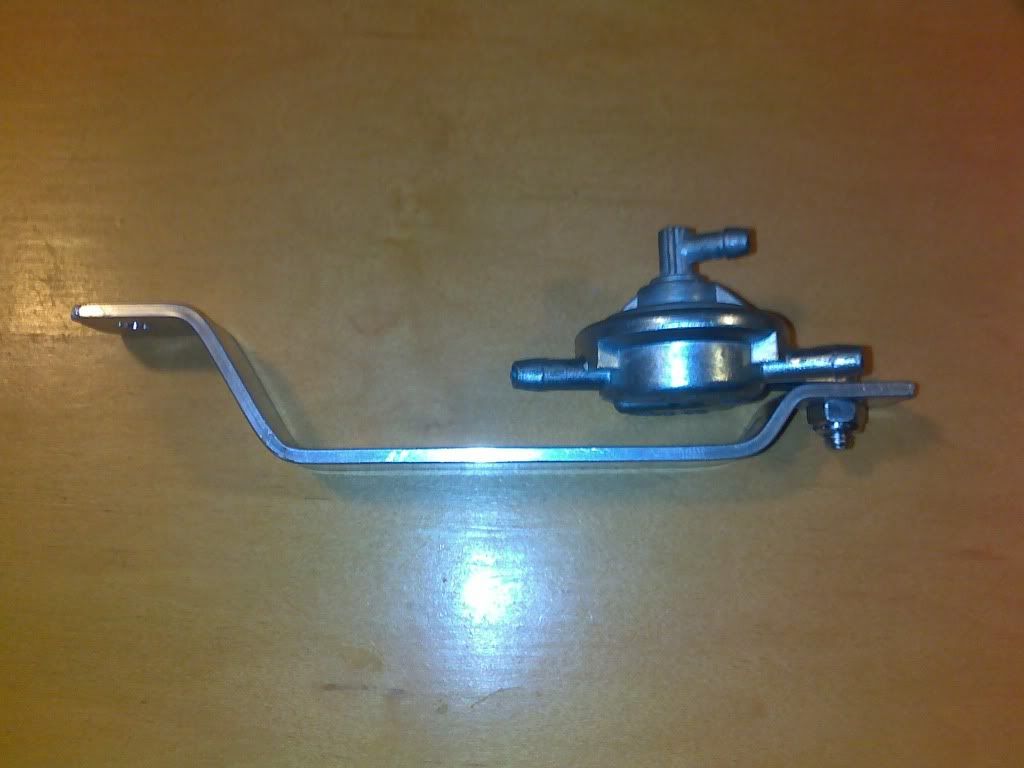 I drilled a hole in the bottom of a small bracket used as a hose guide, and attached this there, using nylon locking nuts to insure less likelihood of nuts rattling loose. Here are few images (top, back, and side) of the completed installation. (You may notice a black rubber washer where the petcock attaches to the aluminum; after taking these pictures I removed and re-bent the strap so as to remove it. Rubber disintegrates, and it would have left the petcock loose). 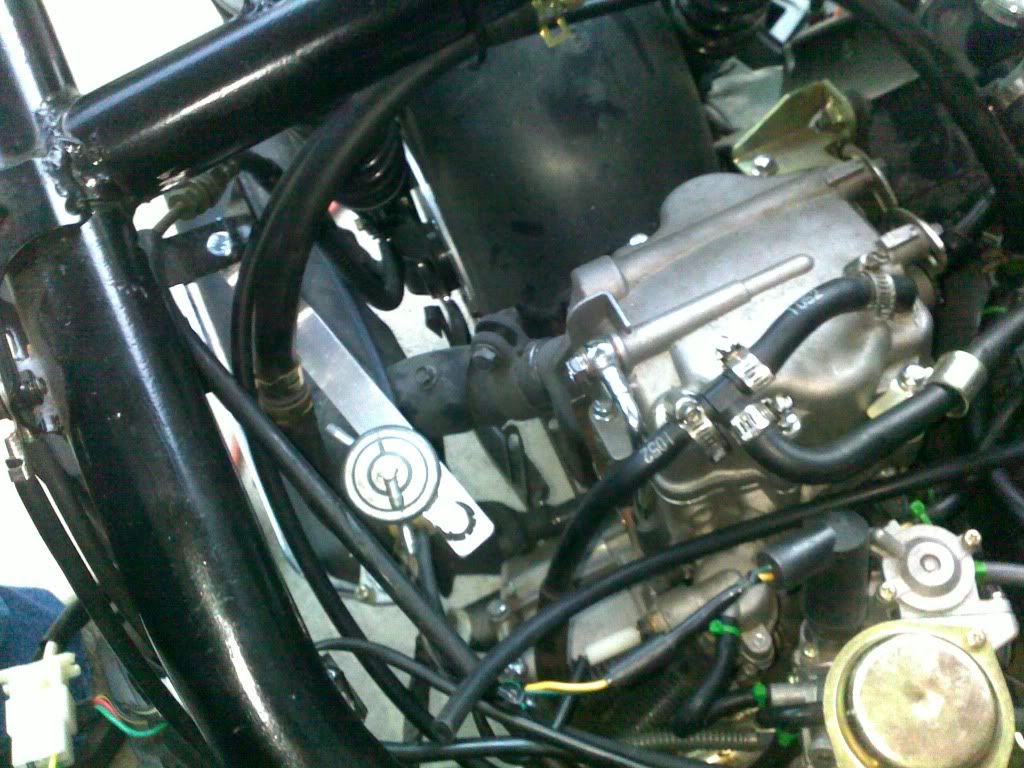 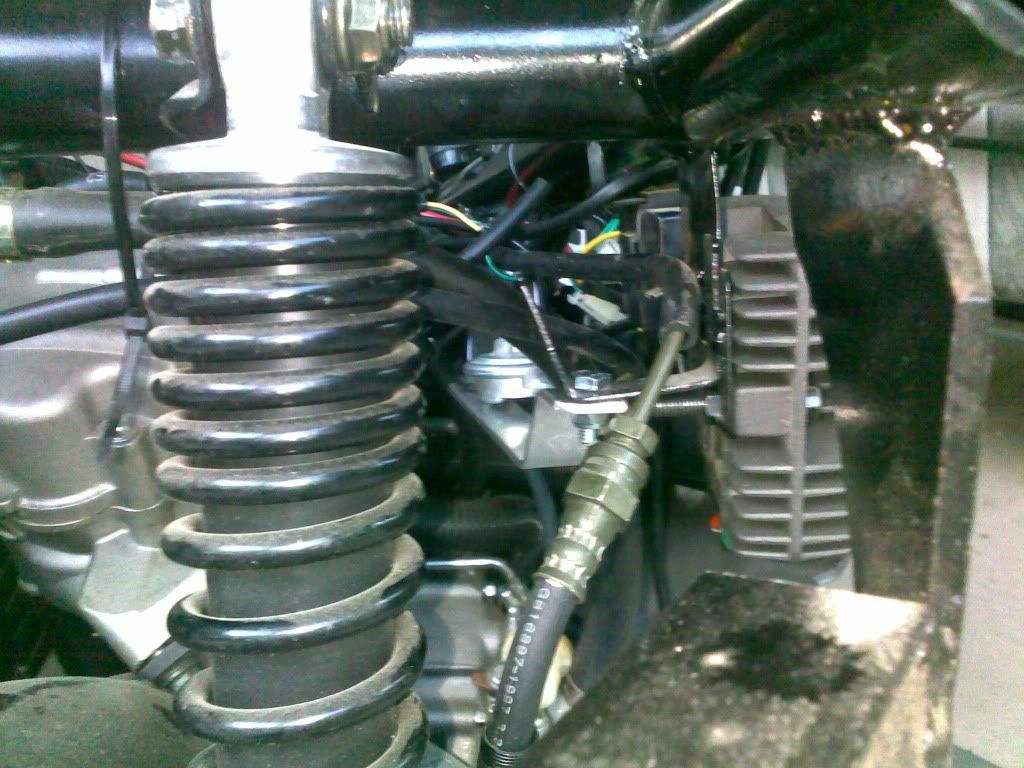 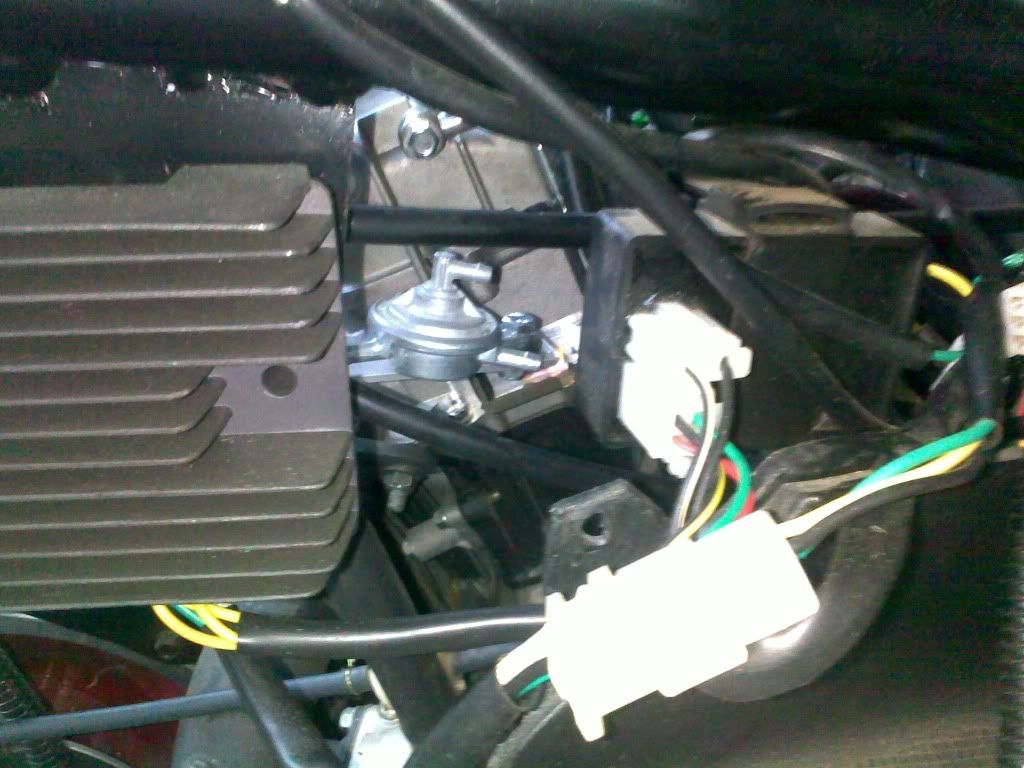 With the seat insert back on, the petcock sits about 1/2 inch below the battery compartment...is that sufficient clearance? Starter arrives on Thursday; I'll hook it up and start testing the electric again. (I'll need all your help then!) |
|
Certified Clinician
 
Currently Offline
Posts: 81
Likes: 0
Joined: Mar 16, 2011 12:32:15 GMT -6
|
Post by philosophydoc on Apr 12, 2011 8:03:04 GMT -6
Good vendors deserve recognition....
I bought the incorrect starter from motosportsparts.com (actually, they sell items on ebay, and the sale was a "Buy it Now" ebay transaction). Ebay listing clearly notes that no returns are allowed (and this was wholly my fault...he even emailed me before the purchase that he had no idea if this starter would fit my bike). After discovering the starter wouldn't work, I emailed the vendor asking if I could perhaps get a store credit if I returned the starter, and here was his reply:
Dear philosophydoc,
Just send it back I will issue a refund. Not a problem. I cannot refund the shipping but the item cost I can no big deal. People make mistakes. I do all the time.
- motosportsparts
Yee-haa! I also bought a battery from him, and it's holding a charge just fine. (Thank to insanetexan for the link to this vendor's sales via ebay).
|
|
Certified Clinician
 
Currently Offline
Posts: 81
Likes: 0
Joined: Mar 16, 2011 12:32:15 GMT -6
|
Post by philosophydoc on Apr 12, 2011 7:48:16 GMT -6
Posted this in "Dealer experiences" forum, but a good vendor deserves a multiple shout-out. The vendor from whom I bought this starter -- motosportsparts.com -- clearly notes that no returns are allowed (and this was wholly my fault...he even emailed me before the purchase that he had no idea if this starter would fit my bike). When I emailed him asking if I could perhaps get a store credit if I return the starter, here was his reply:
Dear philosophydoc,
Just send it back I will issue a refund. Not a problem. I cannot refund the shipping but the item cost I can no big deal. People make mistakes. I do all the time.
- motosportsparts
Yee-haa! I also bought a battery from him, and it's holding a charge fine. (Thank to insanetexan for the link to this vendor's sales via ebay).
|
|
Certified Clinician
 
Currently Offline
Posts: 81
Likes: 0
Joined: Mar 16, 2011 12:32:15 GMT -6
|
Post by philosophydoc on Apr 10, 2011 22:44:39 GMT -6
I decided to go with this vendor because the price was good, and they offered a one-year warranty. Will let you know how it works out. Replaced all the vacuum hoses today, and replaced all the wire clips with zip-ties, per Big Guy's scooter PDI ( x1scooters.com/pdi.html). The larger hoses lines running across the top of the cylinder head have hose clamps, which I inspected and tightened. I need to find a way to mount the vacuum fuel petcock, and then will replace the fuel lines and fuel filter. I'll soon be ready to do some further electrical testing when the starter motor arrives, and I can get everything hooked up. |
|
Certified Clinician
 
Currently Offline
Posts: 81
Likes: 0
Joined: Mar 16, 2011 12:32:15 GMT -6
|
Post by philosophydoc on Apr 9, 2011 22:25:36 GMT -6
|
|
Certified Clinician
 
Currently Offline
Posts: 81
Likes: 0
Joined: Mar 16, 2011 12:32:15 GMT -6
|
Post by philosophydoc on Apr 9, 2011 17:12:38 GMT -6
Rebuilding a 2008 Apollo Ani 250 (looks to be a JCL clone), CF Moto engine. Bike came with no starter motor, so I have nothing to go by. Purchased the following:  ...but the location of the electrical post hits the bottom of the bike, and hence it is unusable. May be able to swap it out with this one:  ...but the length of the gear looks different, and it suddenly is clear to me I don't know what I'm looking for. Again, as I have no old motor to look at, I'm flying blind. So -- 9 tooth gear or 11 tooth? Is there a standard? I have looked at this motor, listed for a CF Moto bike, from a vendor several have recommended. www.motopartsmax.com/index.php/main_page/product_info/products_id/11368/cPath/117_135/eID/8Any advice? Thanks... |
|
Certified Clinician
 
Currently Offline
Posts: 81
Likes: 0
Joined: Mar 16, 2011 12:32:15 GMT -6
|
Post by philosophydoc on Apr 6, 2011 8:45:06 GMT -6
Thanks for clearing up the fuse box mystery. I think what threw me was that I initially began trying to understand the wiring by looking at the Helix wiring diagram (http://mpsracing.net/helix-manual/86-hires.jpgHelix manual), assuming that since Helix diagram clearly showed a fuse box, and the CF Moto is a Helix clone, the "right" wiring diagram for my scooter would show the fuse box.
Logical, but wrong.
The 20 amp fuse does run to the positive terminal of the battery, and is separate from the fuse box. A few days ago I removed the original glass fuse, and soldered in a blade fuse holder (as recommended by many here) with a 20 amp fuse.
|
|
Certified Clinician
 
Currently Offline
Posts: 81
Likes: 0
Joined: Mar 16, 2011 12:32:15 GMT -6
|
Post by philosophydoc on Apr 5, 2011 16:30:42 GMT -6
I have been stumped by the various wiring diagrams I have encountered, because I think I have been misreading one element of the schematic (of which I know precious little). As noted, I have a fuse box, and hence have been looking for something corresponding to a fuse box in the diagrams (just as one finds the battery, CDI, Manostat, etc.). Today it struck me that rather than being represented in the diagram by single location (which is what I have been looking for and not finding), they are actually "distributed" around the diagram. Bluntly put, are these my four fuses (circled in yellow below)   Thanks in advance. |
|
Certified Clinician
 
Currently Offline
Posts: 81
Likes: 0
Joined: Mar 16, 2011 12:32:15 GMT -6
|
Post by philosophydoc on Apr 5, 2011 7:05:23 GMT -6
Thanks Cruiser and Alleyoop...this helps a lot. And sorry I missed the fuel/vac line discussion in the Library, but often when I do a board search that goes back more than 300 days, I get this error:
"This page took too long to generate and has been stopped. A log of this error has been reported to ProBoards Support."
I have searched for fuel and vacuum info, but never found the Library file you pointed me to.
And I had to chuckle at this -- in Bashan's very helpful tutorial, he writes: "The vacuum fuel valve is often mislabeled by sellers as a petcock. A petcock actually fits up into the bottom of the tank."
Just what I need...a THIRD name for it!
I'll start swapping out vac and fuel lines later this week, and see if JR has any advice on what my next step is with the electrical connections.
|
|

