Clinician

Currently Offline
Posts: 25  Likes: 1
Joined: Jul 25, 2010 18:35:29 GMT -6
|
Post by mflorek on Jan 21, 2011 16:45:55 GMT -6
Every time I look at that beautiful view in the background, I say to myself Puerto Rico –WOW! Being that close to the ocean has its price and the salt in the air eats away at everything, including those wiring harnesses. You know what to do – now get busy.
|
|
Clinician
Currently Offline
Posts: 25
Likes: 1
Joined: Jul 25, 2010 18:35:29 GMT -6
|
Post by mflorek on Jan 19, 2011 19:26:14 GMT -6
I read your reference 3 times and didn't find anything about corosion resistance. I did find this in Scientific American Despite its undeservedly high position in the consumer goods market, oxygen free copper does have some applications in very high-tech science equipment, notably, in the construction of magnetometers, superconductors and particle accelerators.
MARINE GRADE - the way to go.
|
|
Clinician
Currently Offline
Posts: 25
Likes: 1
Joined: Jul 25, 2010 18:35:29 GMT -6
|
Post by mflorek on Jan 17, 2011 9:24:29 GMT -6
Bashan – I too was scared that you would lose a nose or something! Worse yet, that two clamps might warp the pulley. Your design - ingenious and your face remains as God intended.
|
|
Clinician
Currently Offline
Posts: 25
Likes: 1
Joined: Jul 25, 2010 18:35:29 GMT -6
|
Post by mflorek on Jan 17, 2011 8:49:40 GMT -6
I got a kick out of reading this story. I recently worked on this very chassis. Very much like a scooter GY6 ‘cept the exhaust goes out the belt side of the engine. The buggy had been abused badly and the timing chain was skipped. I removed the cam and got the chain right. With the plug out, I spun the engine over a few revolutions to allow the chain tensioner to set and checked again. With the timing marks aligned, adjusted the valves. A splash of fuel and it started. Biggest problem with working on a buggy is no center stand. Rev too much and off it goes. Almost smashed the side of my wife’s Avalon!
|
|
Clinician
Currently Offline
Posts: 25
Likes: 1
Joined: Jul 25, 2010 18:35:29 GMT -6
|
Post by mflorek on Jan 16, 2011 12:20:56 GMT -6
How did you come up with the hole placement? I modified a stock bell for a neighbor's buggy project by simply media blasting for extra grab and some hi-temp paint. No complaints from him. Your idea is brilliant. Please share.
|
|
Clinician
Currently Offline
Posts: 25
Likes: 1
Joined: Jul 25, 2010 18:35:29 GMT -6
|
Post by mflorek on Jan 16, 2011 12:06:10 GMT -6
I buy marine grade stuff form these guys in Pompano Beach. www.sherco-auto.com/electacc.htm They carry electrical parts that are “tinned” meaning the copper is less likely to break-down because it is plated which also makes it easy to solder. The wire you are holding in your first picture looks to be completely oxidized, possibly by battery acid. It’s conductivity is zero in that state. MIKE |
|
Clinician
Currently Offline
Posts: 25
Likes: 1
Joined: Jul 25, 2010 18:35:29 GMT -6
|
Post by mflorek on Jan 16, 2011 11:54:02 GMT -6
Noise like you described could fall under two groups, first worn-out moving parts in the engine or detonation under a very lean condition. When the fuel to air ratio is too lean, the combustion is very violent. Extreme heat and a situation where the piston is burnt or broken can result. The quickest check is the spark plug.
|
|
Clinician
Currently Offline
Posts: 25
Likes: 1
Joined: Jul 25, 2010 18:35:29 GMT -6
|
Post by mflorek on Jan 16, 2011 11:31:35 GMT -6
|
|
Clinician
Currently Offline
Posts: 25
Likes: 1
Joined: Jul 25, 2010 18:35:29 GMT -6
|
Post by mflorek on Aug 26, 2010 10:19:38 GMT -6
An eight month nap is probably going to have impact on your battery. I would start by checking and cleaning the grounding locations and get the battery on the charger away from your work location. Remember AC power is the last thing connected and the first thing disconnected.
|
|
Clinician
Currently Offline
Posts: 25
Likes: 1
Joined: Jul 25, 2010 18:35:29 GMT -6
|
Post by mflorek on Aug 26, 2010 9:15:47 GMT -6
I would like to suggest that you have your wife sit in a rider’s position while and you measure with some certainty the amount of seat height you need to loose. This might require a third person to steady the bike. Modifying the seat means removing the existing air box. The air box is why the seat has that saddle horn in the front. Lastly, and with all due respect – I do not agree with some of the projected issues Kiwi mentioned.
1.) Difficult, especially front
Lowering the front is actually easy. The fork tubes are clinched by bolts at the tree. Alignment problems can be avoided by keeping the front wheel assembled and slipping both at the same time. The axle will keep both tubes true to each other.
2.) Potentially unsafe as it changes the whole geometry of the suspension.
If you do to the front as you do to the rear, the geometry hasn’t changed, it’s just 1.5 inches lower.
|
|
Clinician
Currently Offline
Posts: 25
Likes: 1
Joined: Jul 25, 2010 18:35:29 GMT -6
|
Post by mflorek on Aug 26, 2010 6:25:42 GMT -6
It was requested I provide more on the bushings I needed to fabricate. I started with a length of electrical conduit (1/2" EMT) and an old washing machine hose. 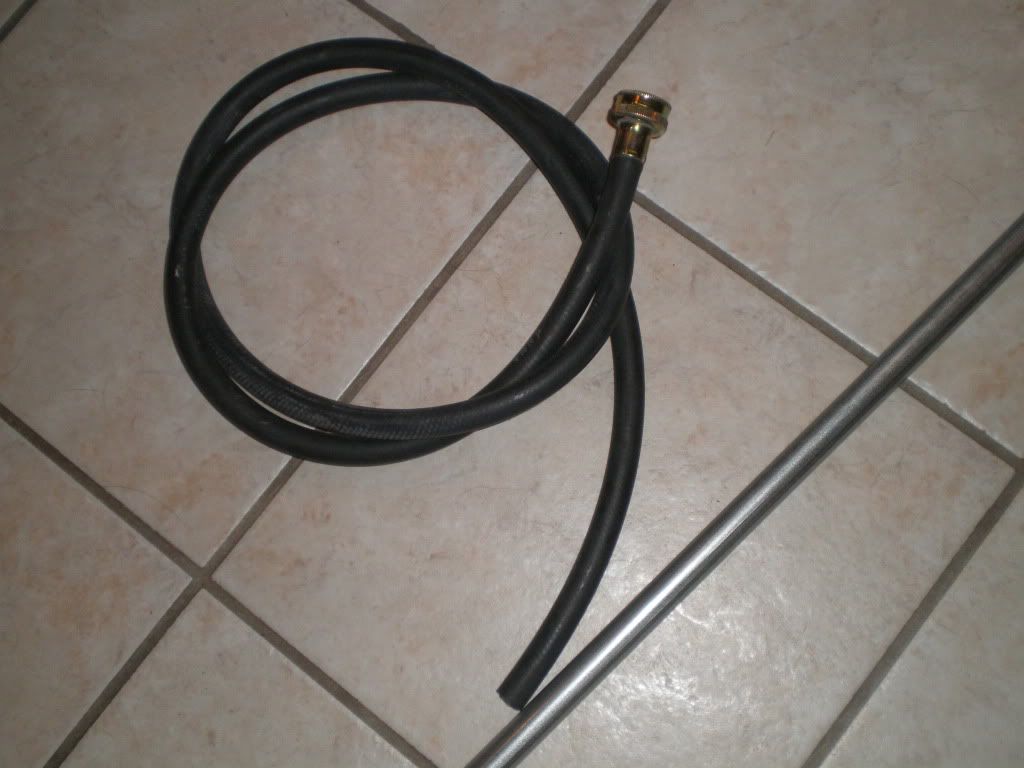 [/img] With the head pipe installed, I measured the gap while my son held the rest of the exhaust system in place. Very much a two man job ! These are after pictures, but you get the idea. 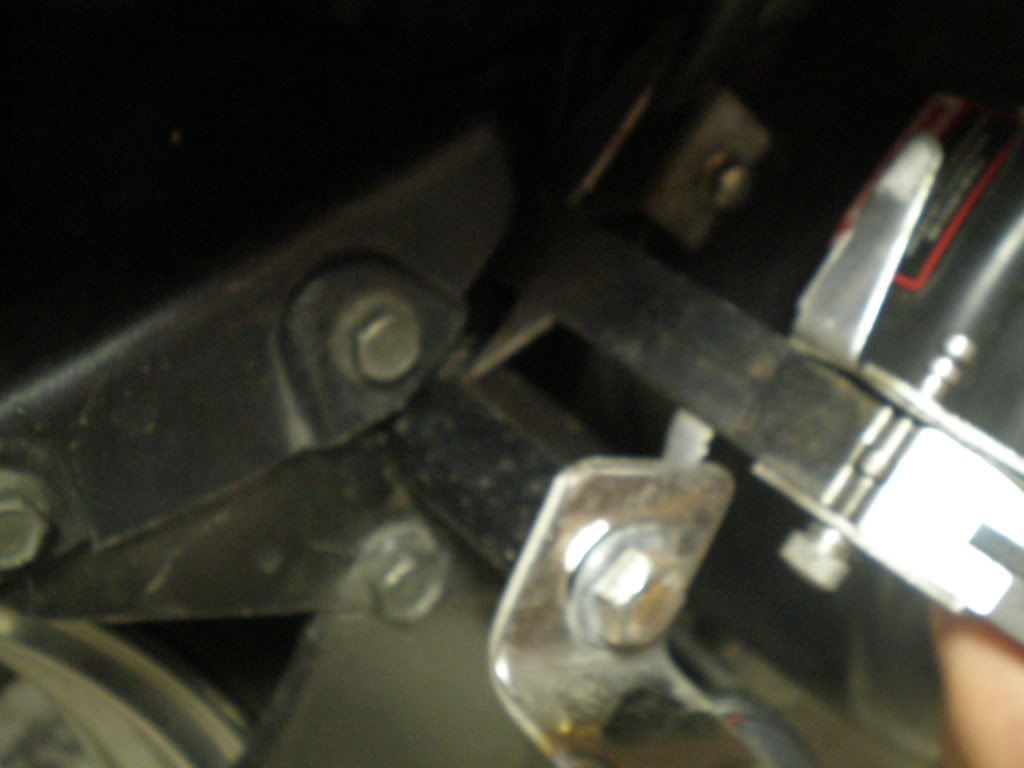 [/img] Hacksaw and razor knife, cut a length of both. One inside of the other, some black paint for that finished look.  [/img] Final photos.  [/img] I'm thinking of fabricating a custom baffle, this dude is loud. Looks cool though.  |
|
Clinician
Currently Offline
Posts: 25
Likes: 1
Joined: Jul 25, 2010 18:35:29 GMT -6
|
Post by mflorek on Aug 22, 2010 21:06:39 GMT -6
I bought a stainless dual exhaust made by Dragon Custom called Double Shot. It came with a matching stainless air box replacement. All of the components are "easy to look at" meaning very nice quality materials and superior welds. Installation of the exhaust required fabricating mounts. The instructions said drill hole in trailing arm, but there was an inch and a half gap. I used 1/2" electrical EMT (conduit) with rubber hose inside (SHADE TREE BUSHING) to fill the void between the bolt and the EMT. Sound is a little more than I had expected.  The air box is like the woman that is SO hot, but not a keeper. (SORRY GALS) It again required the custom touch. I had to saw off 1 3/4" from the mounting flange and re-drill the holes to get things to line up. The maiden voyage was a dud! The filter is SO small that my son's 50cc left me in the dust. I disconnected the hose just to let it breathe. PRICE $150- US |
|
Clinician
Currently Offline
Posts: 25
Likes: 1
Joined: Jul 25, 2010 18:35:29 GMT -6
|
Post by mflorek on Aug 22, 2010 11:38:41 GMT -6
Forty cents fixed my scooter!I had a problem. When riding at a constant speed, the engine would falter like I was running out of gas. It would accelerate OK if I gave it more throttle but cruising has issues. On occasions it would back-fire while slowing. I played with jets, float, settings and replaced the filter but still at cruising speed there was this dead zone. I replaced the plug with a new Iridium NGK and checked all connections. I stumbled upon the connections at the coil. [a href=" 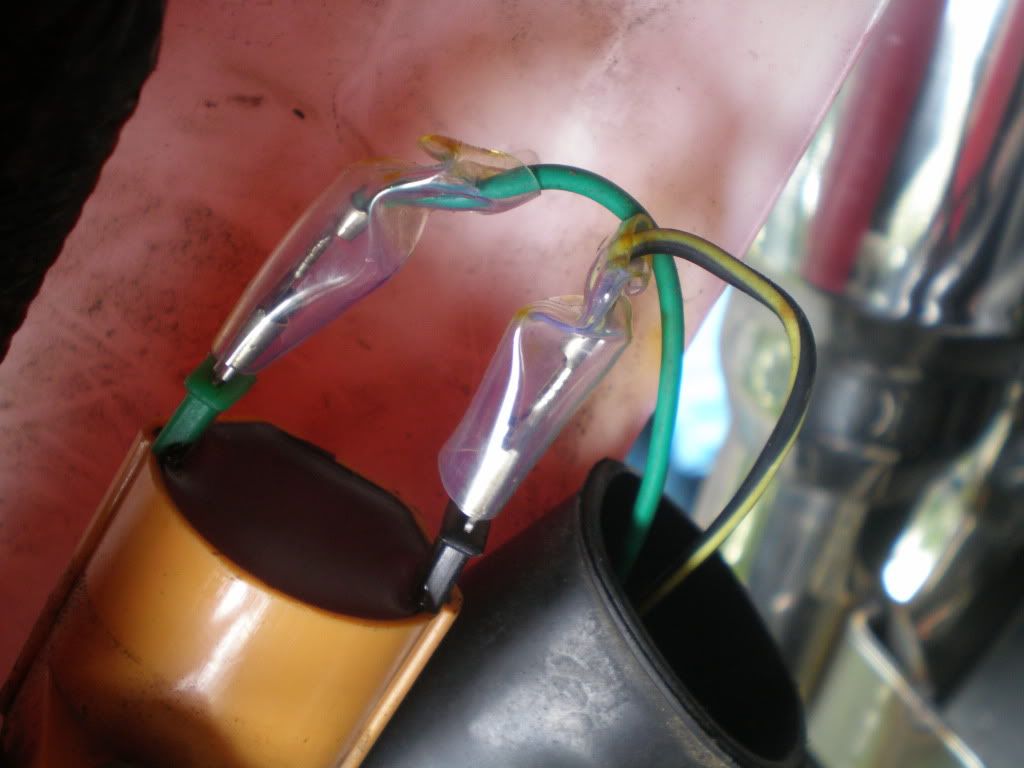 "] [/a] The connection seemed sloppy. Pliers didn’t make it any snugger. I found these connectors in my stash - fit was SO much better. [a href=" 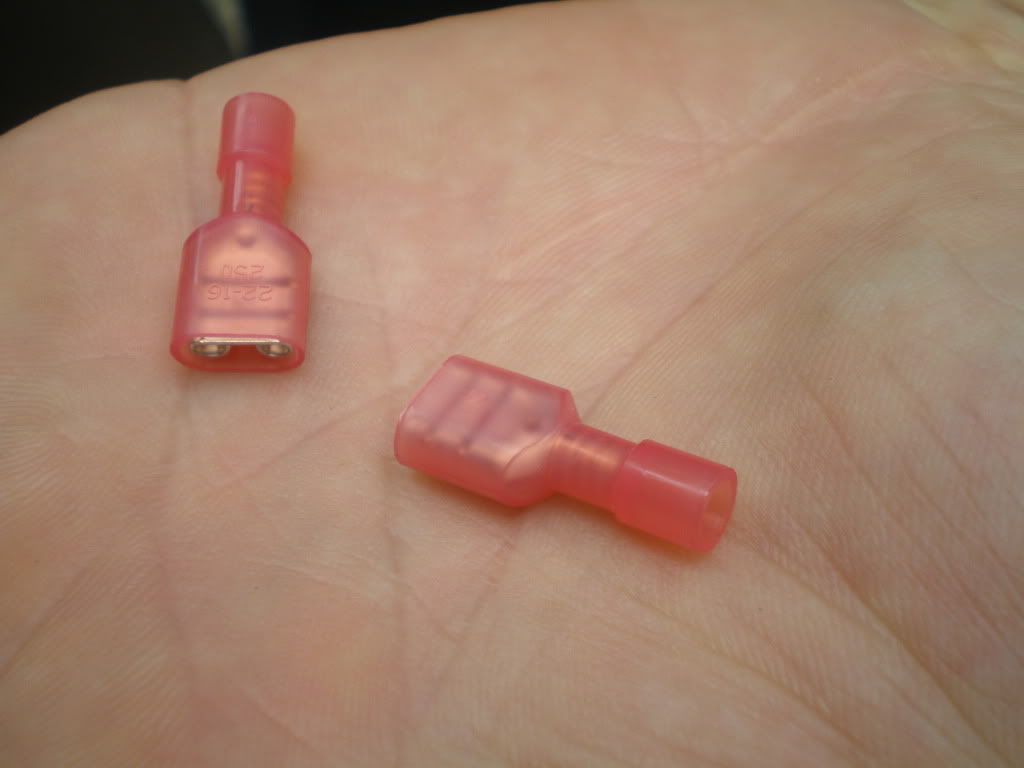 "] [/a] I cut off the factory connectors, stripped back the insulator and “tinned” the wire with solder. I had always heard that a "tinned" wire makes a better connection. [a href=" 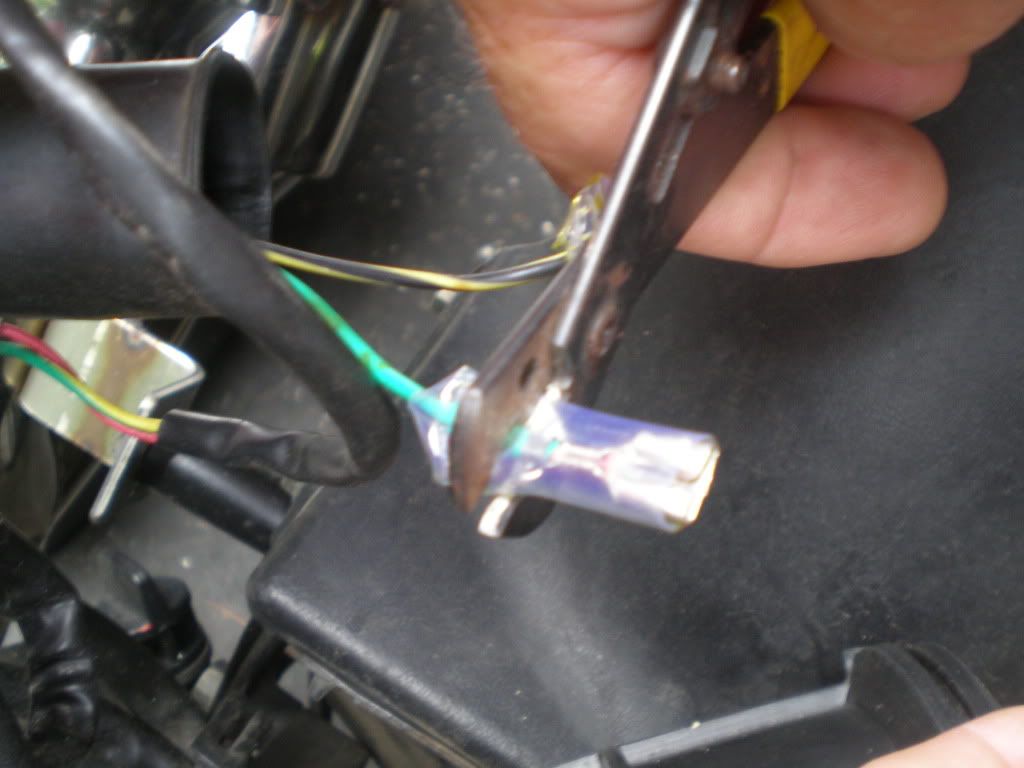 "] [/a] [a href="  "] [/a] Crimped on new connectors and connected the wires, making sure the green lead went on the green coil terminal. [ Bummer - picture of me burning myself didn't come out]  WOW – fixed. Solid at all speeds and loads. No backfire either.
|
|
Clinician
Currently Offline
Posts: 25
Likes: 1
Joined: Jul 25, 2010 18:35:29 GMT -6
|
Post by mflorek on Aug 18, 2010 13:25:25 GMT -6
This old diagram is not universal, but the concepts (not the values) apply, meaning AC voltage in on one pin (from stator) grounded by the GREEN wire, outputs are 1. Battery charging DC on the RED wire 2. Headlight AC voltage on YELLOW.
I had a stack of NEW rectifiers of different manufacture and price but all were for the same application. Using the Ohm meter, the numbers were all over the chart, like Meg-Ohms (100,000 ohm) not K-Ohm (1,000 ohm) as described in the manual, but all worked. Internally they were designed differently so the ohming from pin-to-pin method does not apply.
MIKE
|
|
Clinician
Currently Offline
Posts: 25
Likes: 1
Joined: Jul 25, 2010 18:35:29 GMT -6
|
Post by mflorek on Aug 18, 2010 12:50:28 GMT -6
OK I'm confused (most the time) especially by this Ebay ad. The listing header says 30mm carburetor kit. Later in the product description it says quality Japanese 32mm carburetor ? ? ?
|
|


