|
|
Post by royldoc on Nov 25, 2015 2:15:58 GMT -6
I think I got it. As i wiggle the plugs I can see a blue spark. I replaced with good plug. I do have several timing lights and dwell tach's., Won't do much good on this engine though as the fly wheel is inside the right engine cover. have to drain oil to remove cover. The stator is bolted to the inside the right side engine cover and in the oil bath. The fly wheel does not have to be removed to replace the stator. The specs plate on it says the idle rpm's is 850 for this engine. Sorry to say I no longer own the magnum, somebody made me an offer I couldn't refuse.
Roy
|
|
|
|
Post by royldoc on Nov 23, 2015 0:57:01 GMT -6
here is the story, battery was not charging on the magnum so I replaced the voltage regulator as it had bad diodes. It still wasn't charging so I replaced the stator. After I got it back together it took some try to get started. Let it warm up a while. and watched the voltage gauge I installed. It was reading about 13.5 volts.So I try to rev it up to see if voltage goes up. To my surprise the engine starts to stumble, bog and backfired then died. It ran perfect before I changed the stator. I started it up again (it started right up) let it idle while I took access panel off to check an see if I knocked anything loose And was watching the tach to check Idle speed Idle speed is between 980rpm to 1010rm. Didn't see any thing loose, so I goose the throttle is shuddered backfired then died.I find it strange that All I did was take side cover off engine and replaced stator and I started this problem. I gave up on it for the night. Any comments as to why?
Roy
|
|
|
|
Post by royldoc on Oct 29, 2015 12:03:24 GMT -6
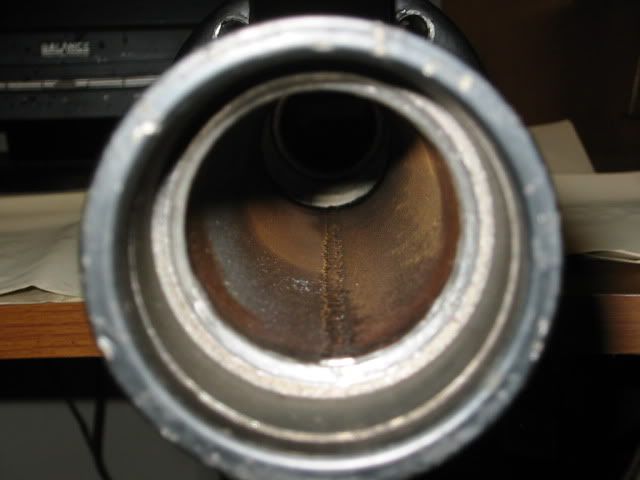
Exhaust port diameter 18mm
Gasket recess diameter 31mm
Stud spacing 49mm
Roy
|
|
|
|
Post by royldoc on Oct 9, 2015 11:45:11 GMT -6
If it's only flat on the bottom, all ya have to do is move the air. Hehe!  Roy |
|
|
|
Post by royldoc on Sept 28, 2015 0:15:54 GMT -6
Mine was slinging grease also. after I cleaned out old grease. I resealed it with red silicon. probably leaking around the shaft. Put a good amount of silicon around the housing and shaft when you reassemble. Talk to Jim at Rapid Repair, he is the go to guy for ice bear parts.
Roy
|
|
|
|
Post by royldoc on Sept 28, 2015 0:02:07 GMT -6
Yep, that's about it. You don't really need to take the whole rear off. Check the splines on axle and in hubs, snap ring still in groove, bearings and axle tube. If you pull both axles out you can get the differential out. Take off chain and remove four bolts on each side holding differential, it should slide out (may need a little persuasion). To get differential apart remove the crown nuts holding sprocket and remove bolts and brake rotor. It is sealed with silicon. There is also locator pins for the two halves. It has a shaft that holds two bevel gears, thrust bearing, and sealing washers. There are two bevel gears that drive the axles and if I remember thrust bearings. The grease that is in them is more like vaseline and should be cleaned out and replaced with good quality grease.
Roy
|
|
|
|
Post by royldoc on Sept 27, 2015 21:24:01 GMT -6
The rear ends on these are fairly simple. It is an open differential. Ally has some photo's of the parts here somewhere and he will probably chime in sooner or later. He is our local expert. Check the triker's alley section. Behind the wheel hub is a dust seal. Behind the dust seal is a large snap ring. Yours may have some small screws in the axle tube just inside where the fenders clamp on the tube. This is a safety measure they added as per ally's recommendation. There is a sleeve welded to axle and the sleeve will hit the screws if the axle starts to pull out. Remove dust seal and snap ring. re-install hub. The easiest way to get axle out is to use a slide hammer.
Roy
|
|
|
|
Post by royldoc on Sept 27, 2015 20:51:32 GMT -6
Also I have since modified the axle tube and no longer use the snap ring to hold the axle in place. I welded a ring to the outside of axle tube at the end with three holes drilled and tapped. I then machined another ring with a lip that fits inside axle tube to press bearing in the tube. It is then bolted to the ring on the axle tube. I will try to get some photo's if I remember.
Roy
|
|
|
|
Post by royldoc on Sept 27, 2015 20:37:24 GMT -6
The edge of spacers are chewed up as well.  Not the right photo WTH! |
|
|
|
Post by royldoc on Sept 27, 2015 20:34:33 GMT -6
The axle should not move in and out. On my 2010 the spacer behind the bearing on thexle chewed up the axle tube. I had to bore the tube out and used a thicker bearing.  In this photo you can see the inside of axle tube. Roy |
|
|
|
Red moon
by: royldoc - Sept 27, 2015 19:18:10 GMT -6
Post by royldoc on Sept 27, 2015 19:18:10 GMT -6
Bout time for me to go out and start howling at the moon!
Roy
|
|
|
|
Post by royldoc on Sept 27, 2015 19:05:29 GMT -6
Check to see if the wheel hubs are tight on the axles. Does the wheels have any play in them ? If so you need to tighten the castle nut on the axle. you may also need to add another washer between hub and nut.
Roy
|
|
|
|
Post by royldoc on Aug 26, 2015 12:06:03 GMT -6
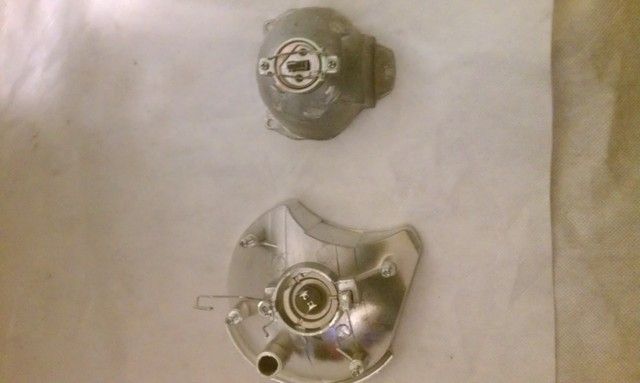
Depends on bulb type. The low beam bulb in mine is an H1 55w bulb. There is a wire clip that holds the bulb in. The high beam bulbs in mine are an H7 55w bulb. It also has a wire clip but it is a little different.  The top is the low beam projector. it uses an H1 type bulb. The bottom is the high beam reflector it uses an H7 type bulb. Roy |
|
|
|
Post by royldoc on Aug 26, 2015 11:08:33 GMT -6
That's it royldoc, Thanks a LOT! Mine has bolts and not screws for the adjusters, but I got it, or am working on gettin it. One more question for you, how many gallons of gas does yours hold??? They are 8mm hex head bolts but have a Phillips slot also. On mine I take the wind shield off then the center plastic and can get to the adjusters but it is a tight fit. I have the housing apart because I am modifying the projector to put in hid projectors. I cant remember exactly, but it is around 3 gallons. Roy |
|
|
|
Post by royldoc on Aug 26, 2015 10:12:59 GMT -6
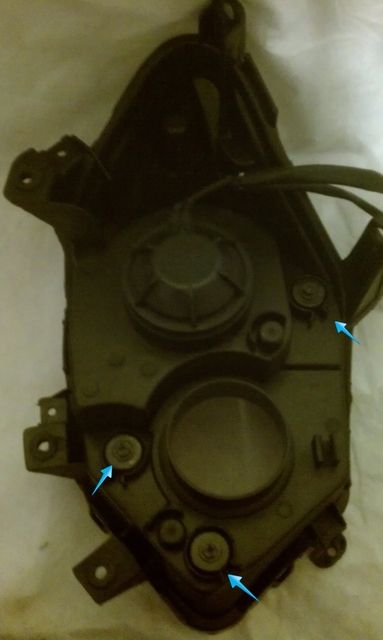
I happen to have the headlight housings apart from my 2010 magnum. There is a sealant glue between the two halves. it is tough stuff took me a while to carefully pry them apart. Here is a photo of the back half. You can see the three adjuster screws.  I'm not sure if yours are the same. Roy |
|

