Doc's Anything Goes
Currently Offline
Posts: 371  Likes: 18
Joined: Jun 13, 2014 16:48:23 GMT -6
|
Post by glavey on Aug 7, 2014 20:25:43 GMT -6
Well, I started off my making a few test washers to see what diameter hole will fit snugly on the 7.95mm machined rod I have; my printer as well as many FDM printers make undersized interior holes. It seemed that 8.2mm was too tight and 8.3mm was just a tiny bit loose so I went with 8.25mm. I modeled a 70mm tall cone with a 45mm base and cut a 8.25mm hole through the middle, and 3 hours later when it was done printing... the interior holes were too small! Such a waste of time and plastic, which I am running low on. I remade the cones with 8.35mm holes and only 30mm tall and 20mm dia. at the base. Those printed much faster and the holes were quite snug, but fit very well. I did manage to balance the front wheel to my liking, I could possibly cut one of my 7g weights in half and stick it too one spot, but I'll leave it as is seeing as how I only have 8 weights left, this wheel took 6, and I still have to do the rear wheel. One spot on the wheel opposite the valve stem needed about 37 grams. 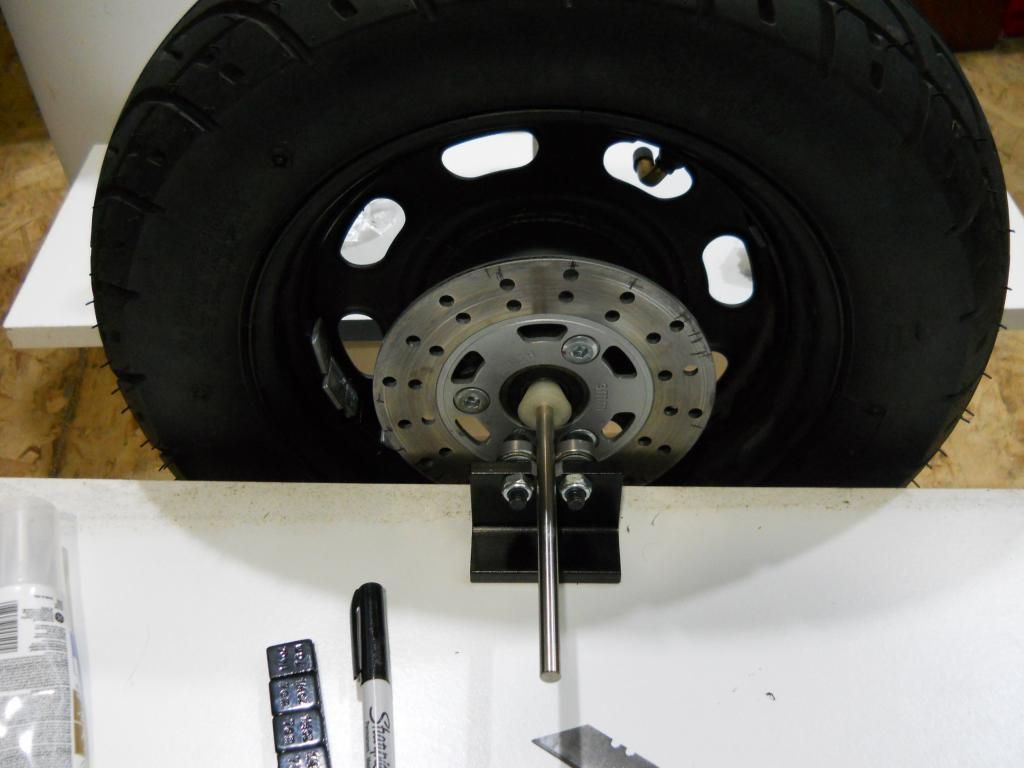 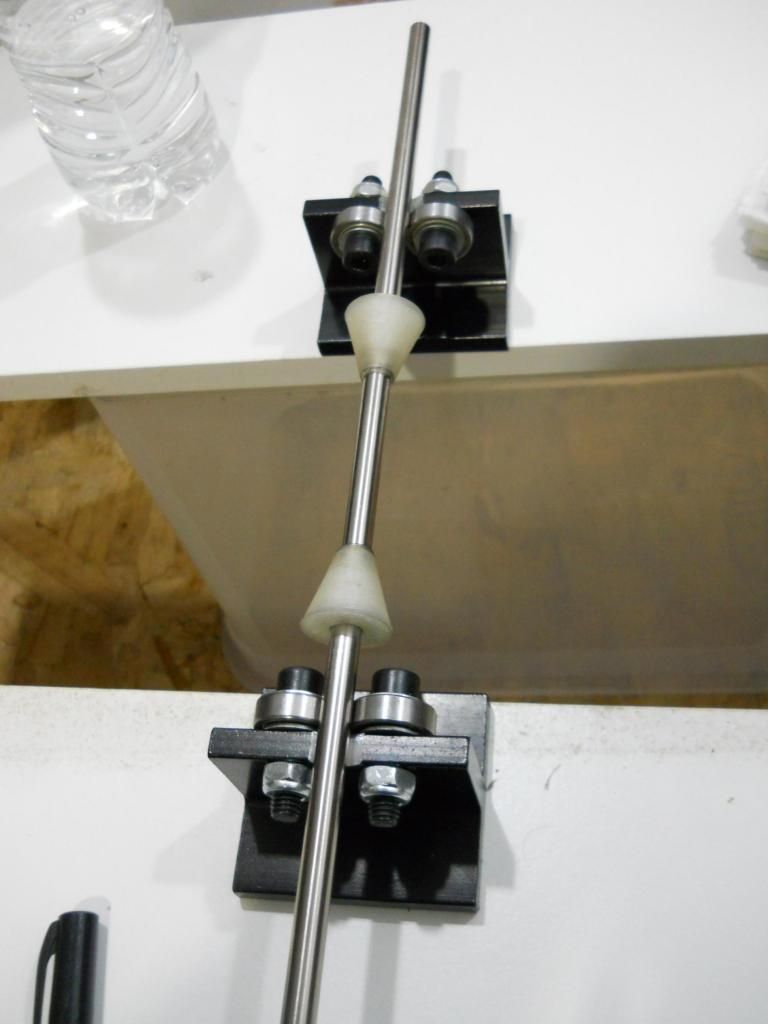 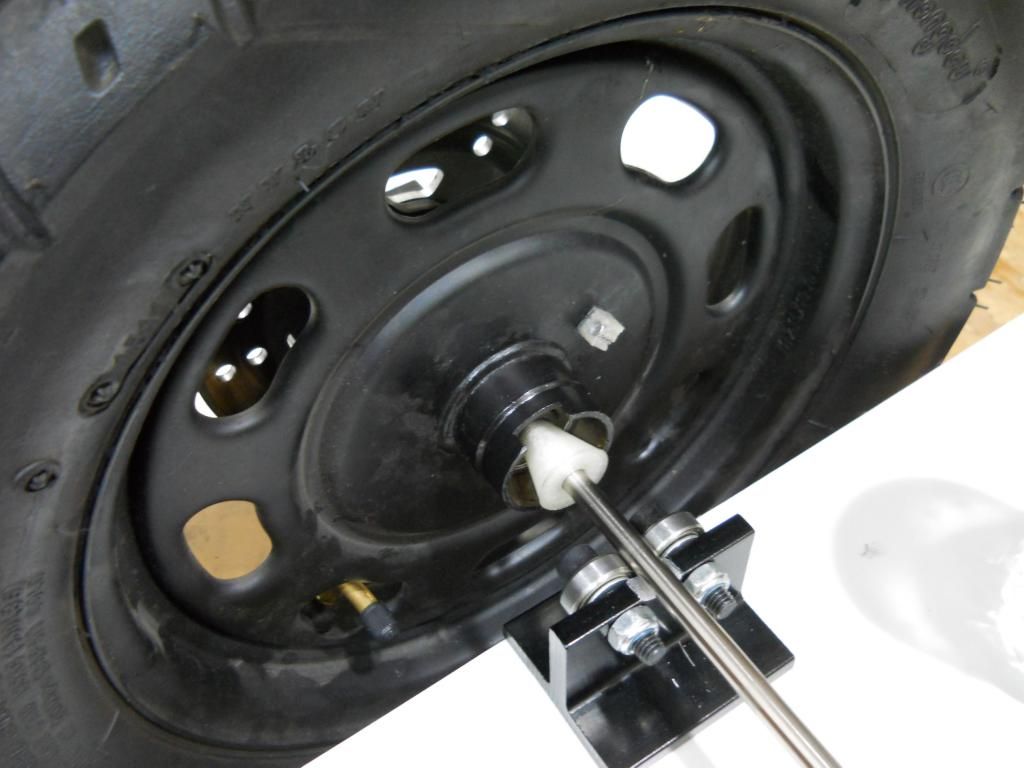 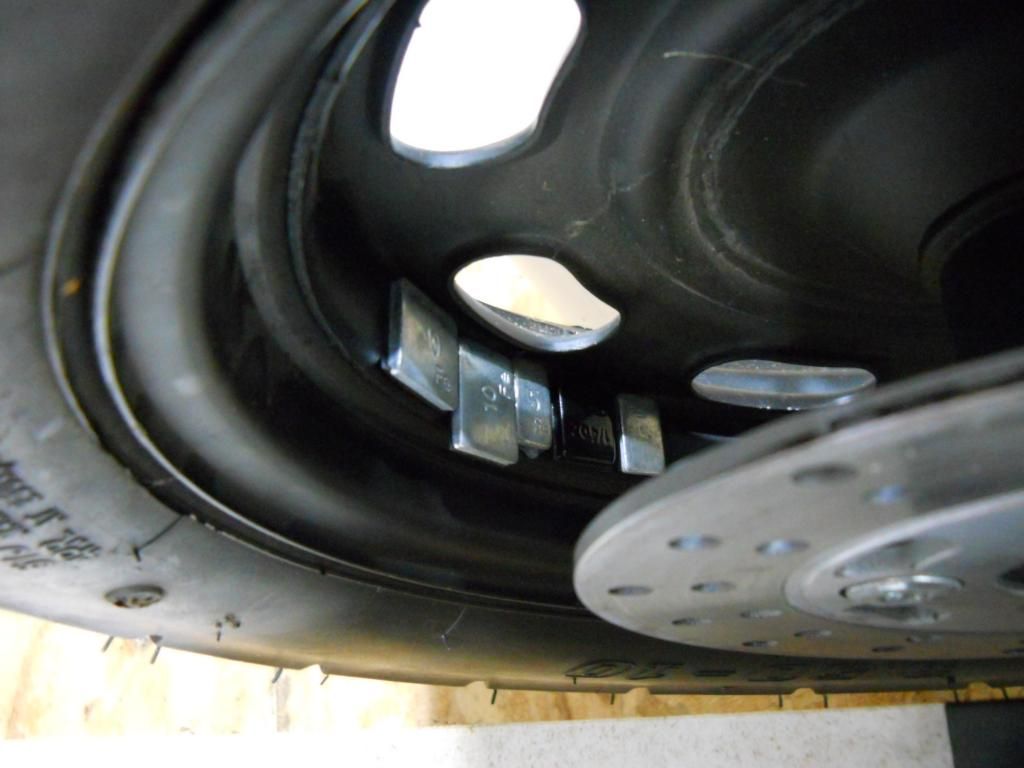 |
|
Ad Free Donut
   
Currently Offline
A bike is music to my ears.
Posts: 1,655
Likes: 93
Joined: Oct 22, 2013 4:11:04 GMT -6
|
Post by Guitarman on Aug 7, 2014 20:43:49 GMT -6
Why are you balancing with weights? I thought most bikes were dynamically balanced with beads these days.
|
|
Doc's Anything Goes
Currently Offline
Posts: 371  Likes: 18
Joined: Jun 13, 2014 16:48:23 GMT -6
|
Post by glavey on Aug 7, 2014 22:59:13 GMT -6
Honestly, I thought the beads were a bit gimmicky. Also, I'm pretty sure I have inner tubes.
|
|
Ad Free Donut
   
Currently Offline
A bike is music to my ears.
Posts: 1,655
Likes: 93
Joined: Oct 22, 2013 4:11:04 GMT -6
|
Post by Guitarman on Aug 7, 2014 23:10:30 GMT -6
The beads really do work. They seem silly till you see them in action.
|
|
Doc's Anything Goes
Currently Offline
Posts: 1,226
Likes: 81
Joined: Apr 4, 2014 3:52:42 GMT -6
|
Post by richardv on Aug 8, 2014 4:45:46 GMT -6
A lot of people, from truck drivers to motorcycle speed nuts, us the beads with great success. And they are easy to reuse in another tire.
|
|
|
|
Post by cyborg on Aug 8, 2014 7:33:50 GMT -6
i must be living under a rock,,,,i never heard of them
|
|
Doc's Anything Goes
Currently Offline
Posts: 371  Likes: 18
Joined: Jun 13, 2014 16:48:23 GMT -6
|
Post by glavey on Aug 8, 2014 9:11:59 GMT -6
Dang... I guess I was wrong. Since I already have the static balancer and the stick-on weights, I'll use those for now, but I'll definitely look at those in the future.
They seem to be just small 2-3mm metal balls, like BB's or buck shot. I wonder if I could use either of those instead?
Today I'll start mocking locations up for the pump, rad, and other items.
On a side note, I haven't had a headache in days! I don't know what I've been doing differently, perhaps it's the weather. Maybe I'm not so tolerant to heat as I thought I was.
Oh well, off to the garage!
|
|
|
|
Post by cyborg on Aug 8, 2014 12:12:28 GMT -6
Good no headache!!!! GREAT!!!! NOW GET BACK TO WORK!!!!,,,i can't wait to see what you do next
|
|
Doc's Anything Goes
Currently Offline
Posts: 371  Likes: 18
Joined: Jun 13, 2014 16:48:23 GMT -6
|
Post by glavey on Aug 8, 2014 12:15:15 GMT -6
Small update: I mocked up the locations of the radiator and the pump. The pump is going to be quite easy to mount. The radiator, however, is another story. 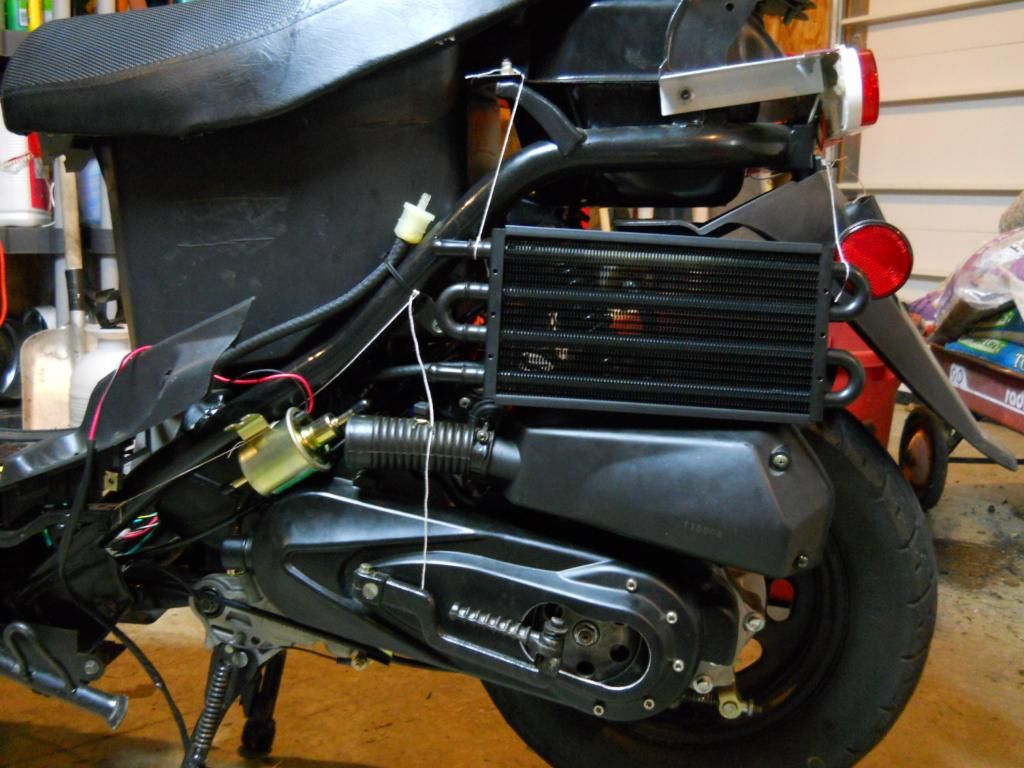 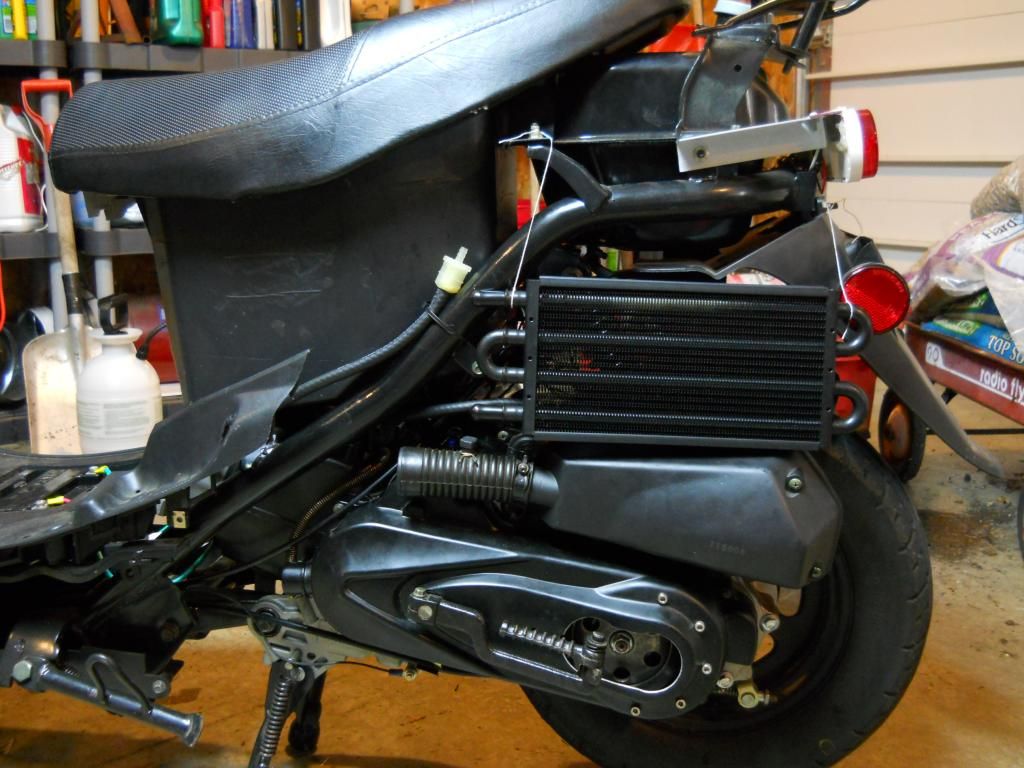 The rear mud flap, reflector, airbox, fuel line, filter, shut-off valve, and frame cross-member are all in the way. I can cut away the parts of the rear mud flap that are in the way, as you can see here: 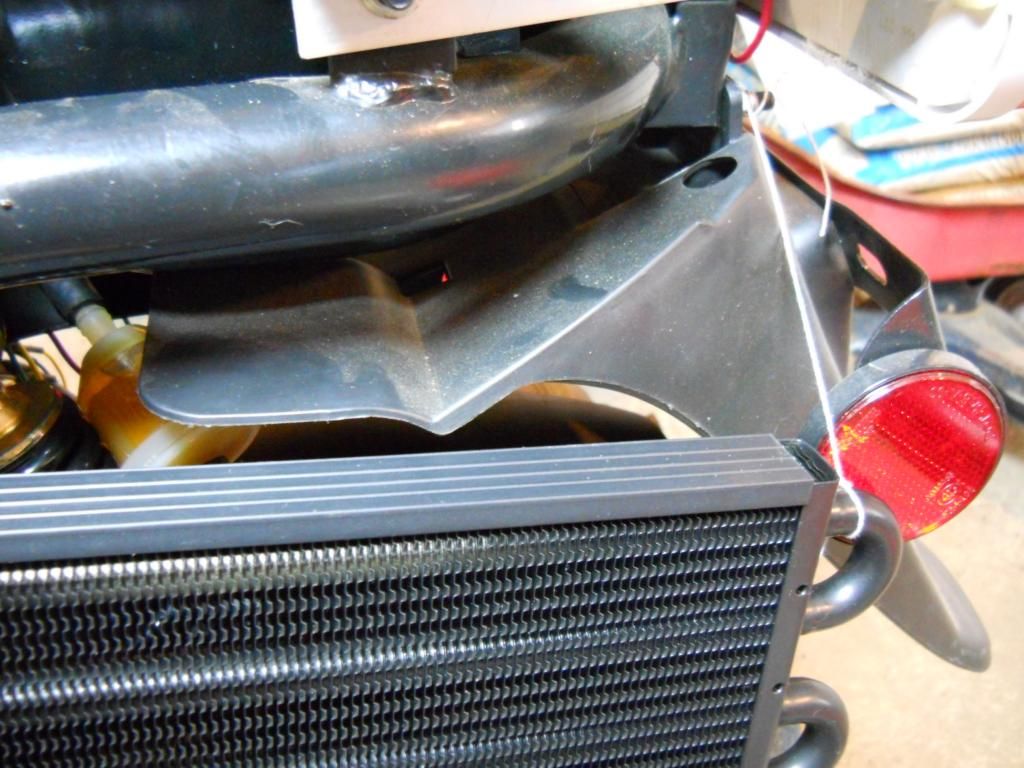 I can route the fuel line coming from the tank down under the rear part of the seat and the frame cross-member. I then realized that if I removed the stock airbox and installed a pod filter I have: 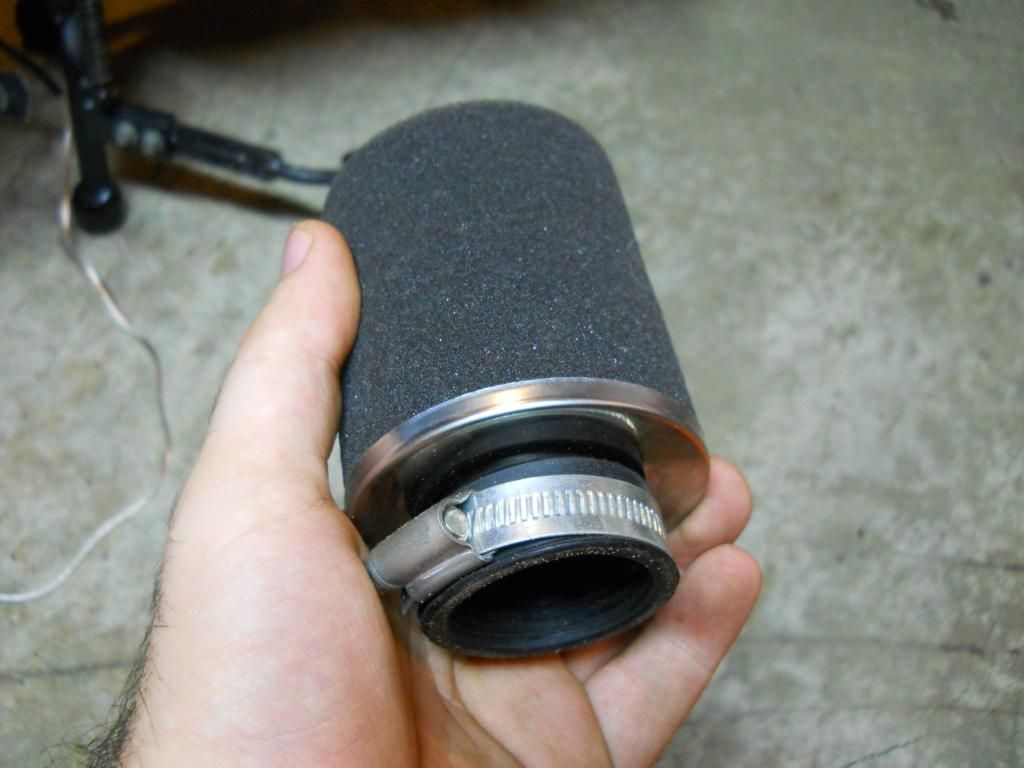 I would have tons of room right where I need it. Here you can see the airbox removed, my fuel lines, and the radiator mocked up: 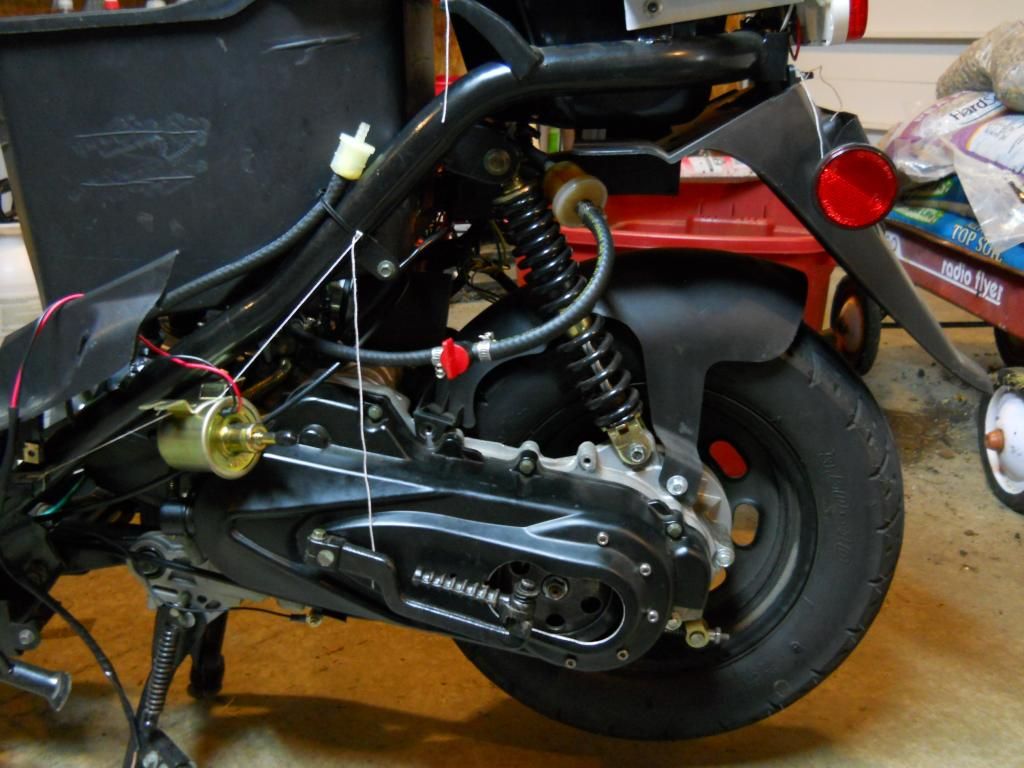 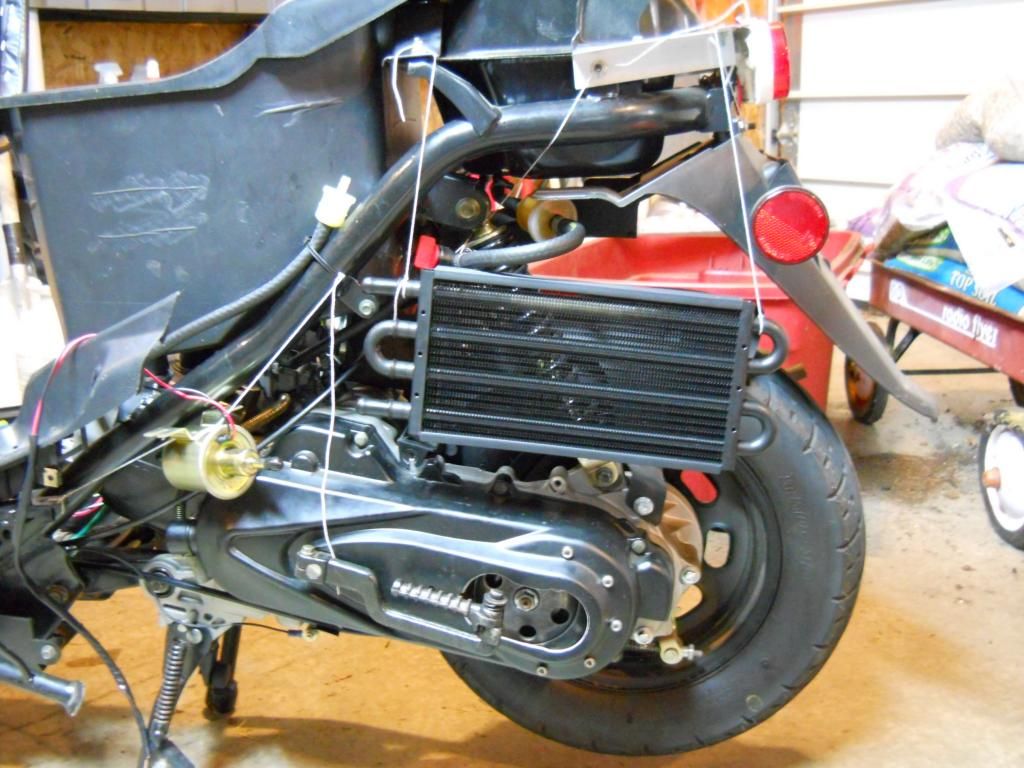 I am trying to keep my scooter as quiet as possible, that is the reason I have the stock airbox and muffler still installed. Also, I have read that these carburetors like some distance between where the air is sucked in and where the assembly is attached to the carb. However, it will be so much easier to mount the radiator with it out that I may just have to live with the noise and tune the carb to the best of my abilities. If you look here: 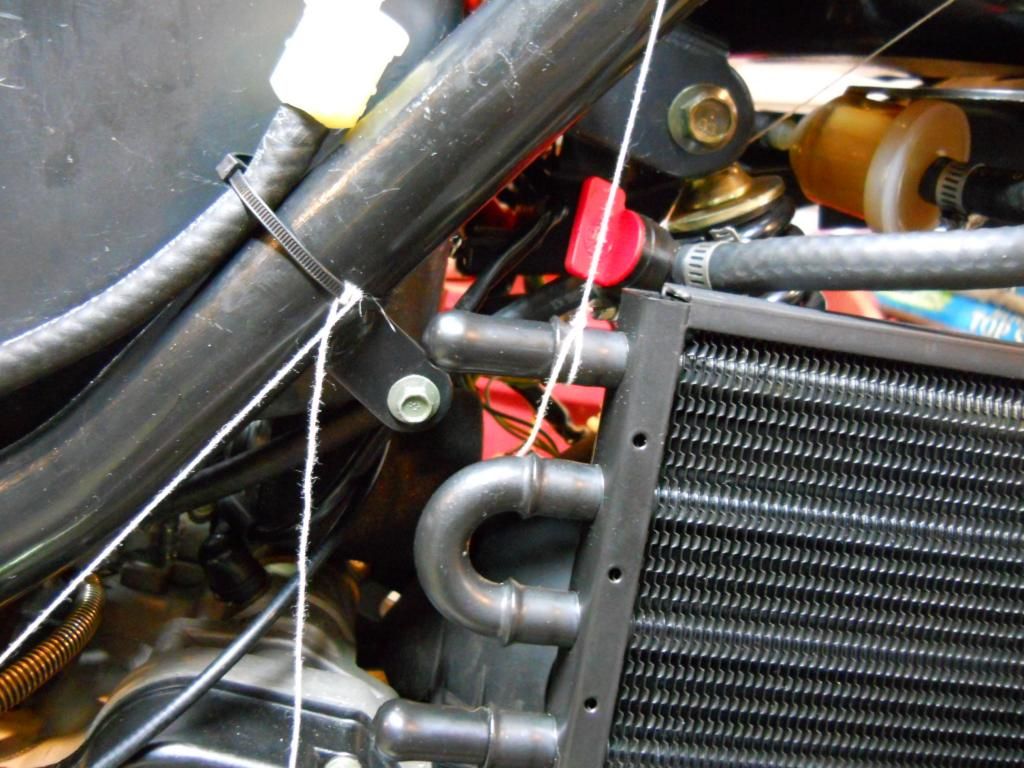 you can see that the upper radiator barb is right next to the frame, and that is where I need to put the 4-way fitting for the temp probe and bleeder valve. I could zip-tie the fitting to the frame (I do believe that zip-ties rival duck tape in usefulness) and put some foam between the fitting and the frame so they don't rub on each other. I could also drill a few holes in the bucket seat and zip-tie it there, but I'm not sure what at what temperature the plastic will start to melt and it is a structural, load-bearing part. Also, I would like to eventually cut the bucket part out and make a some metal framework to attach the seat to the scooter frame. Mounting the radiator in place is going to be a bit tricky, but in the end I think it is doable. In the picture above, you can see that there is a tab on the scooter frame where the petcock usually is; I can bend a piece of metal from there to the back of the radiator and screw or zip-tie it to the small holes you see at the end of the radiator. I can do something similar here: 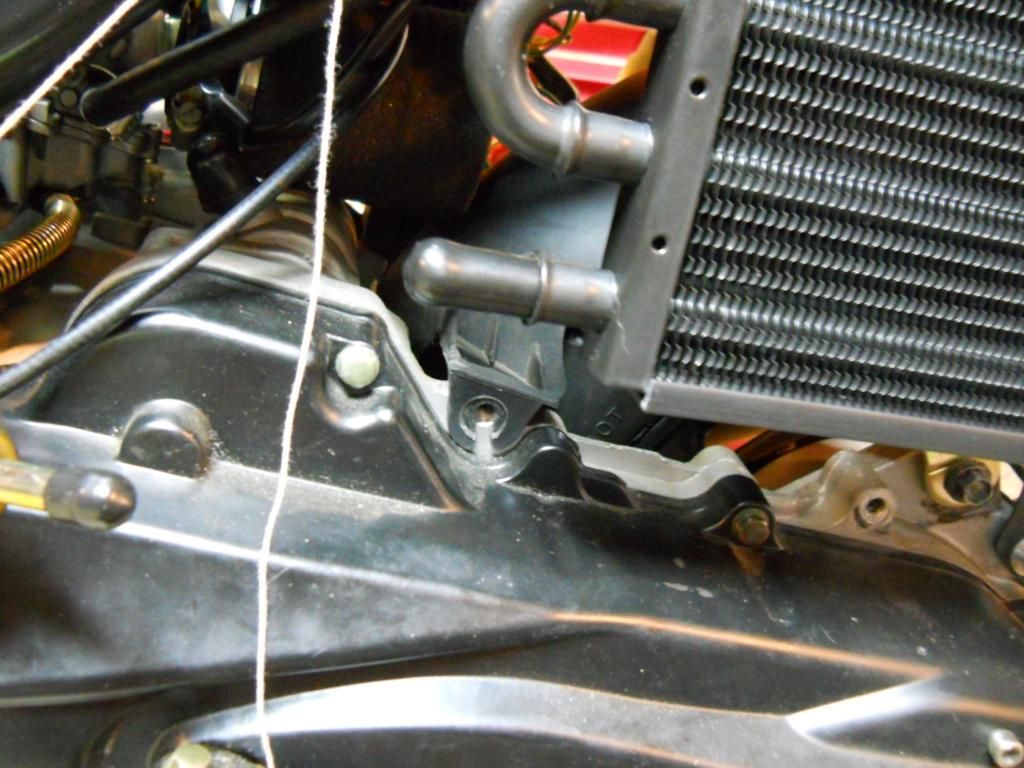 with the vacant bolt hole to the left and the bottom of the radiator and well as here: 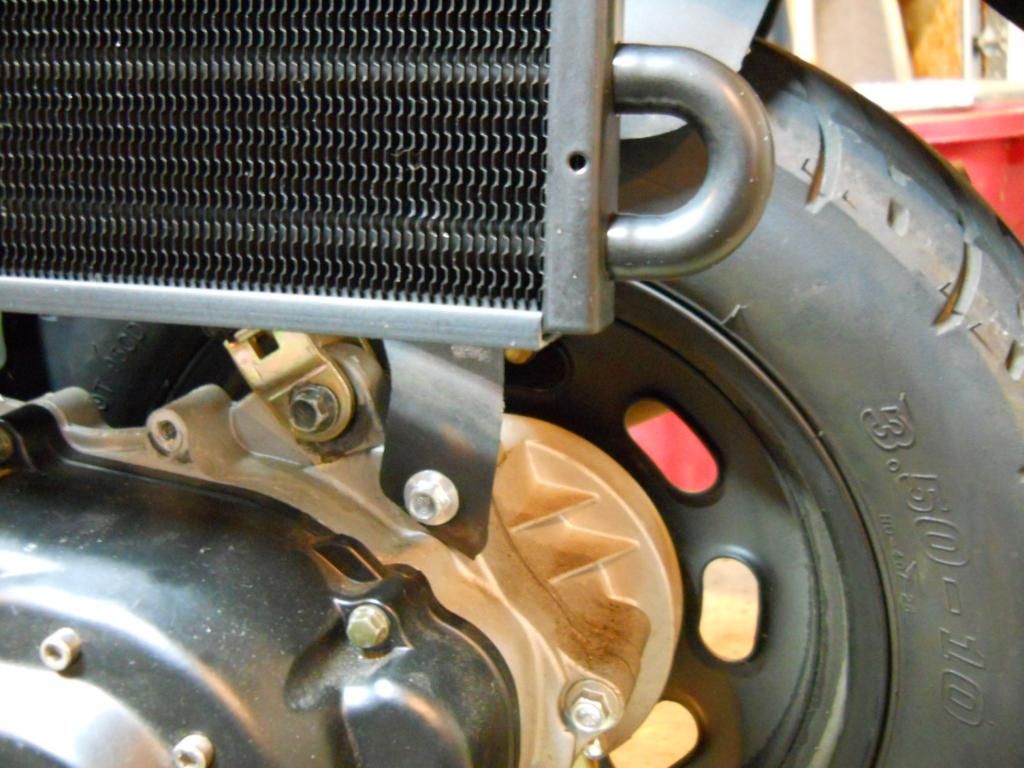 with the bole hole just behind the shock mount and the bottom of the radiator. Holding the top right of the radiator is going to be a little more involved; 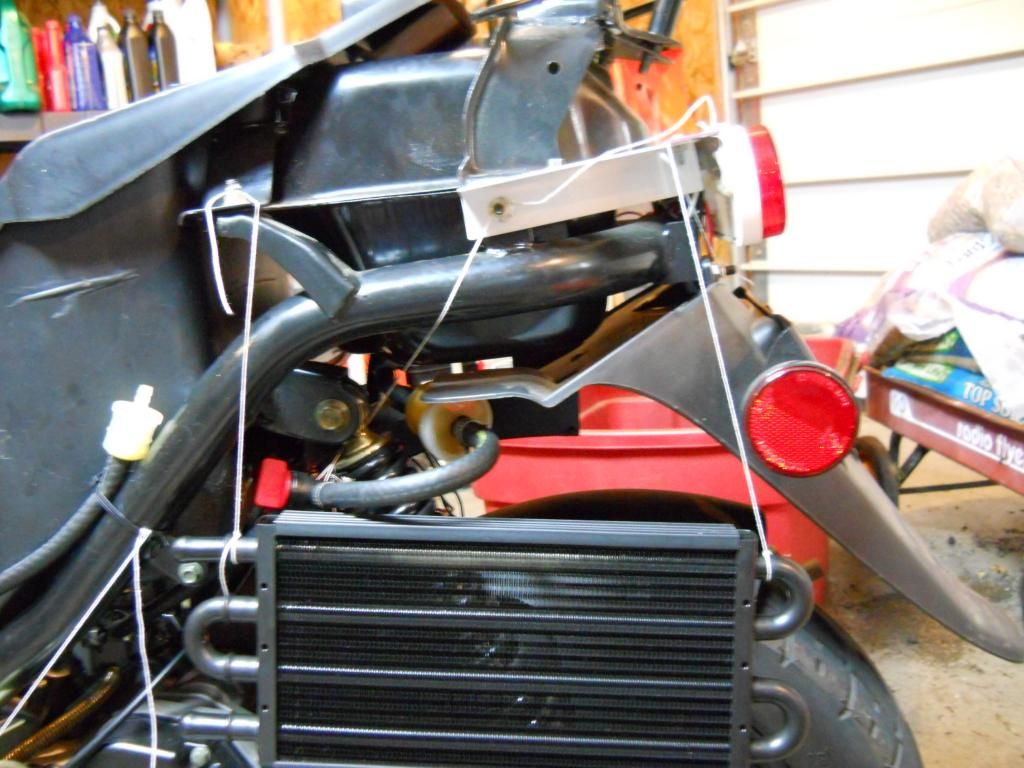 I think I will make something that will be held by the bolt you see in the upper-middle of the picture and go down to the top right of the radiator. Here is all the mounting hardware I have at hand, plus some scrap metal not shown: 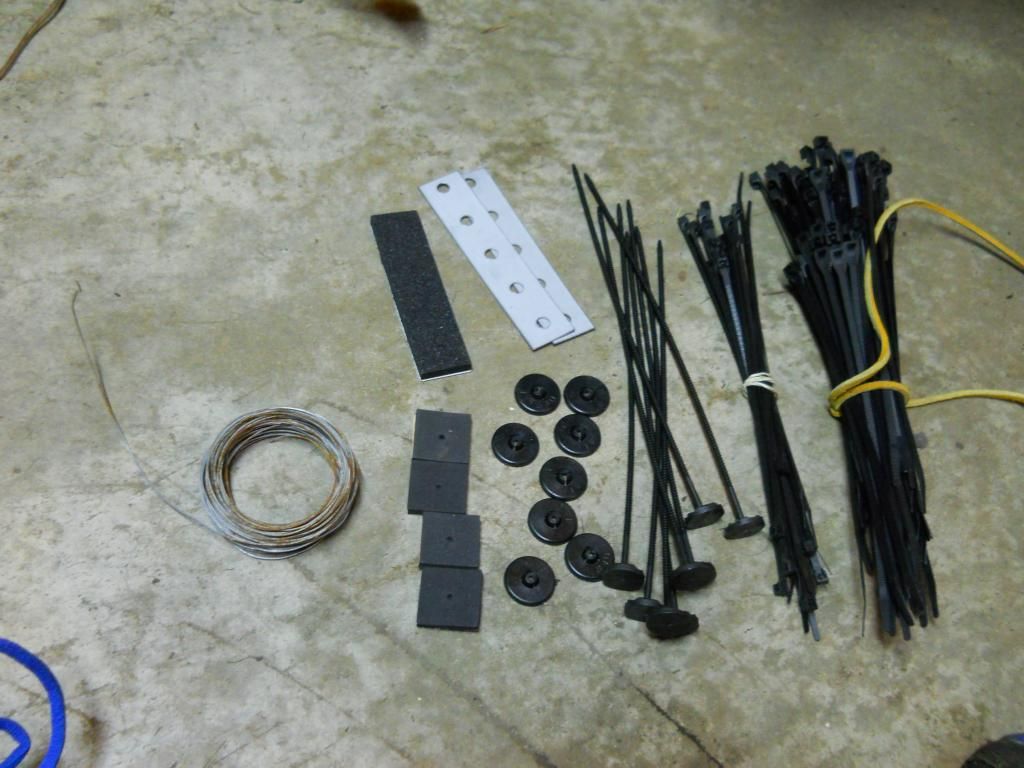 The metal wire is a last-ditch resort; I would rather use things like the metal strips. |
|
Doc's Anything Goes
Currently Offline
Posts: 371  Likes: 18
Joined: Jun 13, 2014 16:48:23 GMT -6
|
Post by glavey on Aug 8, 2014 18:50:14 GMT -6
I modeled and printed a mount for the pump. It'll hold the pump to the frame with zip-ties or hose clamps if I discover that the zip-ties aren't good enough. 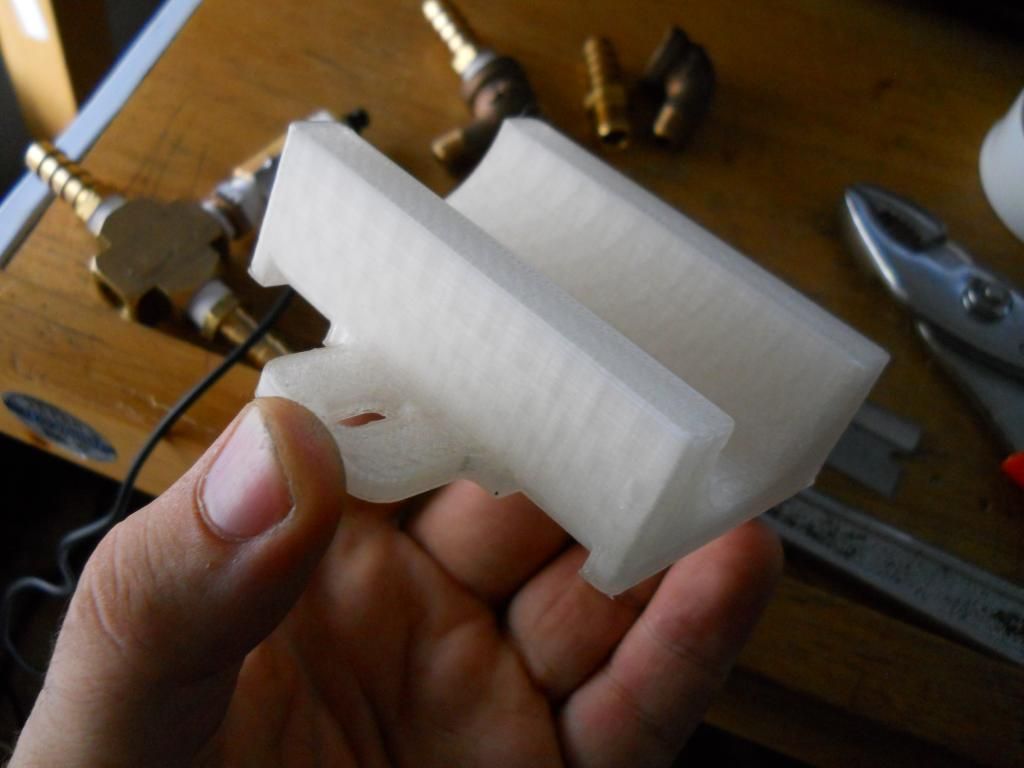 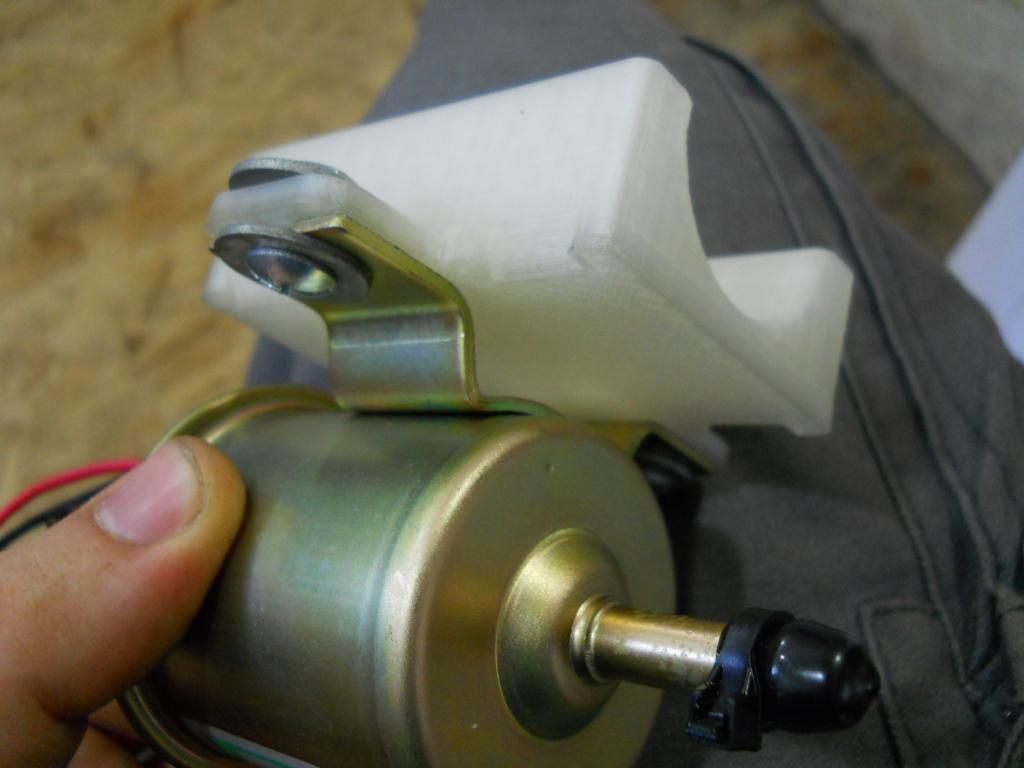 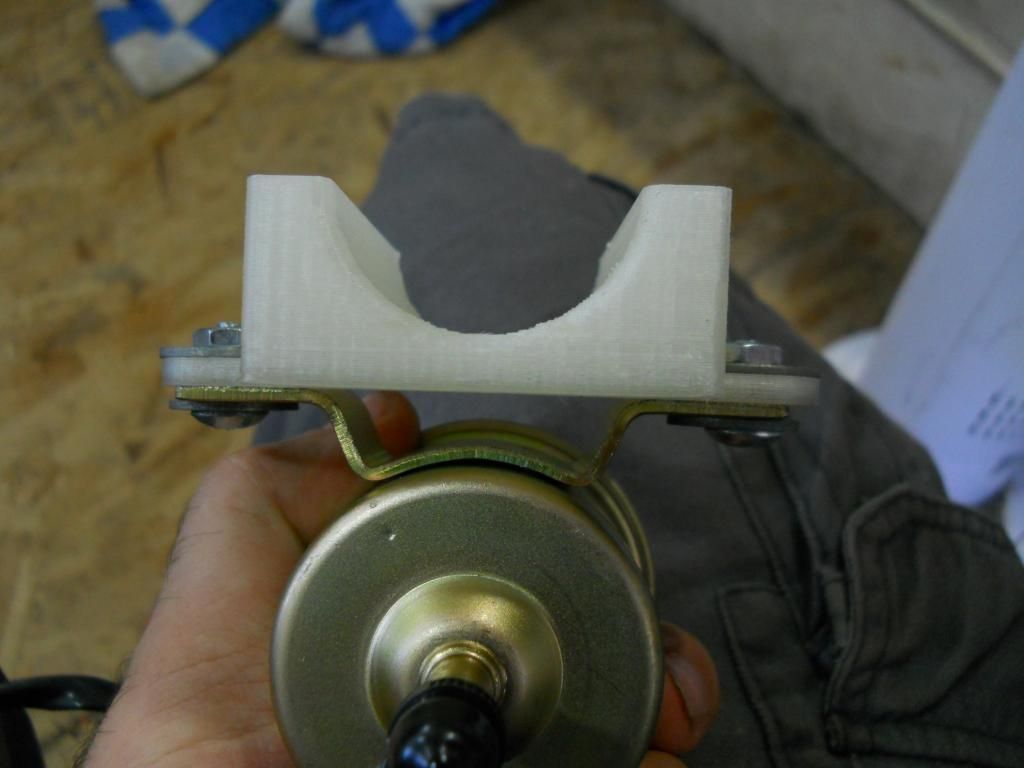 Here it is attached to the scooter's frame in its hopefully final location: 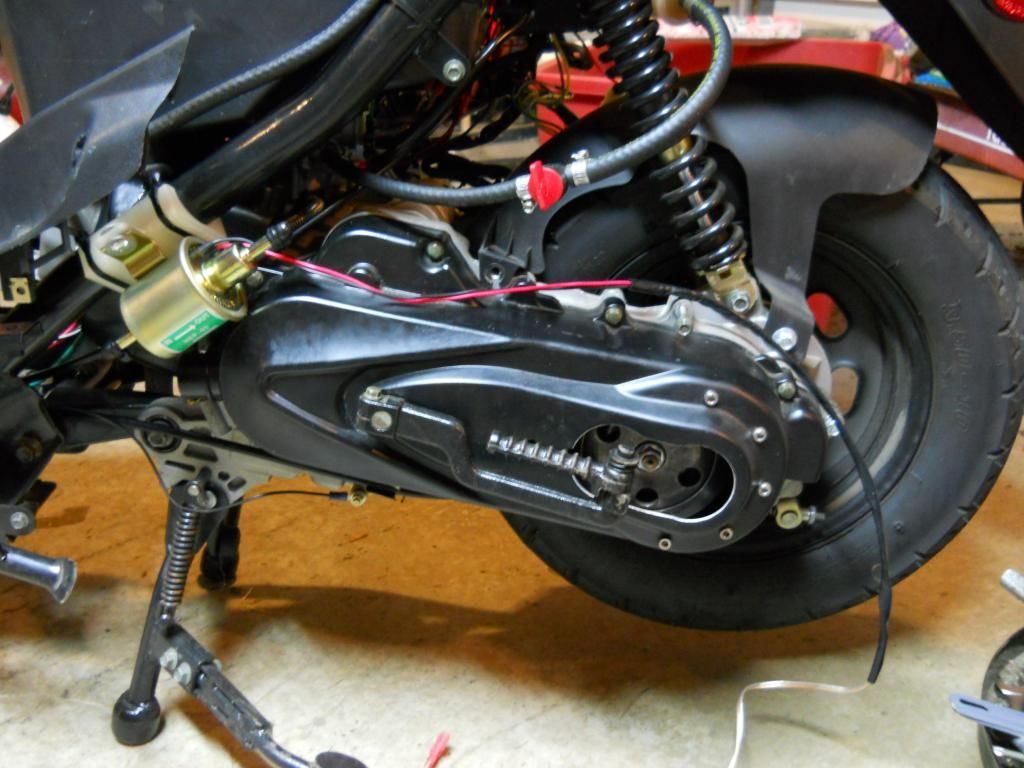 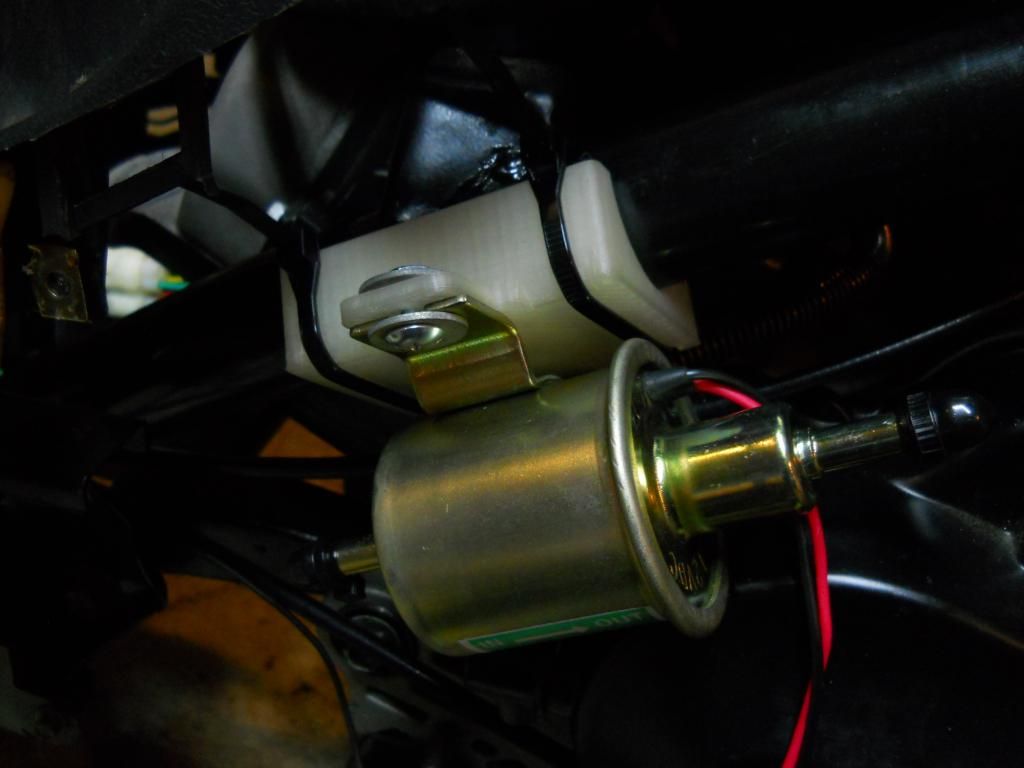 The protruding lip on the pump rubs against the cvt cover. I'll have to do something about that, possibly a small piece of foam or some silicone. 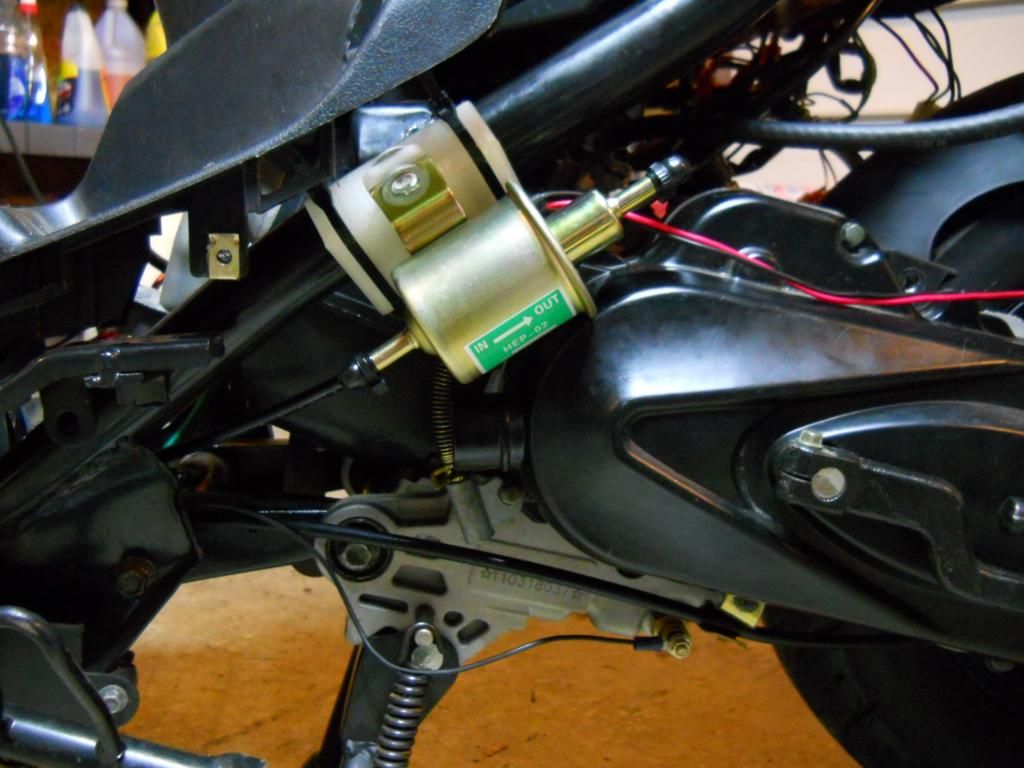 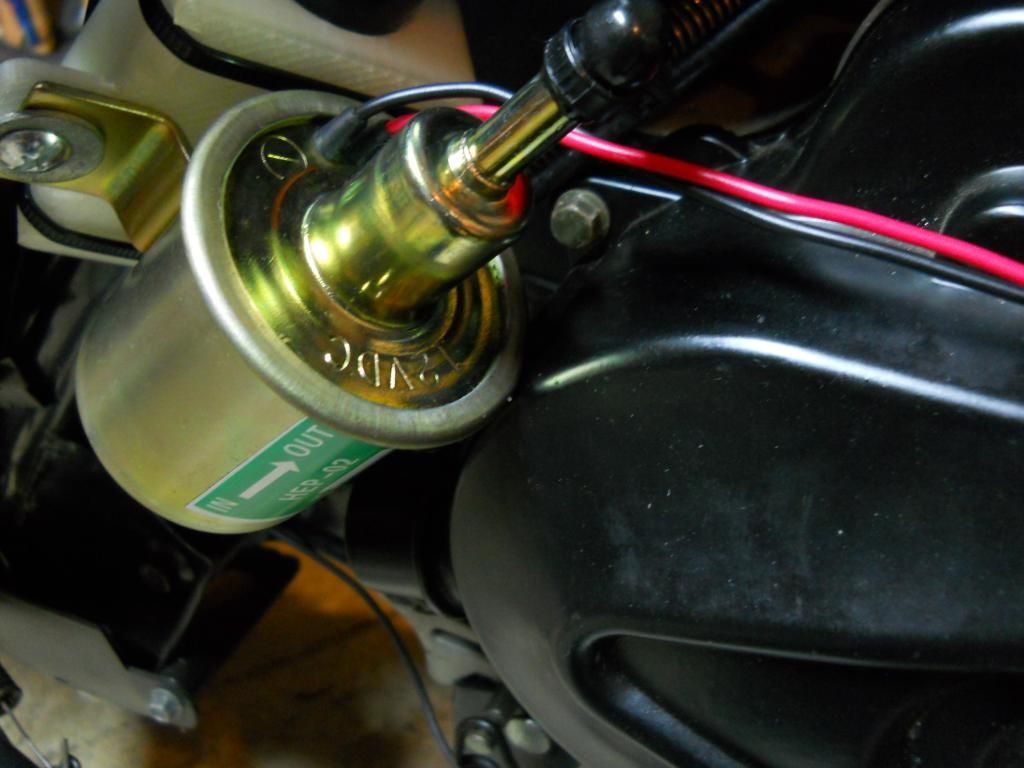 I have two different hoses to use for the cooling loop; one that came with the radiator that doesn't have a brand name, but is thicker; and one that I bought from carquest that is thinner but is made by gates. They look like they have the same internal diameter. 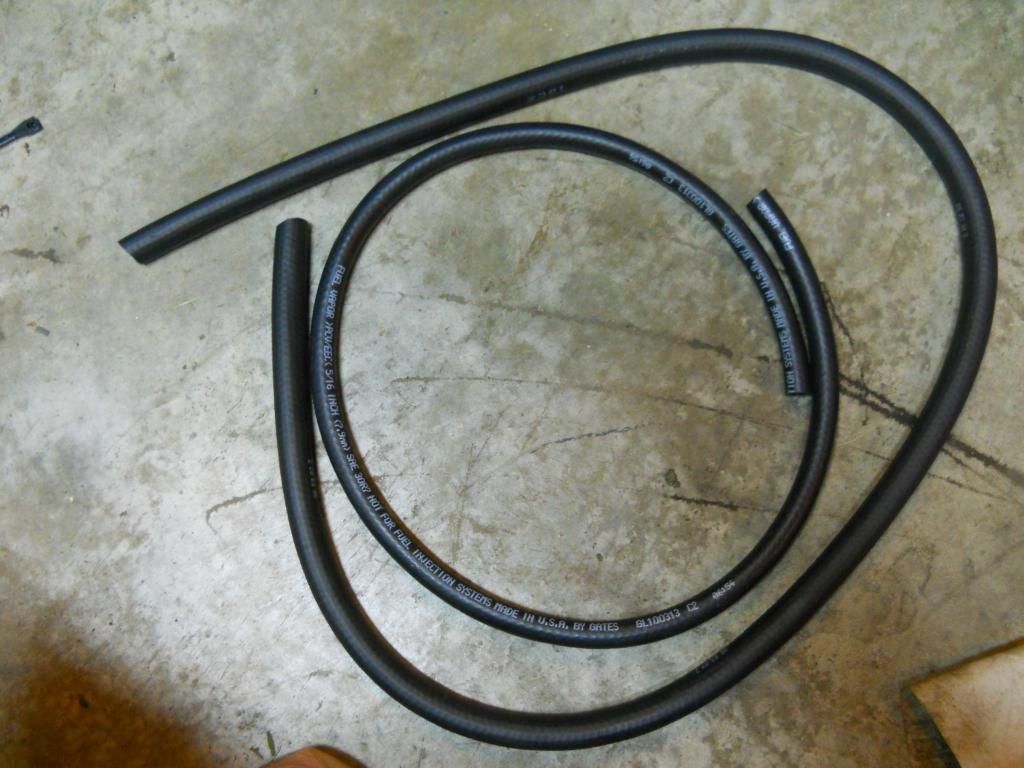 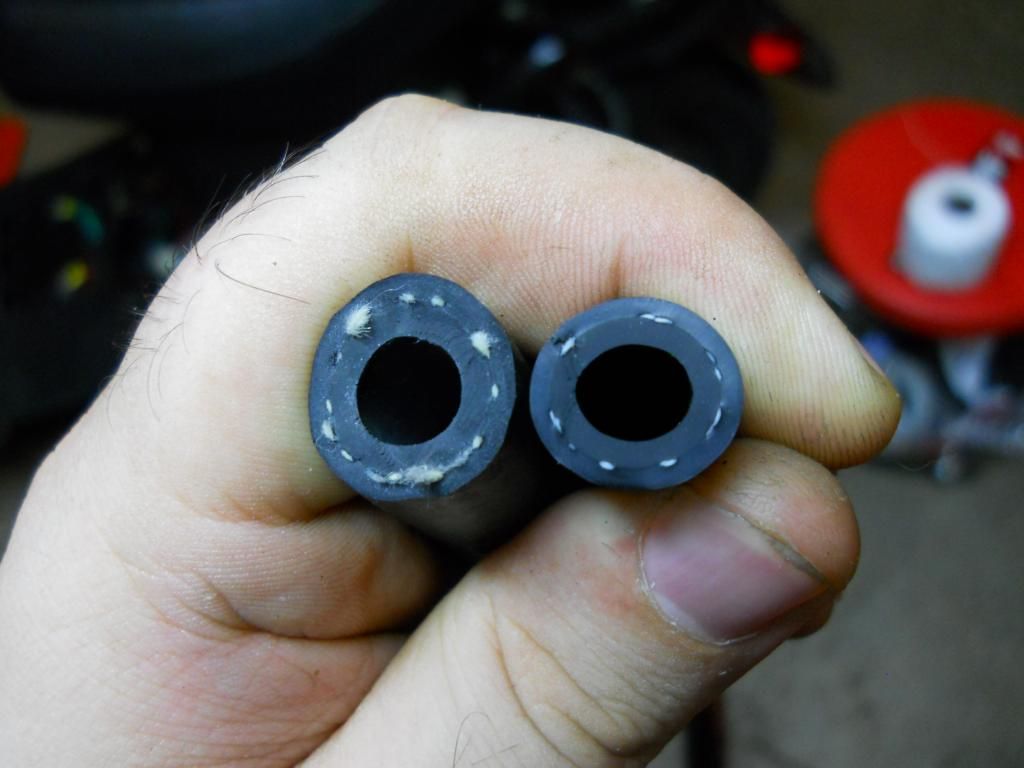 The temperature probe I am going to use requires the probe be grounded through the metal body of the probe itself, it doesn't have an embedded ground wire. Since I am going to use it in the 4-way fitting which will be electrically isolated from the frame ground, I needed to somehow connect the probe exterior or one of the fittings attached to it to ground. I have a HUGE soldering iron that I inherited from my grandpa; 200 watts and a tip as big as my thumb that I used to solder a wire to one of the fittings that will connect to the probe. 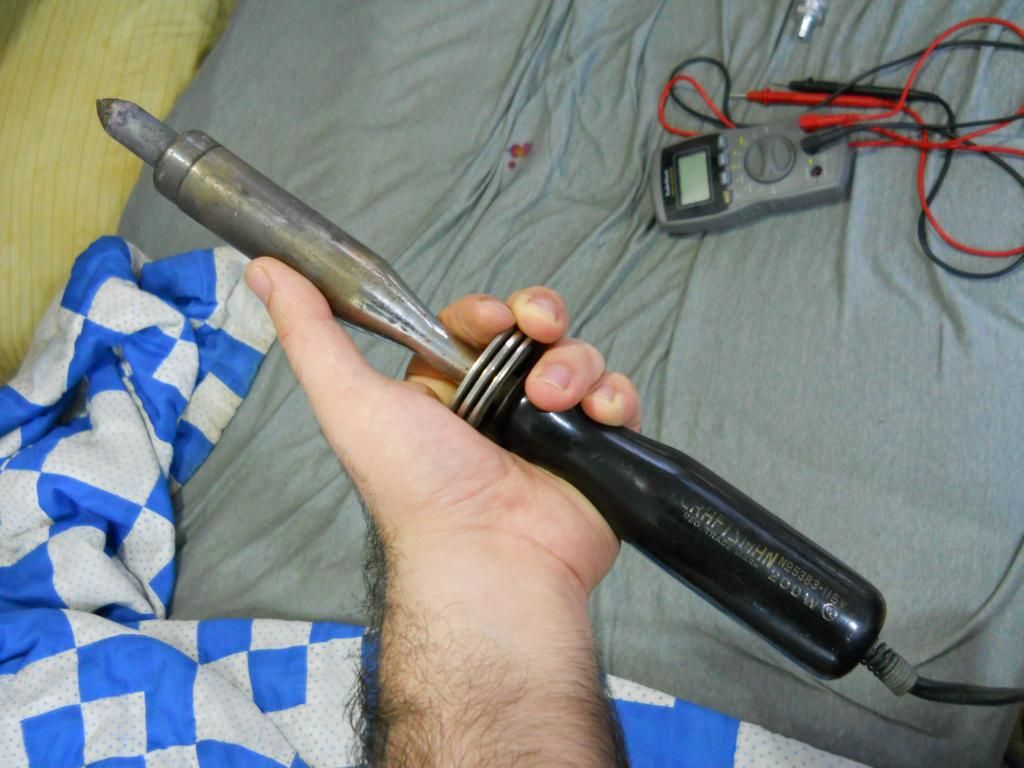 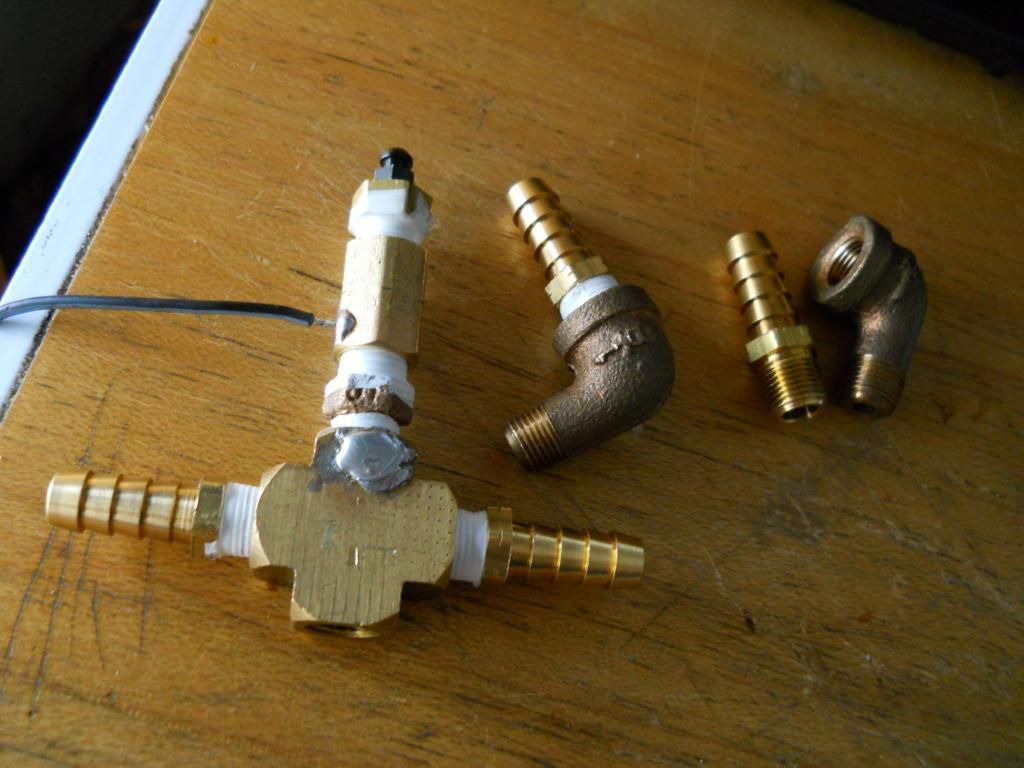 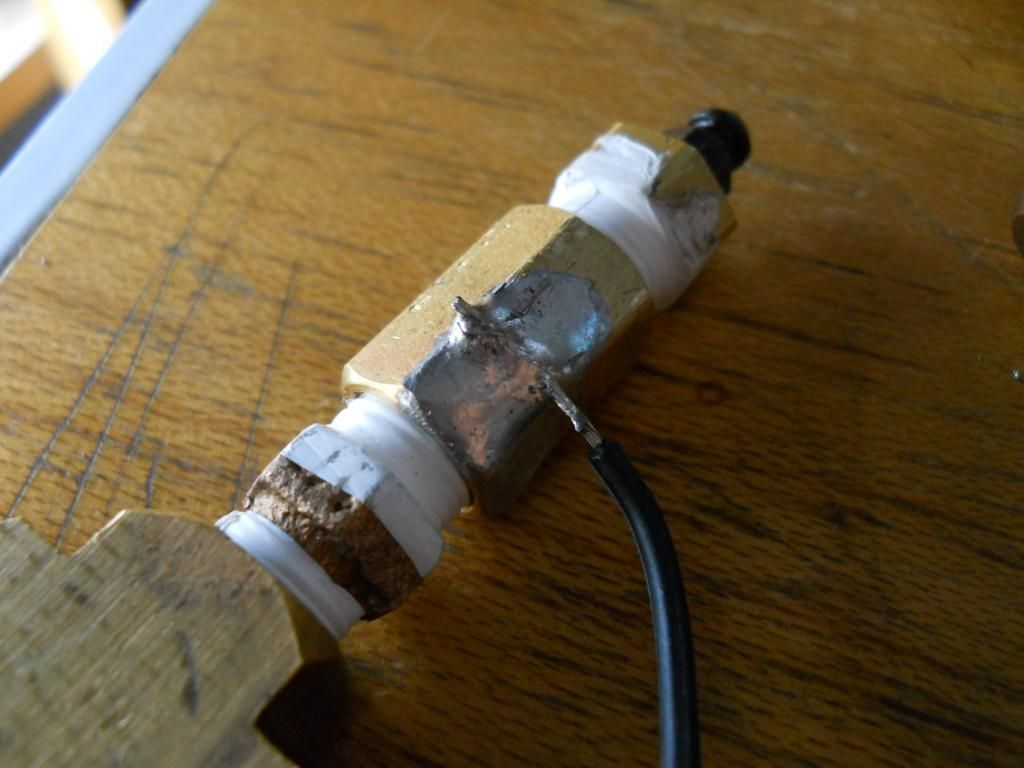 First I tried soldering on to the 4-way fitting, I could get the solder to melt on it, but not "flow". It had too much thermal mass. Next I tried the female-to-female coupling, that worked well. I could get the solder to flow onto the fitting by itself. I added some strain relief in the form of a generous glob of silicone. The silicone I used is rated for temperatures up to 400F, so it will be just fine. On a side note, silicone does not stick well to solder. 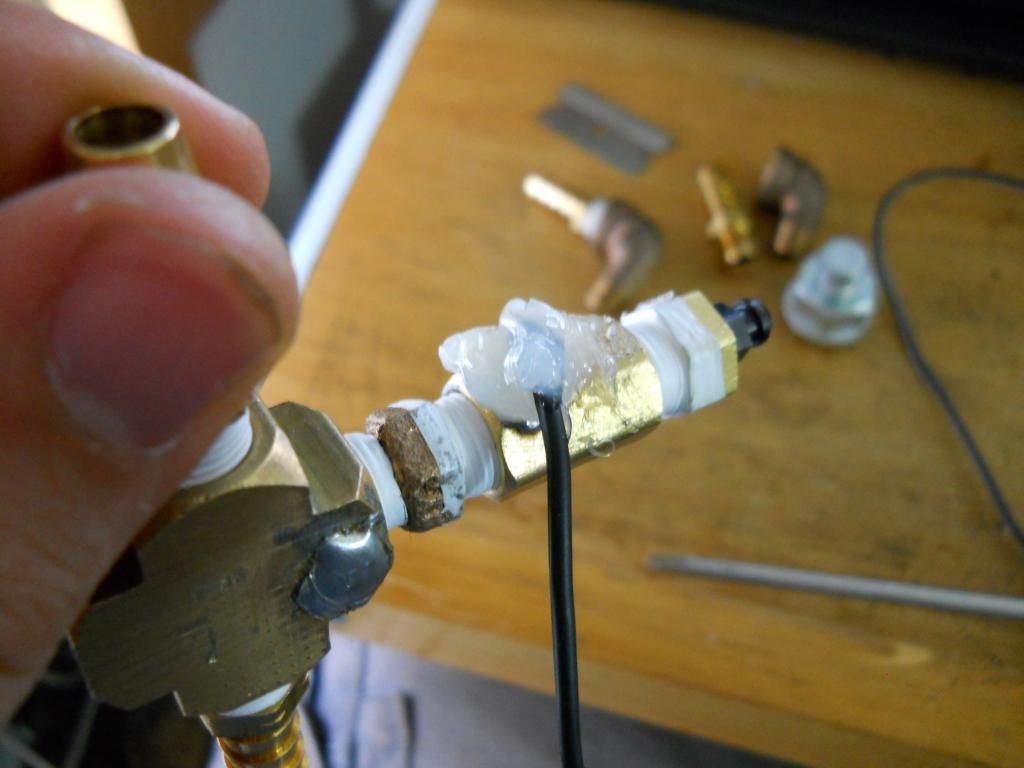 I tested the resistance from the hose barbs to the bleeder valve; 0.1 ohms, essentially a dead short. Tomorrow, draining the oil from my scoot, fitting the probe to the 4-way, and drilling the hole in the valve cover (EEEKKKKK!!!) for the "add-a-drain", and finding a mounting solution for the 4-way and the radiator. Bashan, if you see this before I start tomorrow, is there a place in the valve cover that I should or shouldn't drill into? I'm quite certain I shouldn't mess with the breather labyrinth, but there isn't much room between that ans the sides of the cover. |
|
|
|
Post by cyborg on Aug 8, 2014 19:29:49 GMT -6
The GIGANTIC SOLDERING IRON FROM OUTER SPACE!!!!!!!!!!Let us pray
|
|
|
|
Post by cyborg on Aug 8, 2014 19:46:46 GMT -6
No way to mount the cooler to the inside of the body panel and cut a naca scoop in it?
|
|
|
|
Post by Bashan on Aug 8, 2014 20:30:23 GMT -6
|
|
Doc's Anything Goes
Currently Offline
Posts: 1,226
Likes: 81
Joined: Apr 4, 2014 3:52:42 GMT -6
|
Post by richardv on Aug 9, 2014 7:17:55 GMT -6
Pitting cable ties (electricians) against duct tape (HVAC techs) is probably not a good thing.  I'm for the cable ties. I have concern about the location of the fuel line next to the radiator. It may cause vapor lock in the fuel line due to the heat. Insulation may be adequate but rerouting may be a better idea. As far as using BBs to balance your tires. DON'T DO IT!! The BBs will rust and clump together creating a disaster. Use the real thing. www.innovativebalancing.com/motorcycle.htm |
|
Doc's Anything Goes
Currently Offline
Posts: 371  Likes: 18
Joined: Jun 13, 2014 16:48:23 GMT -6
|
Post by glavey on Aug 9, 2014 10:05:42 GMT -6
I have planned to reroute the fuel lines nearer to the center of the scooter and behind the shock, this poorly produced picture explains what I have in mind: 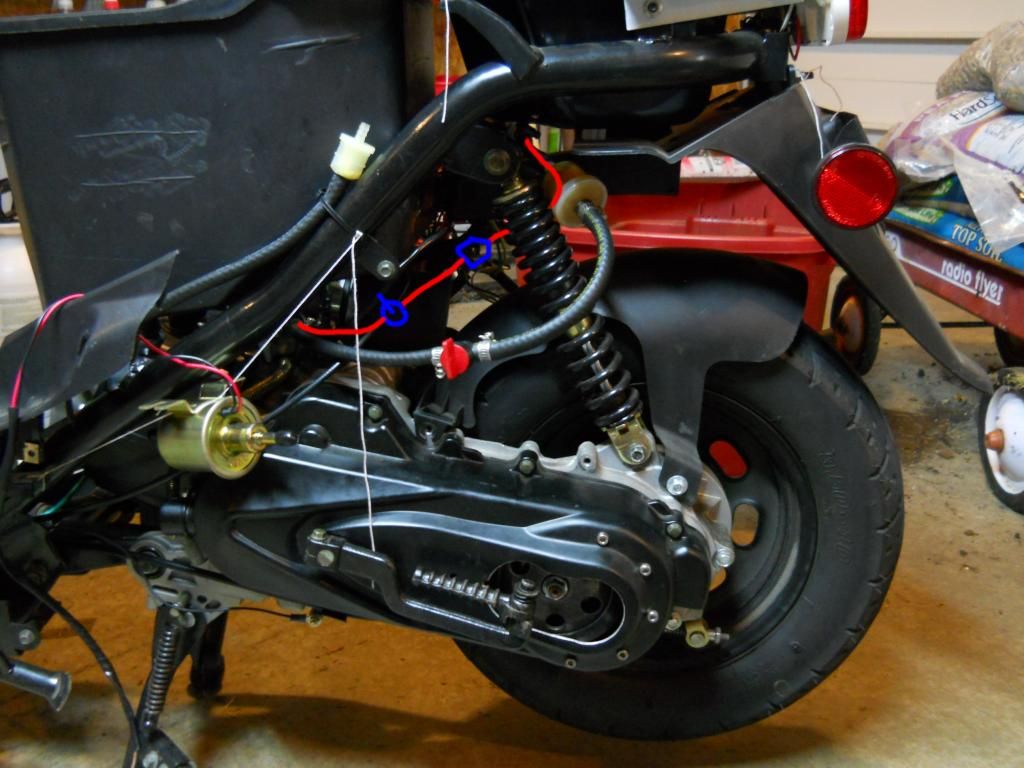 If too much heat still gets into the fuel line, I'll buy some of those metalized heat shields for spark plug wires and insulate the lines. I only have the front body panels on the scoot, and there is a rats nest of electrical wires running through them, so probably not the best place to mount a radiator. I do still have all of the rear body panels, but I've modified my scoot so much, I doubt that any of the original mounting points are available. Thanks for the pic bash, although my "add-a-drain" is quite thick, it may not fit there. I'll check it out. Thanks for the warning richardv, I'll go with the real thing when and if I decide that the weights aren't working. I realized last night as I was trying to fall asleep that the mounting points I mentioned earlier for the radiator won't work, half of them are on the engine and half of them are on the frame. Because the engine moves with the suspension I need to either have all mounting points on the engine OR the frame. I'll probably go for the latter because it will be easier to hang something from the frame than hold something up from the engine. I'm off to make brownies with crushed reeses pieces and chocolate milk mix and then back into the garage. |
|

