Doc's Anything Goes
Currently Offline
Posts: 371  Likes: 18
Joined: Jun 13, 2014 16:48:23 GMT -6
|
Post by glavey on Jul 12, 2018 15:15:56 GMT -6
Thanks for the reply.
After doing my best to eyeball the front and rear sprocket alignment today, I started up the engine and put it in gear. Aside from the carb needing adjustment (which of course has those break-off bolts holding on the float bowl), everything worked. In neutral, the bike didn't move, and in first, with the clutch held in the bike didn't move forward under it's own power and moved forward when the clutch lever was released.
I also re-routed the clutch cable; made a nice long sweeping curve instead of 3-4 sharp ones. Pull effort went down to two fingers. I think if I lube the cable it'll be even easier.
|
|
Doc's Anything Goes
Currently Offline
Posts: 371  Likes: 18
Joined: Jun 13, 2014 16:48:23 GMT -6
|
Post by glavey on Jul 11, 2018 9:53:18 GMT -6
I have a brand-new VIP/Baodiao BD125-8 (essentially a clone of a Honda Grom). So far the PDI had been going good, except for two things so far, one on which is the clutch.
With the trans in neutral, the bike easily rolls forward and backward, with or without the clutch lever pulled in. However, when I put it in first, with the clutch fully pulled in, the bike is difficult to move forward and backward and sometimes locks the rear wheel (won't fully engage). With the clutch lever released, there is NO free play in the lever (clutch won't fully disengage), and the rear wheel always locks.
I have tried to adjust the clutch cable at the lever and down near the clutch arm coming out of the trans. case. If I tighten down all of the adjustments, making the sheathe as short as possible, there is no free play at the end of the clutch travel and the bike is difficult to push forward/backward; If I lengthen the adjusters to make the sheathe as long as possible, the is, again, no free play at the end of the clutch travel, and the bike is slightly easier to push forward/backward while in gear.
My thoughts are that either the sheathe on the clutch cable is too long, not allowing full disengagement, the clutch plates are a bit stuck together from being new/bathed in chinese oil, and/or somehow the clutch lever isn't pulling the cable enough.
If I shorten the cable's sheathe, I'm sure I could get some free play and the end of the clutch travel, but then the clutch would engage even less when I pull the lever.
FWIW, I haven't started this bike up yet to see if it will move forward by engine power with the trans in gear and the clutch pulled in.
Also, I don't know if this ties in to the above problem, but the clutch lever has a very heavy pull; I don't know the the assemblers didn't lube it or if it's kinked somewhere.
|
|
Doc's Anything Goes
Currently Offline
Posts: 371  Likes: 18
Joined: Jun 13, 2014 16:48:23 GMT -6
|
Post by glavey on Oct 16, 2015 13:04:03 GMT -6
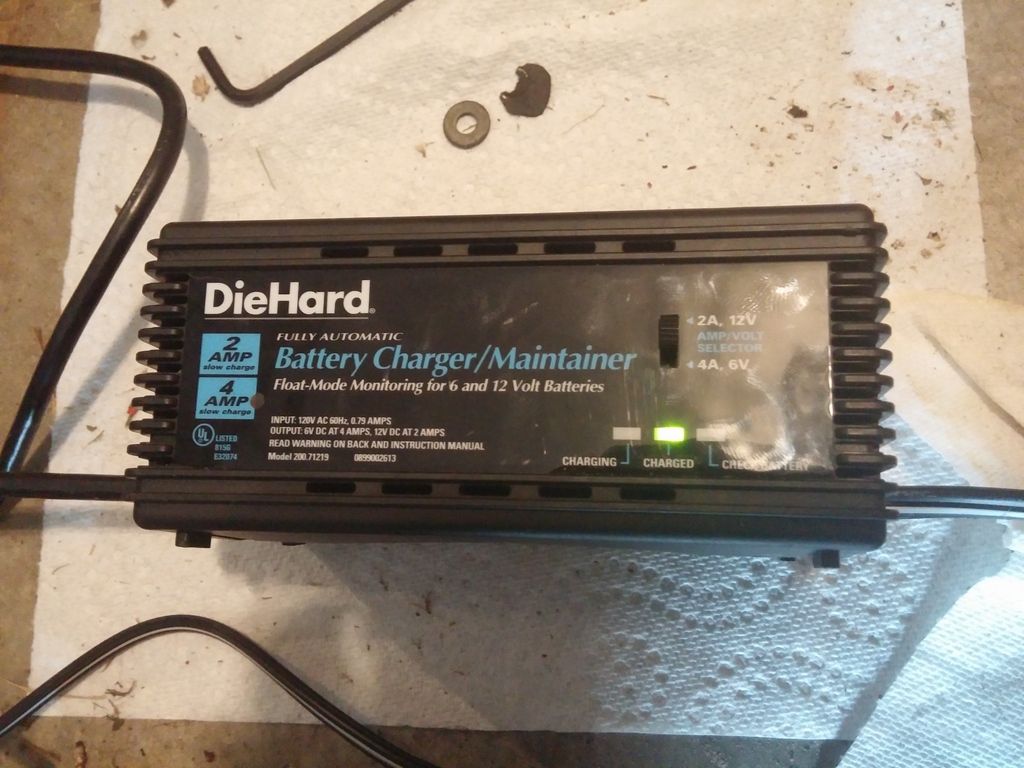
It's been a little while since I rode my scooter anywhere, so last night I hooked up my trickle/float mode charger up to it and let it charge. Curiosity got to me and I checked what the voltage at the battery was with the charger presumably in the "bulk" charging mode. I was a bit concerned when I saw the voltage go up to and past 16 volts. That can't be what it is supposed charge the battery at... right? I looked at the user's manual for the charger for technical specs regarding charging voltages, but there aren't any such specs listed. Ever since I started learning about electronics and cars, I've been taught that 12 volt lead acid batteries charge at 14.5 volts MAX. Has my charger gone kaput? I have another battery charger, but it isn't a float mode charger, and it charges at up to 10 amps, minimum (compared to the 2 amps limit on the float mode one). I don't think continuously charging a battery is good for it. For what it's worth, here's the float mode charger I'm using:  |
|
Doc's Anything Goes
Currently Offline
Posts: 371  Likes: 18
Joined: Jun 13, 2014 16:48:23 GMT -6
|
Post by glavey on Sept 2, 2015 15:46:11 GMT -6
Oh, how I did love the location of the oil filter on a Rambler I had.   I agree that would make changing the oil filter much easier, but wouldn't all the oil left in the filter leak out all over everything below it when you take it off? I might be the minority, but I like the oil filter to be lower on the vehicle, with nothing for the oil to drip down on to when changing it. You are already going to be down under there to take the drain plug out... |
|
Doc's Anything Goes
Currently Offline
Posts: 371  Likes: 18
Joined: Jun 13, 2014 16:48:23 GMT -6
|
Post by glavey on Sept 1, 2015 11:14:43 GMT -6
Well, after screwing around with the pump for a few days, I've found out that the pressure limit is about 60 psi. That might have been good for back-in-the-day tools, but useless for anything except inflating tires today.
The only thing I would have used this compressor with would have been an impact gun for occasional scooter and car-related garage work (yes, I know that the pump wouldn't have been able to provide the cfm to use the tool continuously. I'm talking about removing, at most, lug nuts from a wheel; I can wait for the pressure to build back up after taking off one to two nuts.).
I'm now wondering if buying an electric impact gun would be a better choice... I can get one with a 1/2 in drive for $50-$100, and a small assortment of impact sockets from the local flea market for $25.
|
|
Doc's Anything Goes
Currently Offline
Posts: 371  Likes: 18
Joined: Jun 13, 2014 16:48:23 GMT -6
|
Post by glavey on Aug 26, 2015 15:48:53 GMT -6
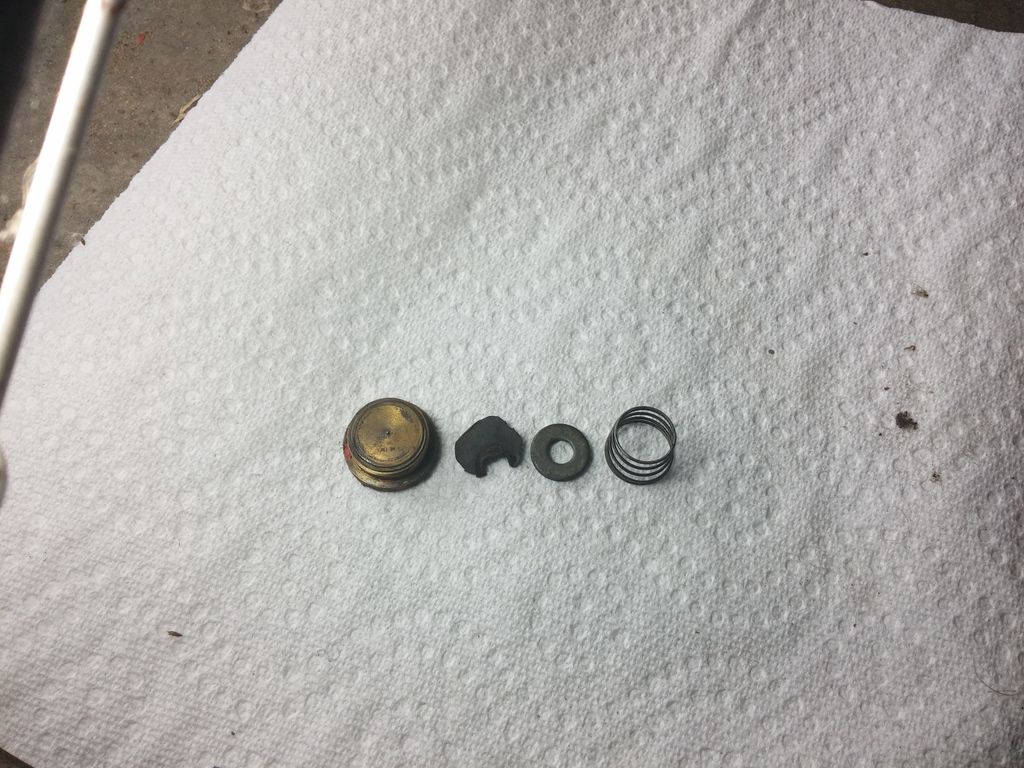
Back from the hardware store; got a hex wrench that fits the reed valves. First I took off the intake valve on the cylinder that wasn't working. Apart from being a little dirty, the valve itself and the spring looked in decent condition. It had a little mound of what I think was paint on the exposed part of the valve, but all of the other valves had some paint there as well, so I just scraped it off and reinstalled it. Before I had taken the valve out, I tested the whole motor/pump/micro-reservoir assembly: As you can see, pressure wouldn't build above about 15 psi. The intake reed valve was letting air out. After I took it out, cleaned it, and re-installed it the pressure held up to about 45 psi (that is as high as I want to take this thing until I've done a more thorough inspection of the internals of the pump. Next I took the exhaust reed valve off:  (In the words of Jamie Hyneman and Adam Savage) Well there's your problem! There's no "real" valve there, just what someone put in there, hoping it would work. It almost looks like a piece of gasket material (how ironic). Without that valve there, the pump will still work, but it will be down a cylinder and will leak (more than it would) air out of the intake reed valve. I tested that by holding my finger over the air outlet on the reservoir, getting the pressure up to about 45 and shutting the motor off. The pressure dropped rather quickly. If I put a finger over the air outlet AND the bad cylinder's intake valve, the pressure drops slower, but still drops. I MIGHT be able to make something that can be used as a reed valve out of a small piece of sheet metal, since that is what all the other valves are; springs and a piece of metal. Even if I get that cylinder working again, I'll probably need a check valve between the air outlet on the micro-reservoir and whatever tank I use. EDIT: Oh, and I also took a video demonstrating the crank wobble: |
|
Doc's Anything Goes
Currently Offline
Posts: 371  Likes: 18
Joined: Jun 13, 2014 16:48:23 GMT -6
|
Post by glavey on Aug 26, 2015 12:57:18 GMT -6
After a little searching, I found a few gasket materials that might work, through none of them explicitly say they are for use as a head gasket: Fel-Pro Pro-ramicListed for use as an exhaust gasket Mr Gasket compressed gasket materialAgain, exhaust gasket Dead soft copper sheetThroughout many threads on many different forums, I've found many mentions of using dead soft copper as a head gasket. |
|
Doc's Anything Goes
Currently Offline
Posts: 371  Likes: 18
Joined: Jun 13, 2014 16:48:23 GMT -6
|
Post by glavey on Aug 26, 2015 7:44:05 GMT -6
I was thinking about doing something like that, but it is down on my list. I'm trying to get away from the mentality of, "fix something broken by breaking it the opposite way." Plus, I don't have a sledge hammer. If I really wanted to I could put the pulley back on, mount the pulley firmly to some surface and then grab the pump block and try and unbend the crank. I have a feeling that if I went the sledge hammer route the pump casing might crack from the impact.
|
|
Doc's Anything Goes
Currently Offline
Posts: 371  Likes: 18
Joined: Jun 13, 2014 16:48:23 GMT -6
|
Post by glavey on Aug 25, 2015 15:04:55 GMT -6
I have a little 10 gallon portable tank I plan on using. Not much, but I don't plan on using anything that consumes too much air. As far as the reed valves go, that is another reason I want to remove the head. The valves themselves have an, I think, 9mm hex head. As luck would have it, I have an 8mm and a 10mm.
I'll look into the gasket material at o'reilly's.
It is the crank itself that is bent. When the pulley is on and the motor is turning, you can see that the pulley and the end of the crankshaft are wobbling. I think "portable" (it weights about 90lbs) nature of it has caused it to fall down and land on the pulley, thus bending the crankshaft.
Because of that, I am quite sure I'll never be able to get the pump to completely stop leaking oil from the crank seal/bushing near the pulley.
|
|
Doc's Anything Goes
Currently Offline
Posts: 371  Likes: 18
Joined: Jun 13, 2014 16:48:23 GMT -6
|
Post by glavey on Aug 25, 2015 9:58:35 GMT -6
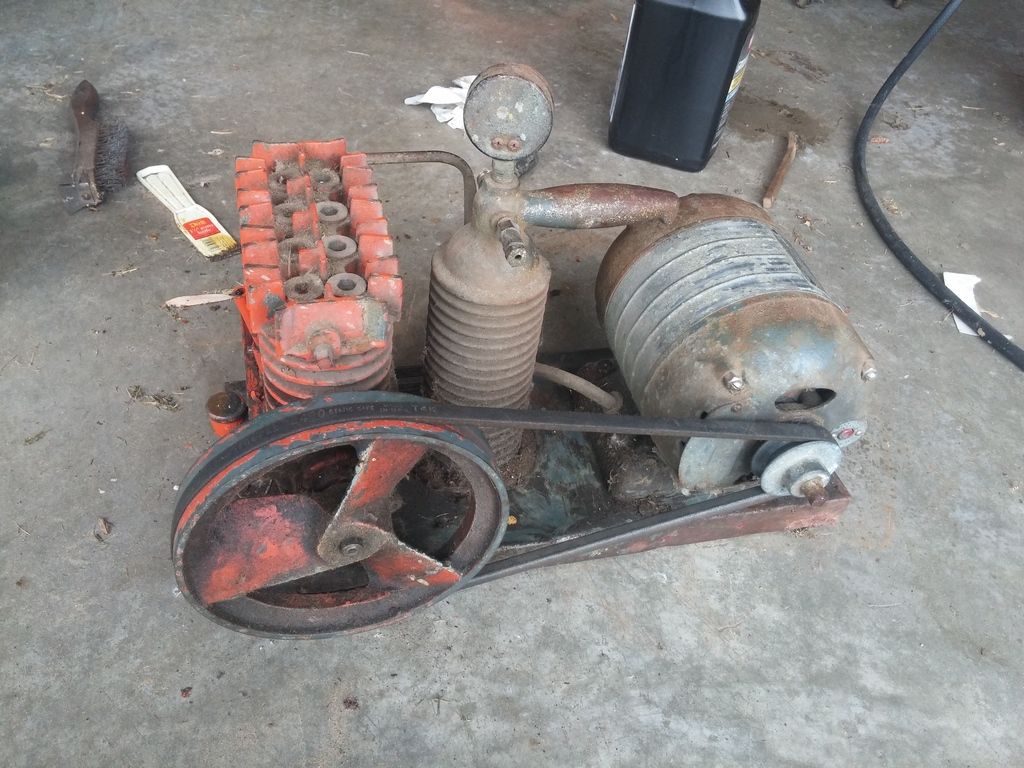
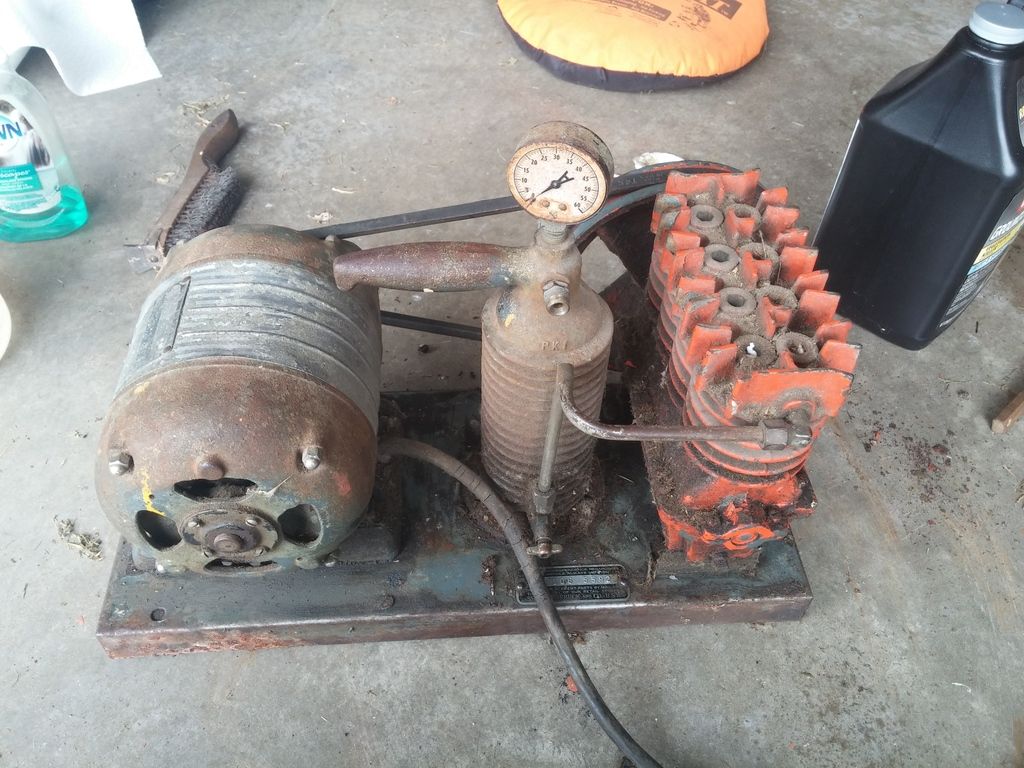
I just bought a very old sears/craftsman air compressor from my local flea market for $15. I've been wanting some form of compressed air for general in-the-garage DIY type stuff for a while now and I thought that $15 isn't too much to lose if it doesn't work.


It was worse before I took these pictures, the entire base and some of the pump and reservoir had 1/16" to1/8" of oily-dusty... stuff on it.
I removed all of the pieces from the base board and cleaned them as best I could. While the pump was off of the base, I noticed that the crankshaft was slightly bent; when the pulley was installed on it, it would wobble about 1/4 inch off-center. Then I noticed that on the seals on both ends of the crank shaft were leaking oil. That explains the mess all over the base board.
Now to get to the point of this thread. I want to partially disassemble the pump and make new gaskets around the crank seals (they are bushings, actually) and inspect the top end of the pump; there are 4 cylinders, but only 3 are working.
Since this pump is nearly an antique, original gaskets are impossible to get. I need to know what, if anything, I can use to make a new head gasket. I first thought of form-a-gasket, went to their website and found this. Under applications it lists compressors and diesel head gaskets. It seems like it might work.
Does anybody else have any other ideas on what I could use? Preferably something that is available at a hardware store or some place like tractor supply co.
I should also mention that I will be running up to about 100 psi and it will only be used for about 30 minutes every... month or less, so very light duty.
|
|
Doc's Anything Goes
Currently Offline
Posts: 371  Likes: 18
Joined: Jun 13, 2014 16:48:23 GMT -6
|
Post by glavey on Aug 11, 2015 9:38:21 GMT -6
Glad you got your scooter running again. Forgetting to check the easy/obvious stuff happens to all of us. One time I just couldn't get my scoot started, then I realized I had no gas in the tank. Another time none of the electrical stuff would work; I didn't even have a battery in the scoot.
|
|
Doc's Anything Goes
Currently Offline
Posts: 371  Likes: 18
Joined: Jun 13, 2014 16:48:23 GMT -6
|
Post by glavey on Aug 9, 2015 13:26:15 GMT -6
By "won't start" do you mean the engine will crank and turn over but not start or will the starter just not turn the engine at all?
|
|
Doc's Anything Goes
Currently Offline
Posts: 371  Likes: 18
Joined: Jun 13, 2014 16:48:23 GMT -6
|
Post by glavey on Aug 3, 2015 11:01:34 GMT -6
You said that the voltage is lower than 12 volts with both lights on; is that the battery voltage or the voltage at the headlight? Also, is that at idle or while moving?
I have a 50cc scooter and I can run a 55w headlight, led taillights, and a somewhat power-hungry oil pump and still get 14+ volts at the battery while moving. I would imagine that your 150cc would have at least the same output from the stator if not more.
|
|
Doc's Anything Goes
Currently Offline
Posts: 371  Likes: 18
Joined: Jun 13, 2014 16:48:23 GMT -6
|
Post by glavey on Aug 2, 2015 11:15:25 GMT -6
About an hour ago I saw someone riding down the street on a bicycle fitted with a bolt-on 49cc two stroke engine towing one of those small covered trailers you put small children/infants in. I wasn't close enough to see if they had a child in there or not but I REALLY hope they didn't.
I could understand using one of those to carry cargo or groceries but never a child when it is attached to something with an engine.
|
|
Doc's Anything Goes
Currently Offline
Posts: 371  Likes: 18
Joined: Jun 13, 2014 16:48:23 GMT -6
|
Post by glavey on Jul 26, 2015 5:22:26 GMT -6
Also, consider scrapping the pair(sp) system. I got rid of it on my cy50-a and it immediately ran smoother and a bit stronger. Removing any and all emission systems on scoots, at least our chinese scoots, seems to be the first thing everybody does and is very frequently recommended on this forum. Unless you live in a state where emissions tests are required, I'd remove them. |
|

