Doc's Anything Goes
Currently Offline
Posts: 371  Likes: 18
Joined: Jun 13, 2014 16:48:23 GMT -6
|
Post by glavey on Aug 23, 2014 19:18:58 GMT -6
Well, I found what I think is a good remote oil filter bracket. I also found the same one that includes some tubing, fittings, and an oil filter. I'll probably go for just the bracket because even though the one with the extra stuff says it has never been used, I would feel better if I bought and installed a new oil filter myself. I'll probably order and add the oil filter later, I'm too eager to get this thing all together and working to wait for another package. Plus, I can feel another ebay spending spree coming up; I'll order it along with some other stuff I don't really need but which tickle my "I want something new" bone. One thing about that type of oil filter and bracket; I only have one idea about where to mount it, and it would be incredibly close to the ground. If I leaned over too much in a turn I could easily snap the filter off. |
|
Doc's Anything Goes
Currently Offline
Posts: 371  Likes: 18
Joined: Jun 13, 2014 16:48:23 GMT -6
|
Post by glavey on Aug 24, 2014 18:54:23 GMT -6
 I got the valve cover installed with the add-a-drain in it. No fitment issues on the inside at all; the bolt doesn't touch anything. On the outside, the elbow and the hose barb are a bit close to the spark plug boot, but I can still remove the spark plug boot and the plug without having to move the fitting.  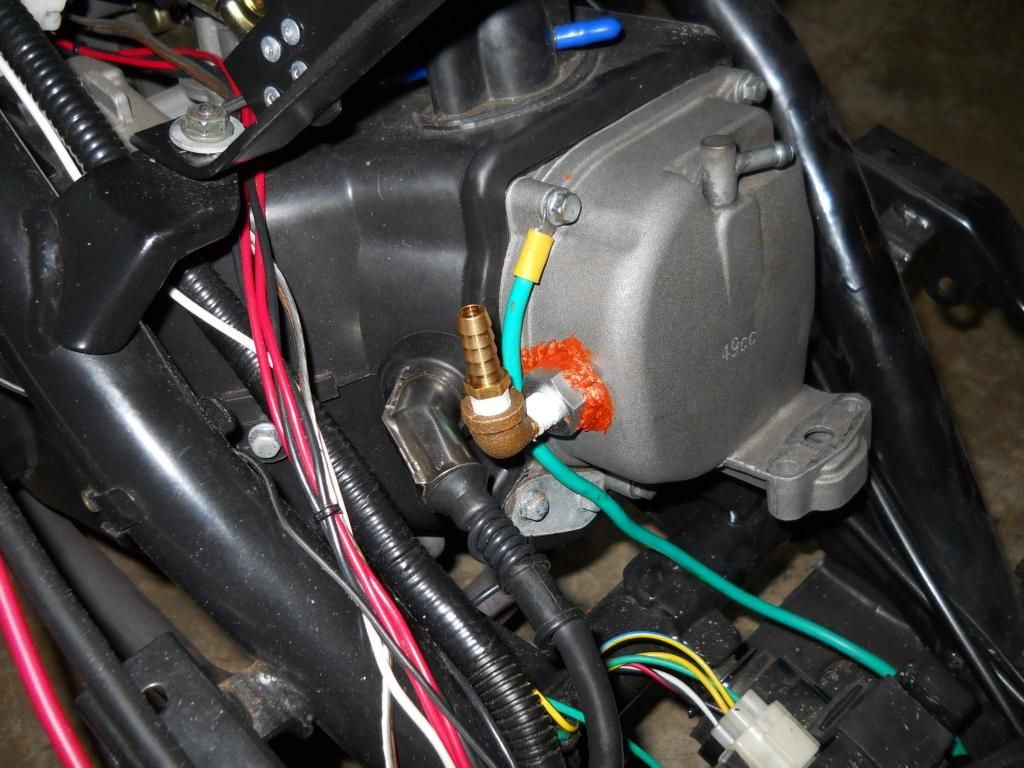 I drained all of the oil, removed the temp probe, and installed it in the 4-way.  Next I put the elbow into the oil drain adapter and put the hose barb into the elbow.  I put the oil pump back into place and secured it with zip ties.   I put a piece of adhesive-backed foam on the cvt cover so the pump won't rub against it.  One of the seat frame reinforcements made a perfect mounting point for the 4-way fitting. I used another one of the adhesive-backed foam pads on the back of the 4-way. I had to put double-sided tape (the kind you use for window insulation in the winter) on both sides of the foam pad, the adhesive that comes on the pad is pathetic. 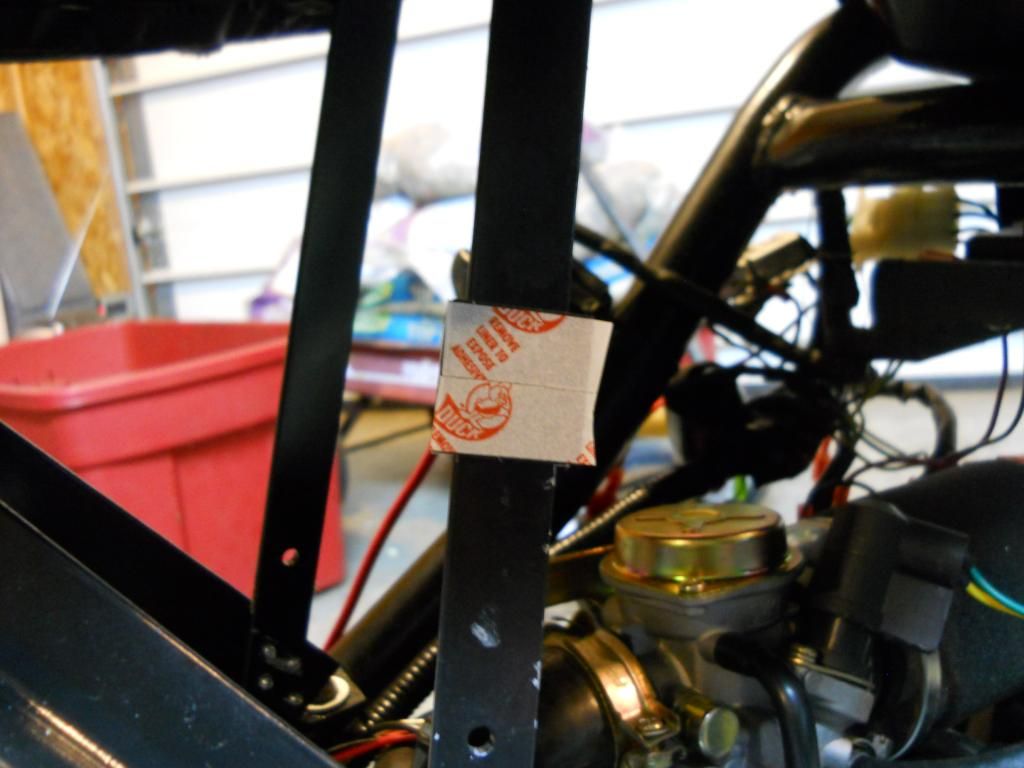  Next I cut pieces of hose to connect everything to everything else. I used the smaller ID made-by-gates hose everywhere except between the pump and the radiator and between the radiator and the 4-way; the barbs on the radiator are quite big and the smaller hose would barely fit over it. I secured every hose connection with a hose clamp. And here it is, the completed cooling loop in all its glory!  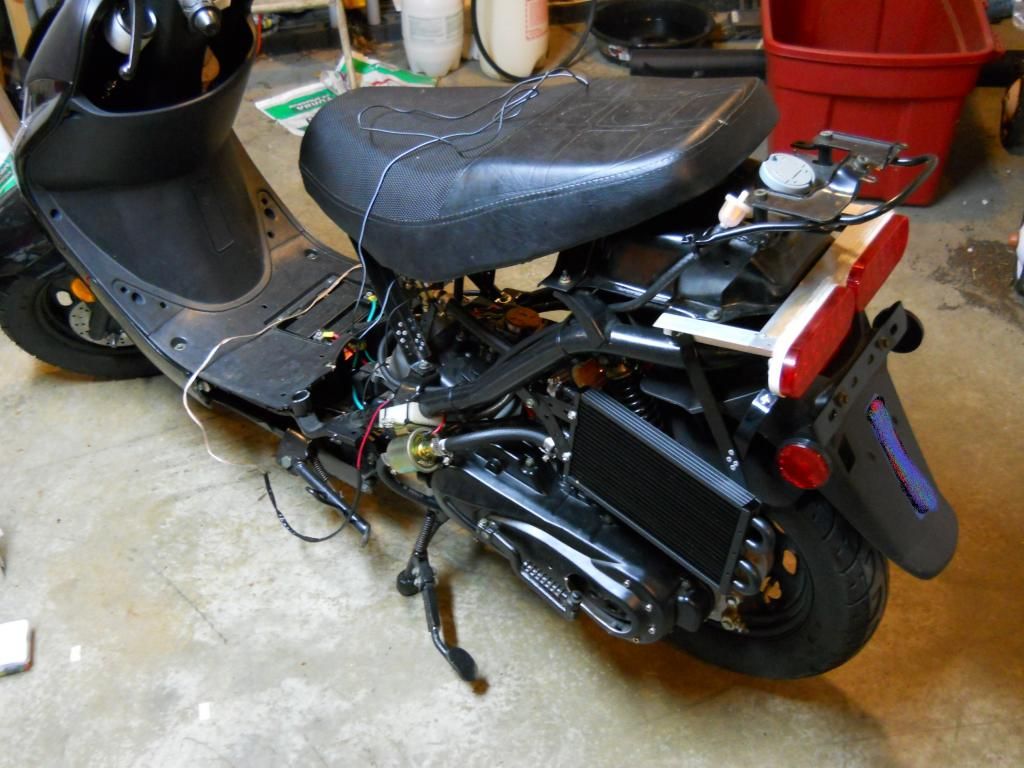  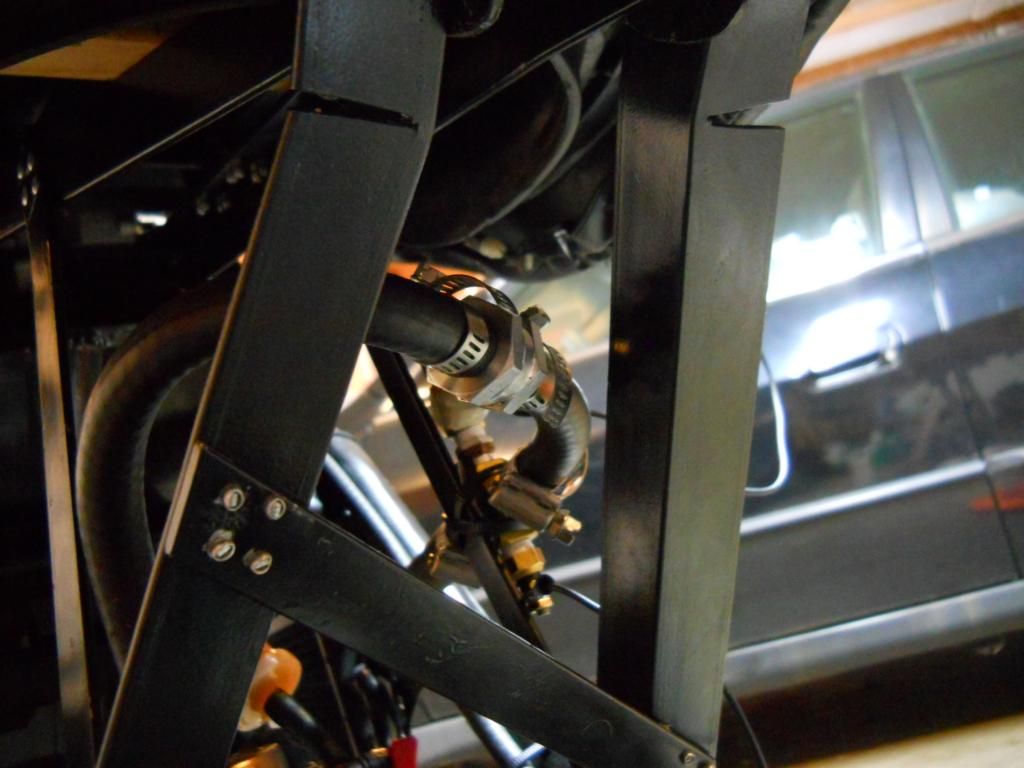    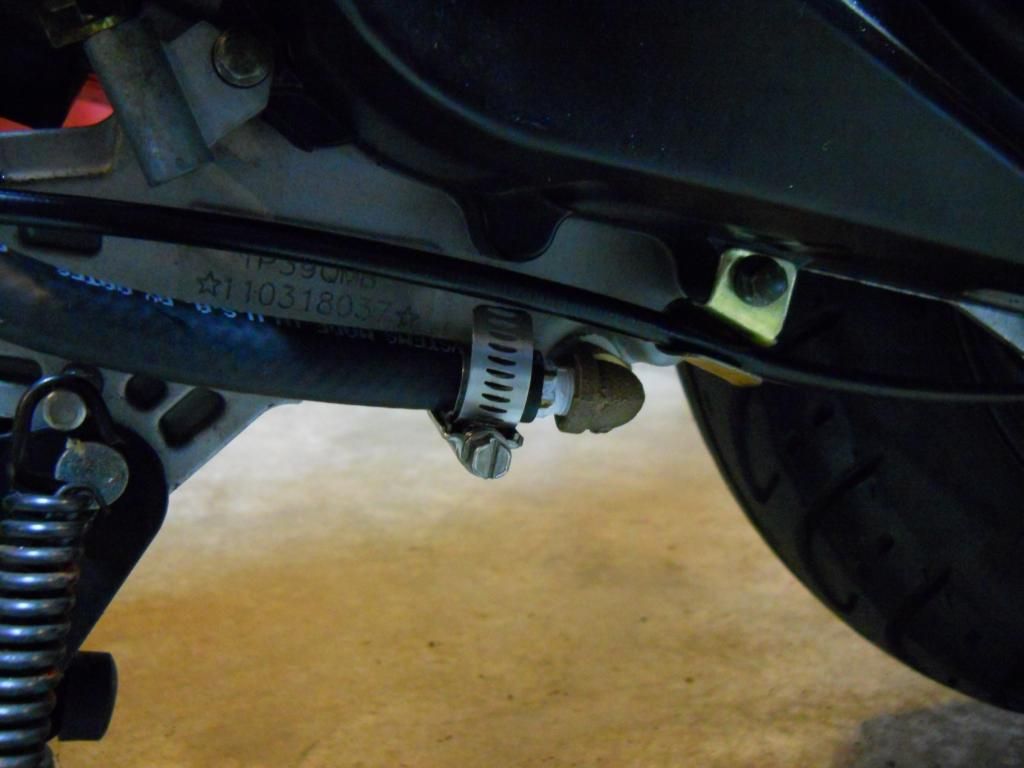       It's freakin' beautiful ain't it? I filled up the scooter with oil up to the half-way point on the dipstick (650ml), then I cracked the bleeder on the 4-way and ran the pump until oil came out, then shut the bleeder. I added another 100ml of oil to the crankcase and then ran the pump for a few minutes to make sure the loop was completely filled. I added another 100ml of oil and that brought the oil level back up to the center of the crosshatching on the dipstick. So all of the plumbing only added about 200ml, but that is still about 30% added oil capacity. That will increase when I add the oil filter. Speaking of the oil filter, I am thinking of mounting here (except on the opposite side of the scooter, it was just easier to take a picture of this side, no plastics in the way): 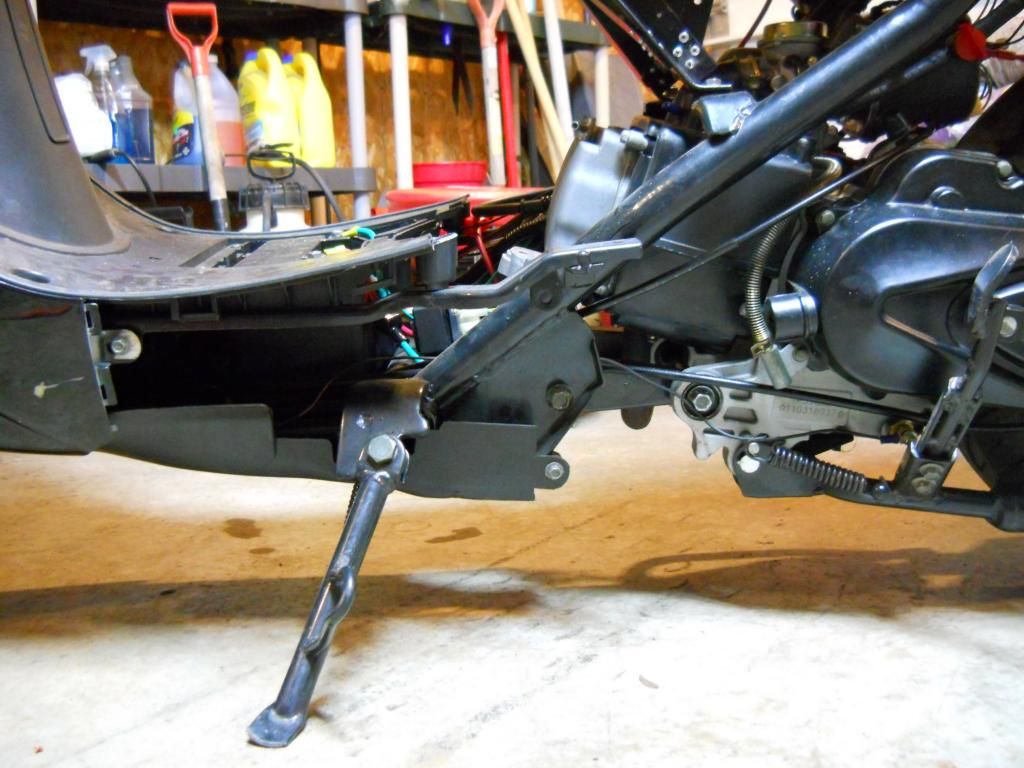 On the flat piece of metal between the two kickstands. As I said before, the filter will be quite close to the ground, but I looked online for the a low-profile filter that will fit the bracket I linked to previously and I found one that is only about 3" tall. That should give enough ground clearance. Back to the oil cooler! I fired up the engine and let it idle to warm up the oil temperature, and that is when I realized a fault with my design; I only get an oil temperature reading if the pump is running. Before I had the probe in the oil drain hole so the probe could read the temperature all of the time, but now since it is in the cooling loop and after the radiator, I will only get a real temperature reading if oil is flowing through the cooling loop. If I find out that this is too much of a nuisance I can go back to the plan I had that used two tee fittings instead of the one 4-way. With the oil up to 50C (122F) the pump only got up to 34C (93.2F).   The difference in temperature between the start and the end of the cooling loop is about 4.5C (40.1F) with no moving air.   I took the scoot out for its maiden voyage with the oil cooler. The oil temp in the garage was about 85C (185F), as soon as I took the scooter out of the garage and in to the open where there was a slight breeze, the oil temp started to drop down to 80C (176F). I went for a short ride around the block at about 25mph. Oh boy, is my carb out of tune since it cooled down, the engine was sluggish as heck. The oil temp dropped down to 75C (167F) during the ride. As soon as I slowed down, the temp went back up 2-3 degrees. I went for a longer ride at mostly full throttle. The oil temp started at about 87C (188.6F) when I first left. As I got moving, the temp dropped down to between 80-83C (176-181.4F) and stayed there as long as I was at speed. As soon as I slowed down the temp went up 2-3 degrees. I should note that the way I have the pump and the oil temp gauge wired (I discovered I did it wrong) causes the temperature to read a few degrees higher when the pump is running. So the difference between full throttle without the radiator, 100C (212F) and with the cooler (with the few degrees error taken into account) 76C (168.8F) is quite good; 24C (44F) difference without any air scoop. When I got home I noticed that the pump had moved slightly downward and was barely touching the foam pad.   I'll have to use something else to keep the pump from touching the cvt. Also, as you can see, the pump vibrated down on the frame mount, the zip ties aren't enough to hold them. I'll get some hose clamps for it. There wasn't one drop of oil leaking from any of the connections. I still have to properly attach the ground wire coming from the 4-way. Right now I have it pressed in a bolt in the valve cover. I'll probably just crimp a ring terminal to it and attach it to the same bolt that the battery ground is attached to. On a different note; are these plates mandatory to have on my scooter:  I don't want any problems from the police if I get pulled over and I don't have one of those plates. I can just rivet them to the front plastic piece I'm using. Also, I would like to make another grocery bag holder or reuse this one:  Oh well, another project for another day. |
|
|
|
Post by Bashan on Aug 24, 2014 19:48:08 GMT -6
Around here you have to have a valid VIN number on the bike. It can be a plate or etched into the frame. So if that plate doesn't carry the VIN I doubt you have to have it. The police don't look for that kind of thing anyway. They check your record and make sure you have insurance.
|
|
Ad Free Donut
   
Currently Offline
A bike is music to my ears.
Posts: 1,655
Likes: 93
Joined: Oct 22, 2013 4:11:04 GMT -6
|
Post by Guitarman on Aug 24, 2014 20:07:54 GMT -6
You keep on keepin on Glavey. There are more ADD folks out here than you know. Why do you think it's taken me 2 months to get my bike this far? LOL
|
|
Doc's Anything Goes
Currently Offline
Posts: 371  Likes: 18
Joined: Jun 13, 2014 16:48:23 GMT -6
|
Post by glavey on Aug 24, 2014 21:13:01 GMT -6
The plate does have my VIN on it, and my frame has it engraved on it. I might rivet the plates to the front plastic place anyway.
|
|
Doc's Anything Goes
Currently Offline
Posts: 371  Likes: 18
Joined: Jun 13, 2014 16:48:23 GMT -6
|
Post by glavey on Aug 25, 2014 9:13:04 GMT -6
Ok, here is the BOM that I promised. I'll list everything I used except for things that you won't be able to buy or will have to fabricate your self (all the printed parts) and I'll include prices for parts which I already had and used in the project. I'll give links where I can. 1/8" npt street elbow x2 $4.98
1/8" npt 4-way $5.001/8" npt to 5/16" hose barb x4 $7.12
3' gates fuel line $5.28
hose clamps x8 $6.48
radiator (price increased $5) $24.95
pump $13.59
bleeder valve $4.69
8mm check valve $5.99
add-a-drain $6.99
1/8" npt nipple (tehehe) $1.49
1/8" npt female to female coupling $1.49
oil temperature gauge $16.39
primary wire (already had, est. price) $10.00
insulated red m/f disconnects x2 $4.78
Total $119.22
Half the price of the alternative with a much bigger radiator and a pump. Oh yeah!
I didn't include the price of the new bench vise because, well, hopefully you won't break yours.
Also, since the seat frame was a kind of separate project and not entirely necessary, I'll list its expenses here in a separate list:
1/8"x3/4"x6' angle iron $8.97
1/8"x3/4"x6" flat iron (already had) $6.24
1/8"x1/4" steel rivets (100) $4.99
Total $20.20
|
|
|
|
Post by cyborg on Aug 25, 2014 12:00:24 GMT -6
not too bad ,,,
|
|
Doc's Anything Goes
Currently Offline
Posts: 371  Likes: 18
Joined: Jun 13, 2014 16:48:23 GMT -6
|
Post by glavey on Aug 25, 2014 17:06:20 GMT -6
I checked the oil level to see if any drained back into the crankcase overnight; nope, same level as it was yesterday.
I removed the foam pad from the cvt and in its place put a glob of silicone on the pump. It is drying as I type this.
I didn't check the amount of flow through the cooling loop yesterday, so I thought I might as well do that now. I removed the valve cover and eekk! the siliconed-add-a-drain bolt turned as I removed the cover and the silicone on the outside of the cover became unstuck from the valve cover, but still stuck to the bolt. When I was installing the add-a-drain I couldn't use the full amount of force I would have used to install it because the silicone would have just been squeezed out and not sealed. I might have to redo that bolt install.
Anyway, I turned on the pump to see how much oil was flowing through the loop. Not much at all. It looks like... an old man trying to urinate (no offense bashan), however this is with a bone cold engine and oil (no oil leaked from the outside of the add-a-bolt when I had the pump running). The only real sources of flow restriction in the system are the 4-way and the check valve. The check valve has a 0.1 psi cracking pressure so I'm quite sure that is not it. The 4-way... that's the only real restriction I can thing of, the radiator is really just a long tube with bends in it. I'll check the flow with hot oil tomorrow (it's gonna hurt taking that valve cover off when it's hot). If it still flows unsatisfactorily, I'll start with the cheapest solution, taking off the 4-way and using two tee fittings in it's place. As an added bonus, if I do that, I'll be able to get an oil temp reading without the pump running. If that doesn't work, then I'll be looking for a slightly more powerful pump of the centrifugal type.
I can't go to much higher in power draw; as it is now the battery is only charging a little bit with the headlight on and no dummy loads attached to the charging system. Or I could get a pump that uses too much power and attach some sort of current or volt limiting to it.
I've been doing a bit more research on oil filters and it appears that most, if not all filters use an anti drain-back valve which I assume is just a check valve. Now, on cars, at least my car, the oil pressure can easily get to 50 psi, getting up to or over 80 psi. What is the cracking pressure on the for-automobiles oil filter check valve? I'd assume it would be a bit more than the 0.1 that my check valve has.
I had a spare fram ph3387a in the gargage and I kinda tested the anti drain-back/check valve with my mouth. I could get air to flow through it if I sucked on it hard enough (oh man, did I really just type that?) but it is considerably more than what the check valve on my scooter required. If I installed one of these on the cooling loop with the flow already as low as it is, I doubt I'd get ANY flow at all.
Just more things to sort out...
|
|
|
|
Post by Bashan on Aug 25, 2014 22:44:19 GMT -6
Anyway, I turned on the pump to see how much oil was flowing through the loop. Not much at all. It looks like... an old man trying to urinate (no offense bashan)  |
|
Doc's Anything Goes
Currently Offline
Posts: 371  Likes: 18
Joined: Jun 13, 2014 16:48:23 GMT -6
|
Post by glavey on Aug 26, 2014 7:31:34 GMT -6
Ok, that's a bit of a relief to me (pun not intended, but definitely welcome). I, about a year ago, had a problem with having to go every 15 minutes and having insomnia because of it, but enough about urine.
I'll see if I can get a video of the oil flow so you can judge for yourself. I haven't forgotten what you said about the flow needing to be slow enough for heat transfer to occur; I'm just concerned that, when at WOT, the flow will only be enough to cool the oil if I remain at speed for an extended time.
|
|
Doc's Anything Goes
Currently Offline
Posts: 371  Likes: 18
Joined: Jun 13, 2014 16:48:23 GMT -6
|
Post by glavey on Aug 26, 2014 11:49:01 GMT -6
Disregard my previous worry about too little flow; I let the engine run at idle until the oil temp was at 60C (140F), shut the engine off, took off the valve cover (while wearing wool/kevlar oven gloves!), and turned on the pump. Flow is much better when the oil is warm. It seems old men who can't pee are useful. Here's the blob of silicone I put on the pump:  So far, it has faired well. I checked the seat for any stress cracks that weren't already there before I made the metal seat frame, everything looks good.  Recently, I've been thinking of making a nearly-all-in-one micro dashboard for my scoot. In theory, an arduino should be able to extrapolate temperature data from the oil temp probe, read the battery voltage (with some external circuitry, of course), and display the speed of the scooter (I have a couple ways of doing this in mind; 1: using a dc motor attached to the speedo puck and getting the speed from the amount of voltage it produces while it is being turned. 2: using the same algorithm the bicycle computer uses, I can get the speed from the reed switch mounted on the speedo puck.). I could display all of this on one of those 16x2 character LCDs. It would probably be difficult to see in the day under direct sunlight; I might have to go for a few 7-segment LED displays. Heck, with an sd card shield, I could even do data logging. Ohh man I'm getting that tingly feeling... |
|
Doc's Anything Goes
Currently Offline
Posts: 1,226
Likes: 81
Joined: Apr 4, 2014 3:52:42 GMT -6
|
Post by richardv on Aug 26, 2014 17:47:04 GMT -6
|
|
Doc's Anything Goes
Currently Offline
Posts: 371  Likes: 18
Joined: Jun 13, 2014 16:48:23 GMT -6
|
Post by glavey on Aug 26, 2014 18:59:09 GMT -6
I had something almost exactly the opposite of that on a bicycle once. Here's a link to a page with a picture on it, albeit in a different language. But that doesn't really answer your question. That battery appears to be a lithium ion-type battery and I'm not that up on the specifics of how those charge. At it's most basic level, I do think it is doable. I think all lithium ion batteries require some sort of smart charger to avoid things going boom. If you could find a charger that could take the unregulated voltage from the generator (or put the power from the generator through a regulator, but that wastes energy) and charge a battery with it, I don't see why it couldn't work. depending on where you would mount the generator and thus make it contact the wheel, the wheel may wear a bit more there. Also, that energy that the generator is... generating has to come from somewhere and that somewhere would be your fuel tank. You would lose mileage and maybe just a wee bit o' acceleration and/or top end. But please, take everything with a grain, nay, a pound of salt. I really don't know that much about electronics; I understand stuff like volt, amp, capacitor, continuity, resistance, high-voltage shock warning, and DON'T TOUCH THIS signs, but that is about it. I would hate for you to be injured or waste money on my account. I've been doing a lot more thinking on the all-in-one dash thing; all of the oil/water temp probes I can find give a non-linear resistance-change-from-temperature-change response. Making a linear map on an arduino is a one-line deal, but having something like a lookup table... I have no idea. On this page you can see the resistance-to-temperature chart. If I just used the probe to read from 140f to 250f instead of from 100f to 250f, I could use a linear map with just a little bit of accuracy loss. As for measuring 12 volts with a 5v cuircuit, a voltage divider will suffice, I think. The speedometer... I'm still working on that one. The two ideas I had previously turned out to be more difficult than I thought. Using a motor as a generator produces spikes of energy, not a smooth voltage. A generator might work better. The programming needed for using the bicycle speedometer is... almost over my head. Also, since there would only be one pulse per revolution, resolution and accuracy would go down and delay in reading would increase. Using something like a car's abs sensor where there are somewhere between 50 and 100 pulses per revolution would work much better and would only require changing one variable in the programming. I smell smoke. I think my brain is overheating. Time for food. |
|
Doc's Anything Goes
Currently Offline
Posts: 371  Likes: 18
Joined: Jun 13, 2014 16:48:23 GMT -6
|
Post by glavey on Aug 26, 2014 21:48:08 GMT -6
Here's another somewhat random idea. Instead of using a regulator/rectifier that requires a specific load to output 14.7 volts for charging the battery, could you use something like a solar panel charger regulator to keep the voltage at 14.7 regardless of load? At first I thought of using something like a buck converter for the regulation, but as soon as the engine stopped, the battery would be pushing voltage into the output of the regulator; not good.
Just a thought...
|
|
Doc's Anything Goes
Currently Offline
Posts: 1,226
Likes: 81
Joined: Apr 4, 2014 3:52:42 GMT -6
|
Post by richardv on Aug 27, 2014 6:12:35 GMT -6
Can't help with your random idea. I've no experience with those.
As far as the power pack I mentioned I will be getting one as soon as funds are available and it is rechargeable by both AC and DC. But wonder if something like that little generator would put out enough to do the charging and run some accessory. Those adds give so little information.
It only requires an 8mph wind to activate and I can pedal my bike that fast.
Oh well! Some thing to play with in the future.
|
|

