Doc's Anything Goes
Currently Offline
Posts: 371  Likes: 18
Joined: Jun 13, 2014 16:48:23 GMT -6
|
Post by glavey on Aug 19, 2014 16:10:47 GMT -6
It appears that it is supposed to rain for the next few days here, so I have a question regarding humidity and painting; what is the highest humidity I can spray-paint at? One of my rattle-cans says to not use it above 85% humidity, last time I checked it was 80% outside.
|
|
Doc's Anything Goes
Currently Offline
Posts: 1,226
Likes: 81
Joined: Apr 4, 2014 3:52:42 GMT -6
|
Post by richardv on Aug 19, 2014 20:23:06 GMT -6
Take advantage of the situation and do work on other aspects of the project. Or start another little one.
|
|
Doc's Anything Goes
Currently Offline
Posts: 371  Likes: 18
Joined: Jun 13, 2014 16:48:23 GMT -6
|
Post by glavey on Aug 20, 2014 6:23:54 GMT -6
Take advantage of the situation and do work on other aspects of the project. Or start another little one. Will do. Humidity dropped late last night and I got a few coats of paint on the pieces, one or two more should do it. Now that I know exactly what I have to work with, I'll start trying to make the radiator mounts and maybe balance the rear wheel. Again, what I say I am going to do and what ends up getting done are usually completely different. |
|
Doc's Anything Goes
Currently Offline
Posts: 1,226
Likes: 81
Joined: Apr 4, 2014 3:52:42 GMT -6
|
Post by richardv on Aug 20, 2014 13:07:52 GMT -6
I know exactly what you mean. It's been the story of my life.
|
|
Doc's Anything Goes
Currently Offline
Posts: 371  Likes: 18
Joined: Jun 13, 2014 16:48:23 GMT -6
|
Post by glavey on Aug 20, 2014 15:56:30 GMT -6
The weather cooperated with me a bit; the humidity dropped enough that I could finish painting the frame pieces. Overall they turned out very well: 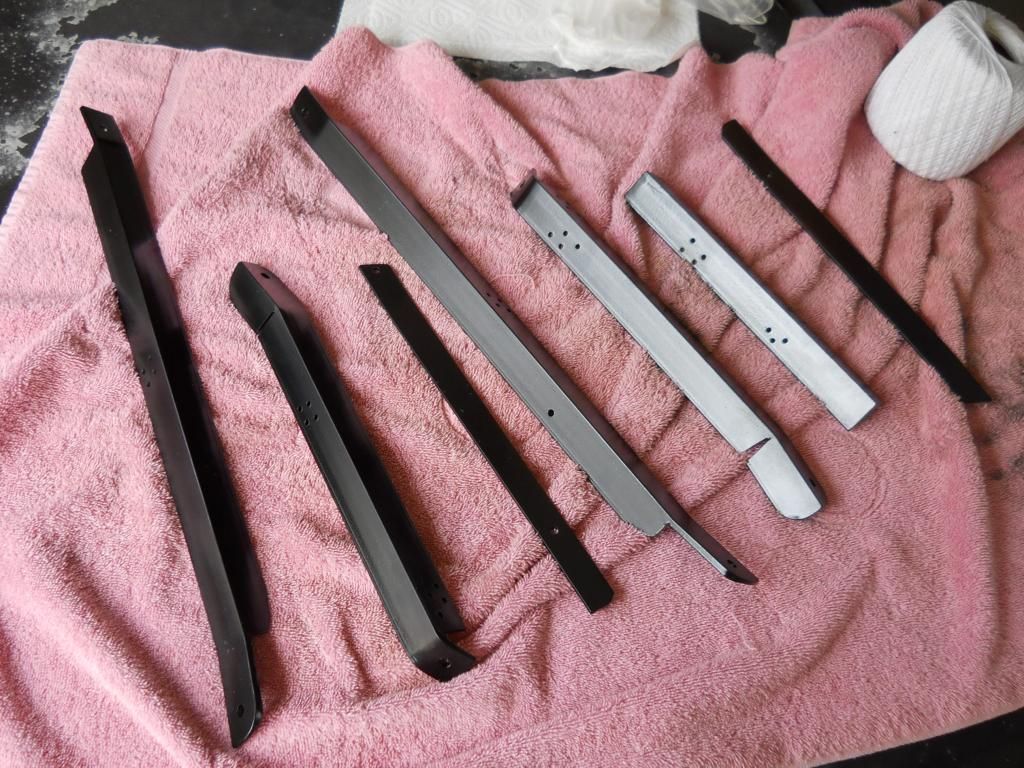 I started planning and making pieces for the radiator mount: 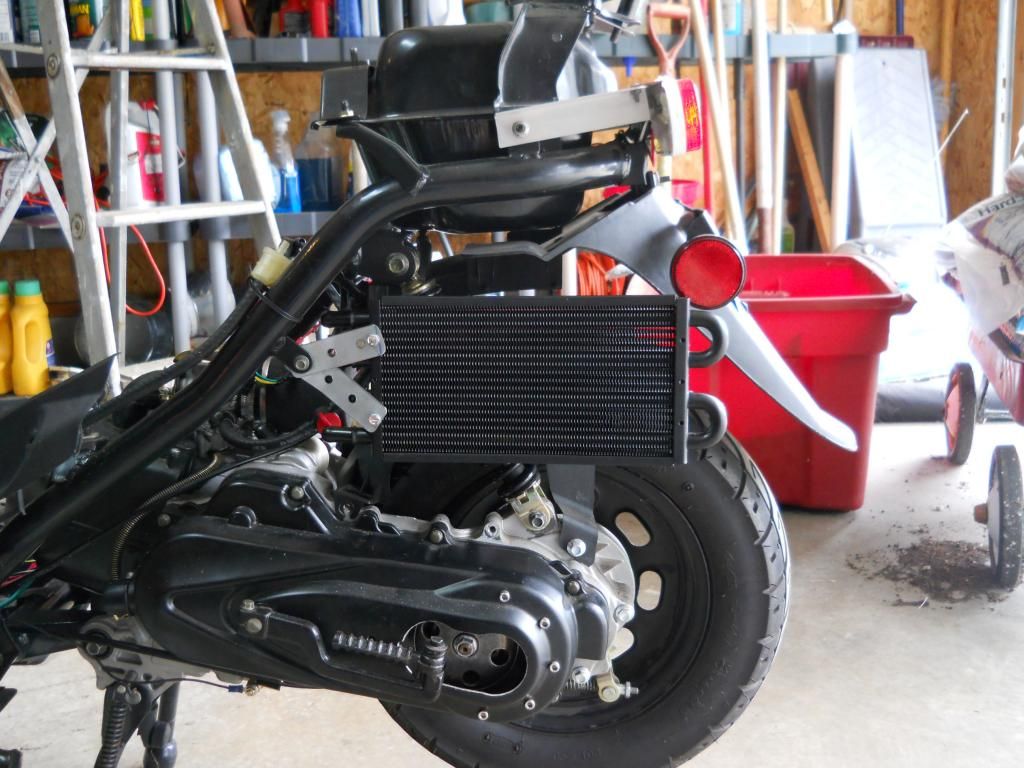 I got so caught up with working on it that I forgot to take more pictures. Besides the pieces you see in the above picture, I made a support for the rear of the radiator that goes from the bolt in the top center of the above pic to the top right of the radiator. Just those two pieces held the radiator nicely, but there was a bit of movement along the z-axis, relative to the view from the above picture. I fashioned a brace for the brace (hehehe) that ran between the two bolts that are below the brake light but above the reflectors and bolts to the support coming from the top-center bolt. I know that much be difficult to visualize; I will get pictures soon. Now I have to paint those pieces. I just finished the last primer layer on them, and assuming the black clouds I see out of my window are there just to taunt me, I will get them painted by tonight. |
|
Doc's Anything Goes
Currently Offline
Posts: 371  Likes: 18
Joined: Jun 13, 2014 16:48:23 GMT -6
|
Post by glavey on Aug 21, 2014 18:50:47 GMT -6
Finished! (With the seat frame at least) 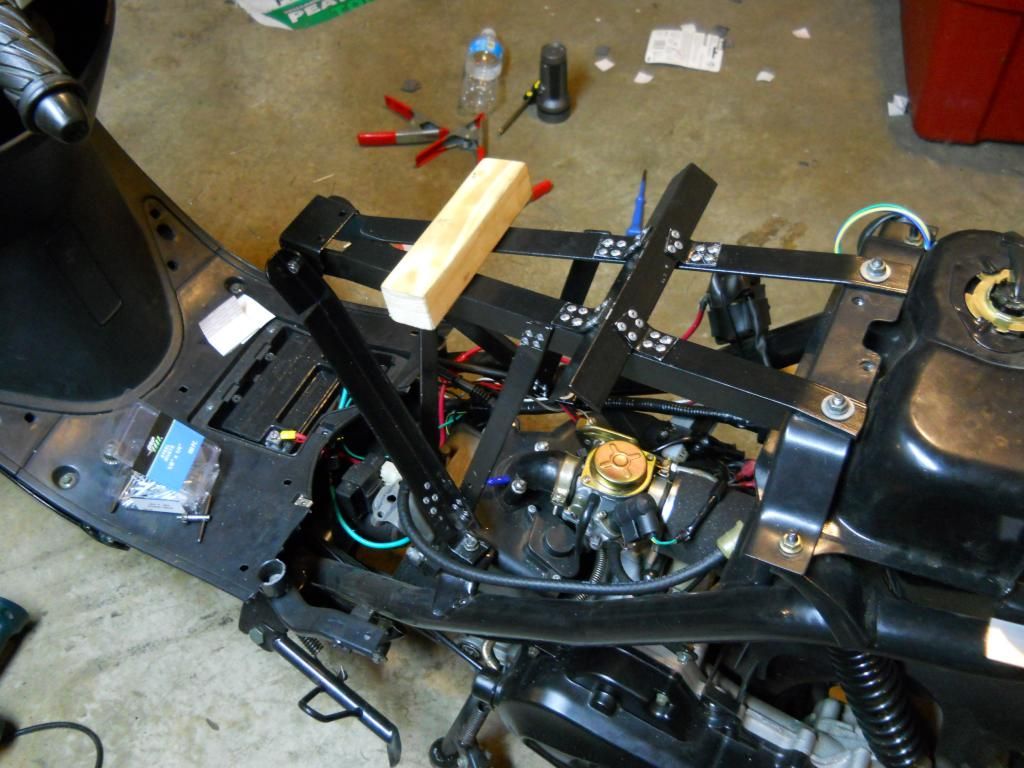 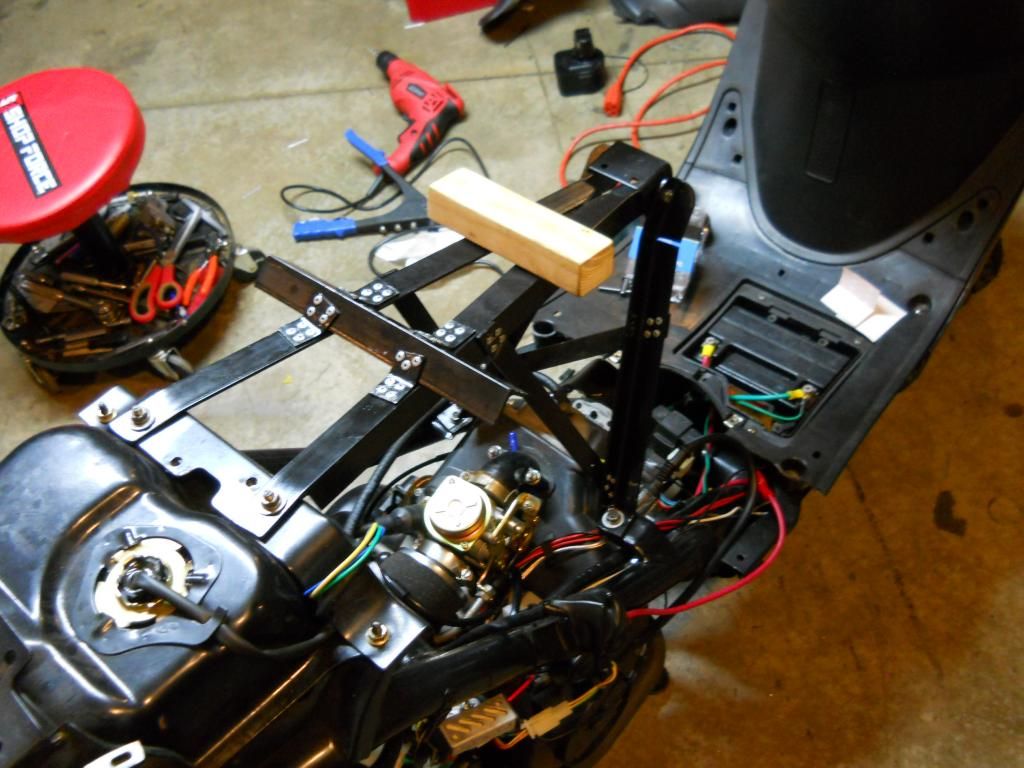 I might, one day, go over the entire thing with a few more coats of black paint to make the rivets stand out less and hide all of the little nicks that happened during assembly. The pieces for the radiator are still going through their final 24-hour dry time from yesterday's painting. All that's left to do is mount the radiator, install the pump, put the temp probe in the 4-way, drill a hole for and install the add-a-drain, and do all of the plumbing. Oh and design/print an air scoop, I hope I have enough filament for that. Of course, I have jinxed myself by saying that. Hopefully by Monday I will be riding a scoot with an oil cooler. After I finish this project, I may take a break for a little while before going into the tachometer. |
|
Doc's Anything Goes
Currently Offline
Posts: 371  Likes: 18
Joined: Jun 13, 2014 16:48:23 GMT -6
|
Post by glavey on Aug 22, 2014 9:33:09 GMT -6
Here's the mounted radiator: 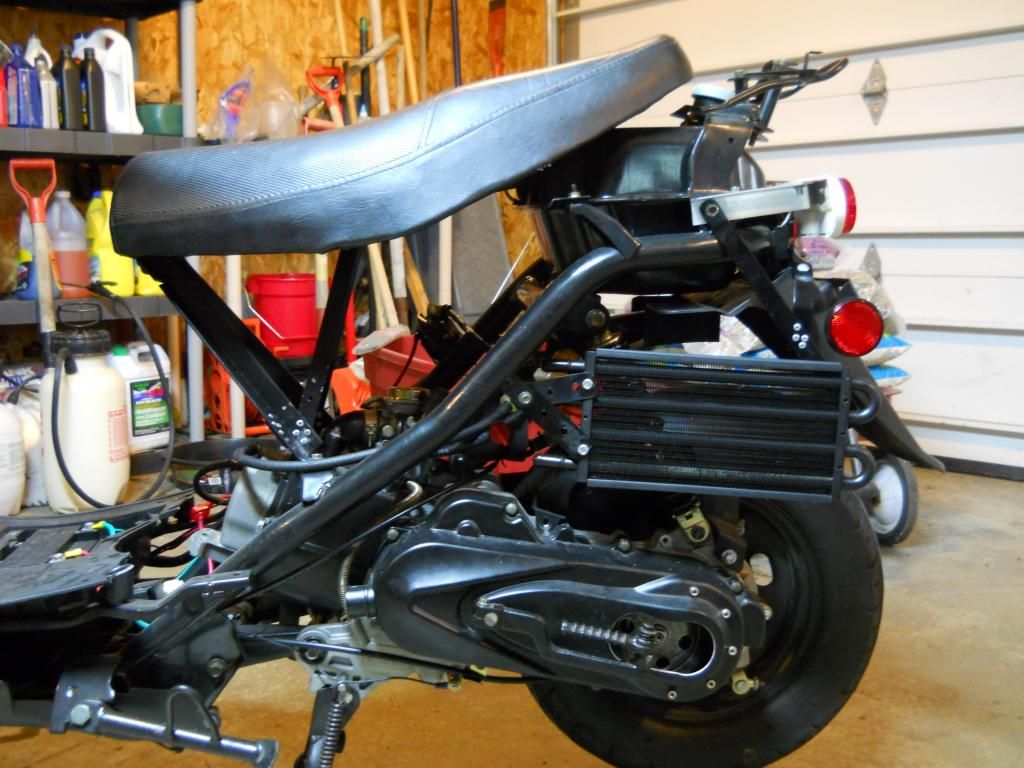 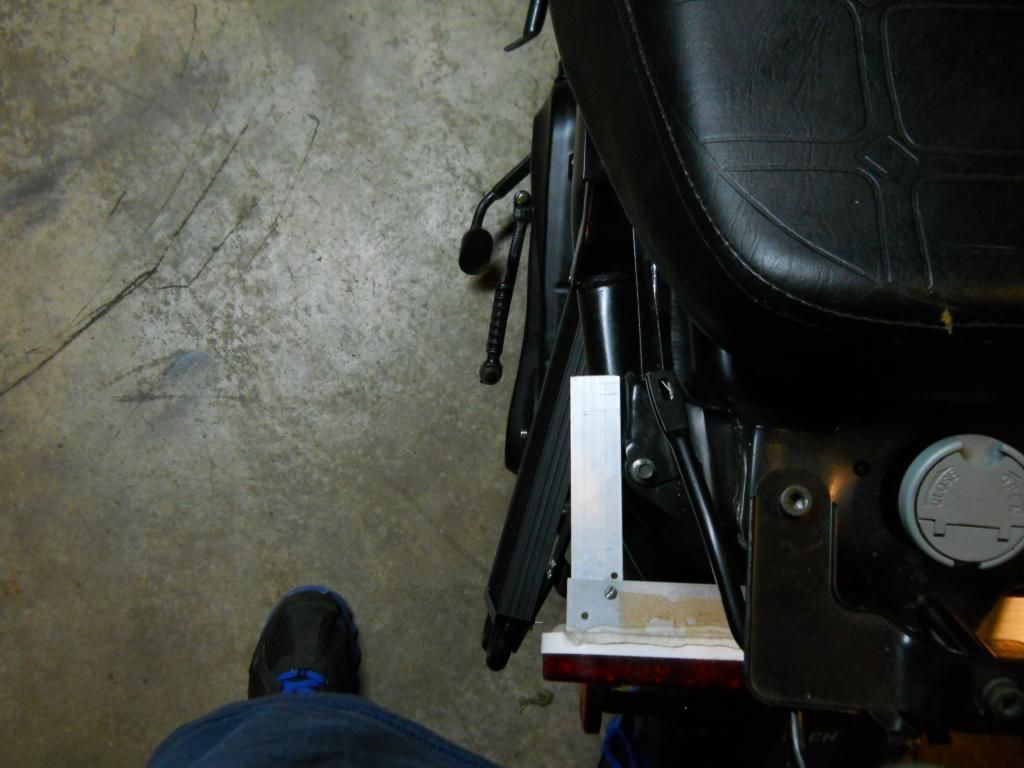 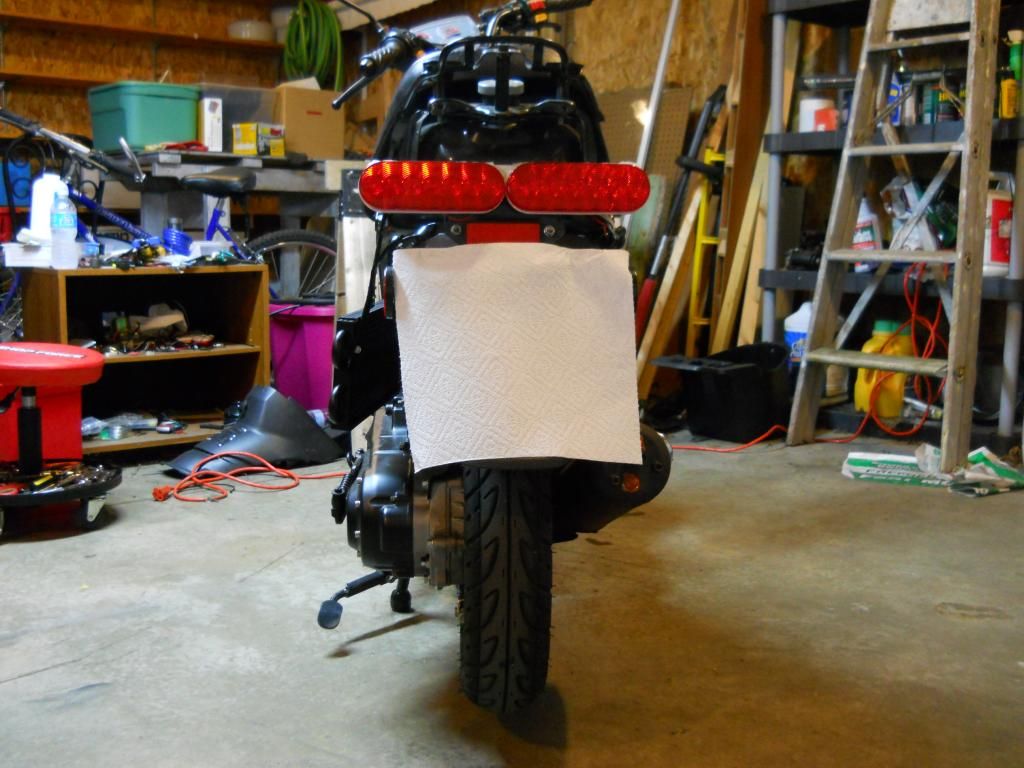 The way I mounted it, it sticks outward slightly so even without an air scoop it will get a little air flow through it. Today I have to go and get a haircut and do a bit of shopping. It has been about 6 months since I got my hair cut and half that time since I shaved my beard. No wonder people make chewbacca sounds when I walk past them, and my hairy-as-heck arms and legs don't help. EDIT: I was going to drill the hole for the add-a-drain today, but my allergies are killing me right now. At the moment I have two tissues stuffed up my nostrils; I must look a bit like Jamie Hyneman with a white mustache. I'll do something else indoors, like designing the air scoops for the radiator. Later dudes. |
|
|
|
Post by cyborg on Aug 22, 2014 22:39:40 GMT -6
Not sure if I like the rear fender mockup,,, you need to trim it back a bit,, it looks like an afterthought ,, like a piece of paper taped on the back of the rig
|
|
|
|
Post by cyborg on Aug 22, 2014 22:59:15 GMT -6
I also think overkill is the operative word on the oil cooler ,,there is so much added oil volume and increased surface area to dissipate heat I don't think there will be any issue with heat,, with a scoop or not,,, I'll wager a guess at a 30-35% drop in operating temp at any given moment ,, and an added bonus I would think oil change intervals can be extended considerably very safely
|
|
Doc's Anything Goes
Currently Offline
Posts: 1,226
Likes: 81
Joined: Apr 4, 2014 3:52:42 GMT -6
|
Post by richardv on Aug 23, 2014 7:20:42 GMT -6
Not sure if I like the rear fender mockup,,, you need to trim it back a bit,, it looks like an afterthought ,, like a piece of paper taped on the back of the rig  |
|
Doc's Anything Goes
Currently Offline
Posts: 371  Likes: 18
Joined: Jun 13, 2014 16:48:23 GMT -6
|
Post by glavey on Aug 23, 2014 7:31:33 GMT -6
That is just a piece of paper towel to hide my registration sticker; the regular plastic fender is still in place. As for the overkill part, "If it's worth doing, it's worth over doing". I looked into smaller radiators, pc watercooling radiators, heater cores, and nearly everything else. The radiator that I bought was the cheapest I could get that wasn't rusty or made with proprietary fittings (heater cores), or constructed in a way that would drastically reduce flow, or just not made for the purposes I had in mind (pc watercooling radiators, of which I have one of approx. the same size). I made the BOM for this project to use the least amount of money without ignoring pieces that are necessary for functionality. A few such examples are: The check valve; without it oil would drain back into the crankcase and cause havok on the next engine start-up, a necessary expense. The bleeder valve; without it, it would be very difficult if not impossible to bleed air out of the system, also I can remove it prior to the engines first start with the cooling loop installed and fill the loop with oil so I can avoid the pump draining the crankcase of oil, a necessary expense. The 4-way fitting; I originally was going to install a tee fitting at the "1" on this picture: 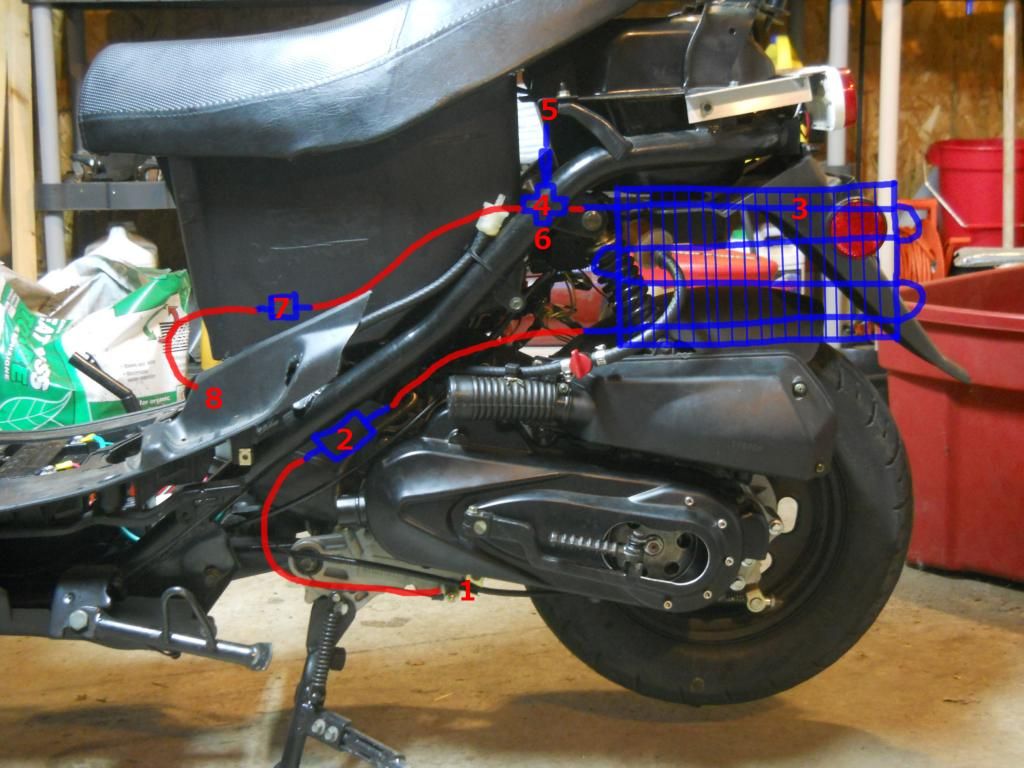 I would install the oil temp probe in the tee instead of in the 4-way. In place of the 4-way I would have put another tee for the bleeder valve. It turned out it was cheaper to buy a 4-way and install the temp probe and bleeder in it, saved a few dollars. I still haven't given up the idea of adding some filtration to the loop, I think that would be a wise addition considering the only filtering the scoot has now, if you can even call it filtering, is a metal mesh screen. Granted the oil temp gauge is unnecessary, but without it i couldn't tell how much or if the radiator was cooling the oil. The voltmeter, and all of the tachometer-related parts are for a different project, so I won't list them in the BOM that I will give when I am done with this particular project. |
|
|
|
Post by cyborg on Aug 23, 2014 9:50:46 GMT -6
Oh i wasn't cutting on you because of the cooler size,,i was just musing on the fact that i think a scoop is a moot point and unnecessary ,,,and i also like the idea of a smaller spin on filter,,when i was building my type 1 vw engines that was the number one mod,,,a remote cooler with an inline filter,,and i was only joking about the paper mockup,,,
|
|
Doc's Anything Goes
Currently Offline
Posts: 371  Likes: 18
Joined: Jun 13, 2014 16:48:23 GMT -6
|
Post by glavey on Aug 23, 2014 12:27:30 GMT -6
Ah, ok. It can be very hard to distinguish sarcasm through text only.
I think some form of scoop might be necessary because the airflow over the radiator will be perpendicular to the fins; the scoop will be more about making the airflow parallel to the fins than actually "scooping" air.
I just got a bit of money by selling some stuff to a pawn store, so my reserve funds are back to normal. I'll look into one of those remote mount filters, or maybe an inline filter that uses one of those thumb-sized replaceable paper filters.
I'm off to drill the hole for the add-a-drain.
|
|
Doc's Anything Goes
Currently Offline
Posts: 1,226
Likes: 81
Joined: Apr 4, 2014 3:52:42 GMT -6
|
Post by richardv on Aug 23, 2014 13:09:57 GMT -6
I see glavey's project as just a pastime, hobby, experimenting, tinkering or what ever you wish to call it. For fun and learning. His sharing the project with us is appreciated as we could all learn something about a common interest. Keep it coming my friend.  |
|
Doc's Anything Goes
Currently Offline
Posts: 371  Likes: 18
Joined: Jun 13, 2014 16:48:23 GMT -6
|
Post by glavey on Aug 23, 2014 15:29:26 GMT -6
I see glavey's project as just a pastime, hobby, experimenting, tinkering or what ever you wish to call it. For fun and learning. His sharing the project with us is appreciated as we could all learn something about a common interest. Keep it coming my friend.  Thanks so much man! That means a lot to me. There are a few reasons I chose to make this thread, one being what you have mentioned; I am sharing my progress, triumphs, failures, epic failures, and thoughts along the way to hopefully help someone else who might have this or a similar project in mind and could benefit from my failures without having to have it cost him or her any money or time. Like bashan has done with his oil cooler thread, and countless other people in countless other threads. Another reason I made this thread is because I have severe social anxiety; I don't like going out into the public or being in social situations, and when I am there I am always so nervous about what to do, what to say, how to say it, who to talk to, when it is ok to crack a joke and when it is best for me to just shut up. With avoiding social situations naturally comes a lack of social skills. This thread and talking to all of you is helping me learn how to talk to people, what to say, how to say it, and when to say it. One more reason is I have a very bad habit of not finishing projects. I always get part way through it and I lose interest, or I'll still have the interest, but I just can't make my self do the project, or I find something else that grabs my attention more than my current project and then that new thing becomes my current project. My (undiagnosed) A.D.D. doesn't help any either. This thread keeps me liable to keep working on the project, or else I'll have this half-finished project thread on a forum where people will keep asking my questions about stuff. Also, it had given me heaps of touch-typing practice. Enough of that, back to scooter stuff. I finished drilling the hole and installing the add-a-drain. The place I had originally intended to drill the hole wouldn't have worked out. 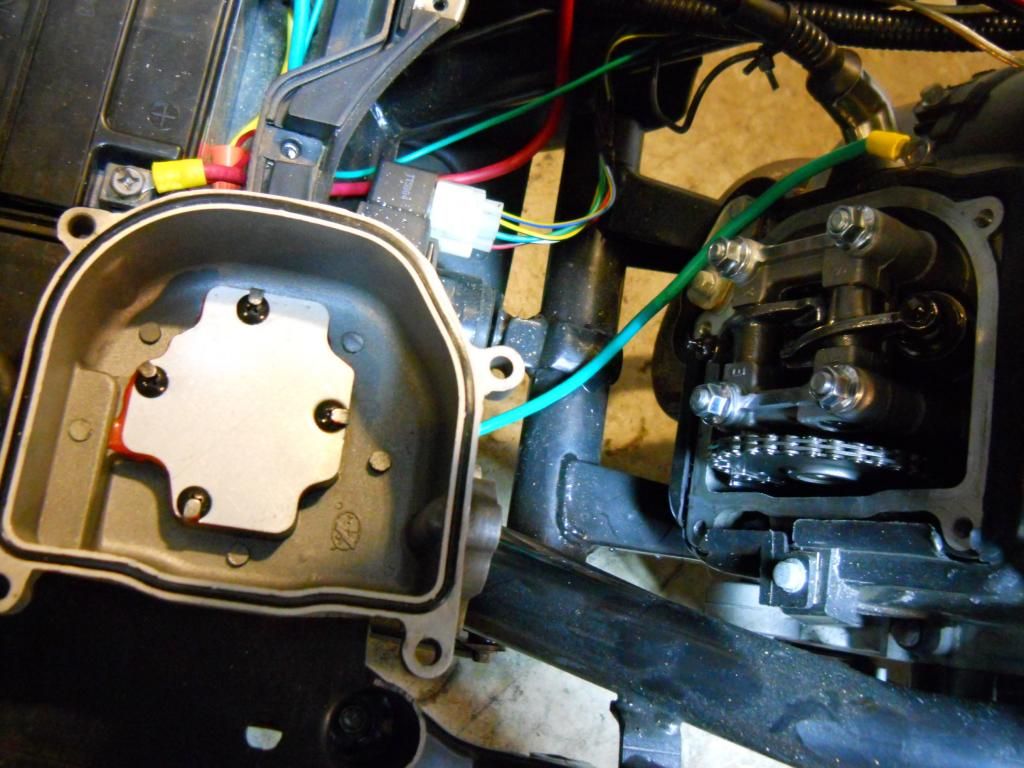 The original planned location was on the side of the valve cover that the timing chain is on. The bolt that holds the add-a-drain in place from the inside would have interfered with the cam gear and chain. The top, right behind the breather port was my second choice, but the bolts were just too big and the available room just too small to put it there. I finally settled on the side of the valve cover that the spark plug is near. No cam gear, oil labyrinth, or valves to interfere with the bolt, although the wall wasn't perfectly flat. 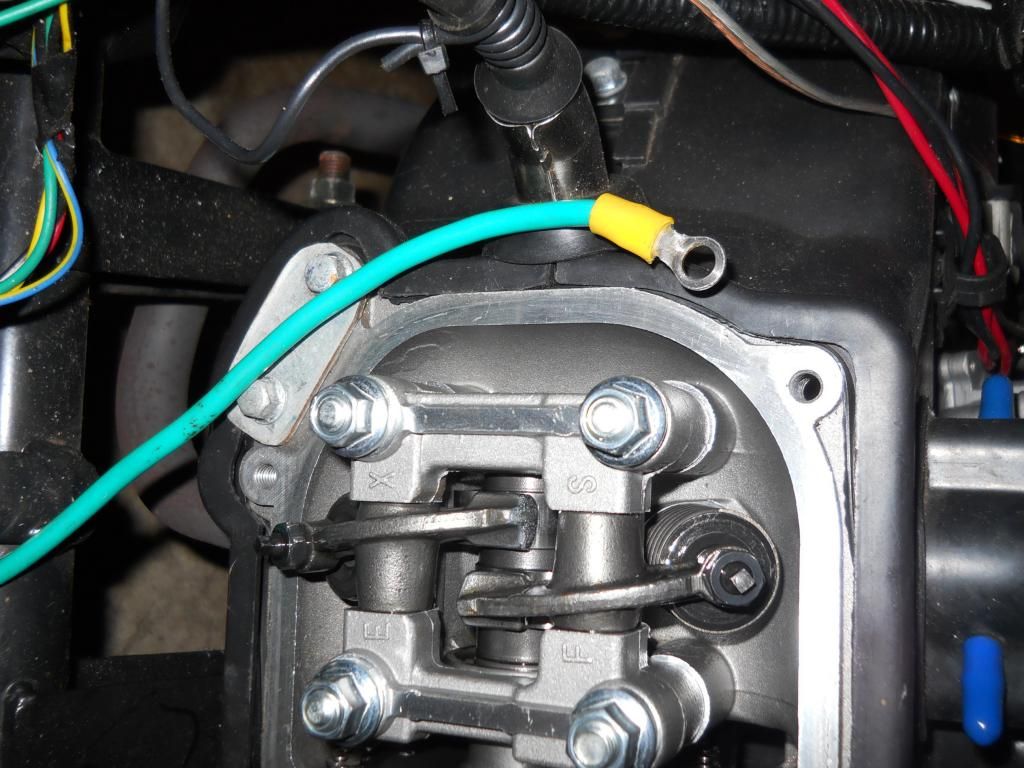 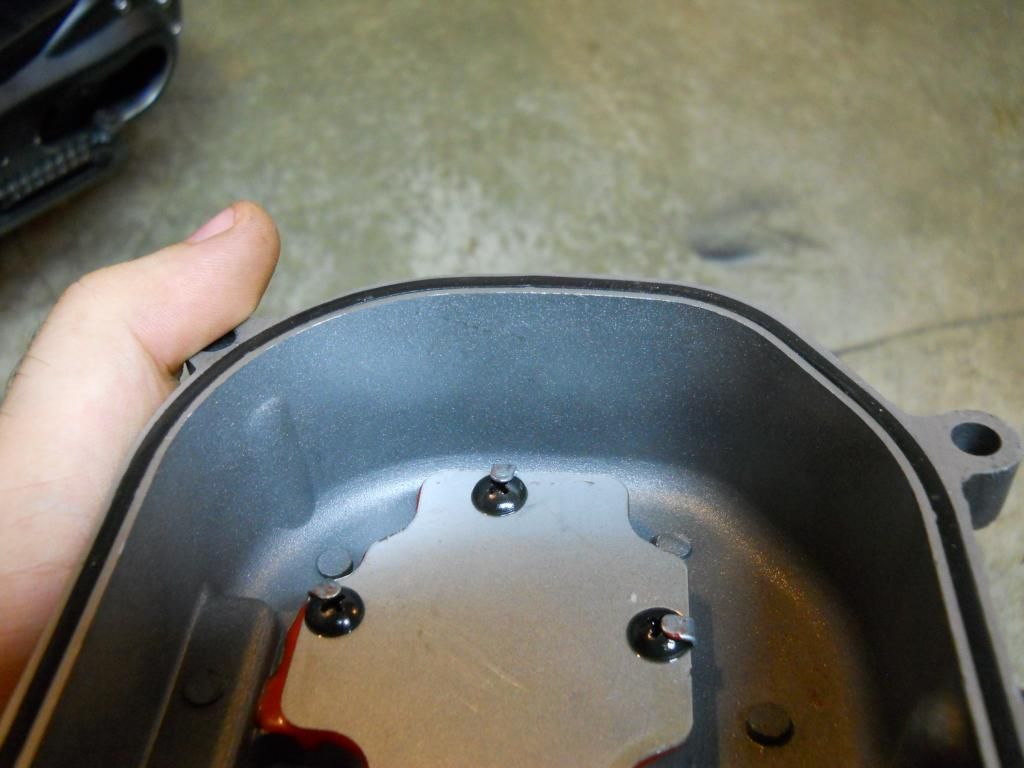  I used some copper high temperature silicone to fill in the voids caused by the rounded shape of the valve cover wall. 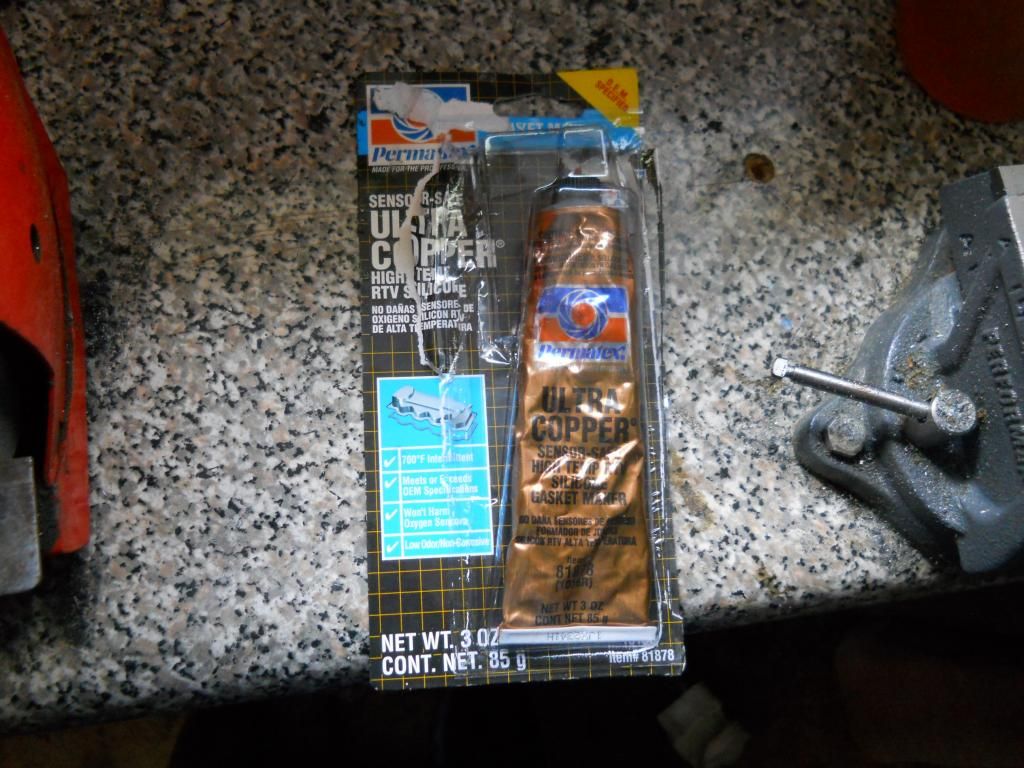 Here is the cover in the vise with my improvised holder: 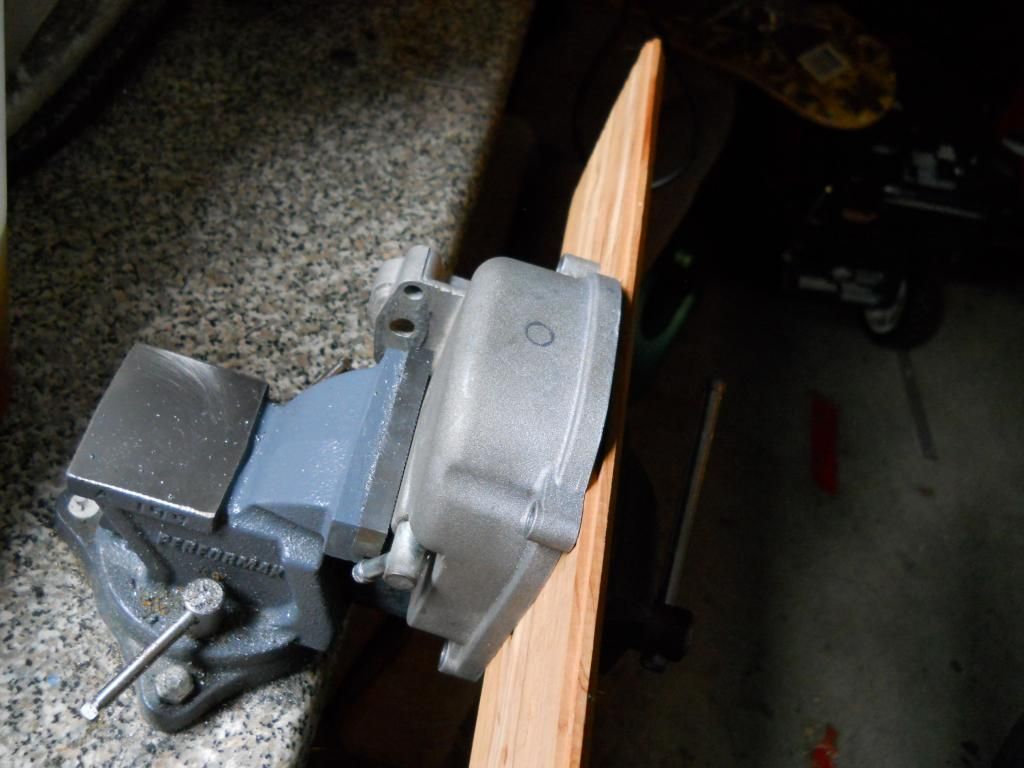 The first thing I realized was this metal is SOFT! It took me 1/10 the time to drill a hole 4x bigger than I did in the angle iron. 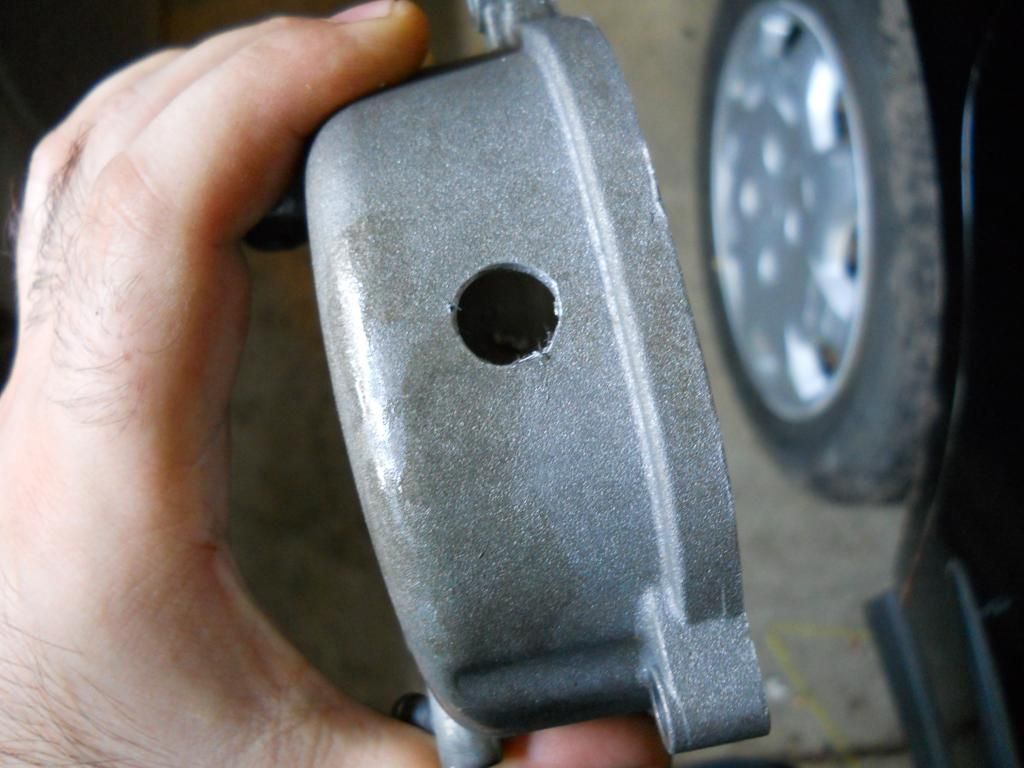 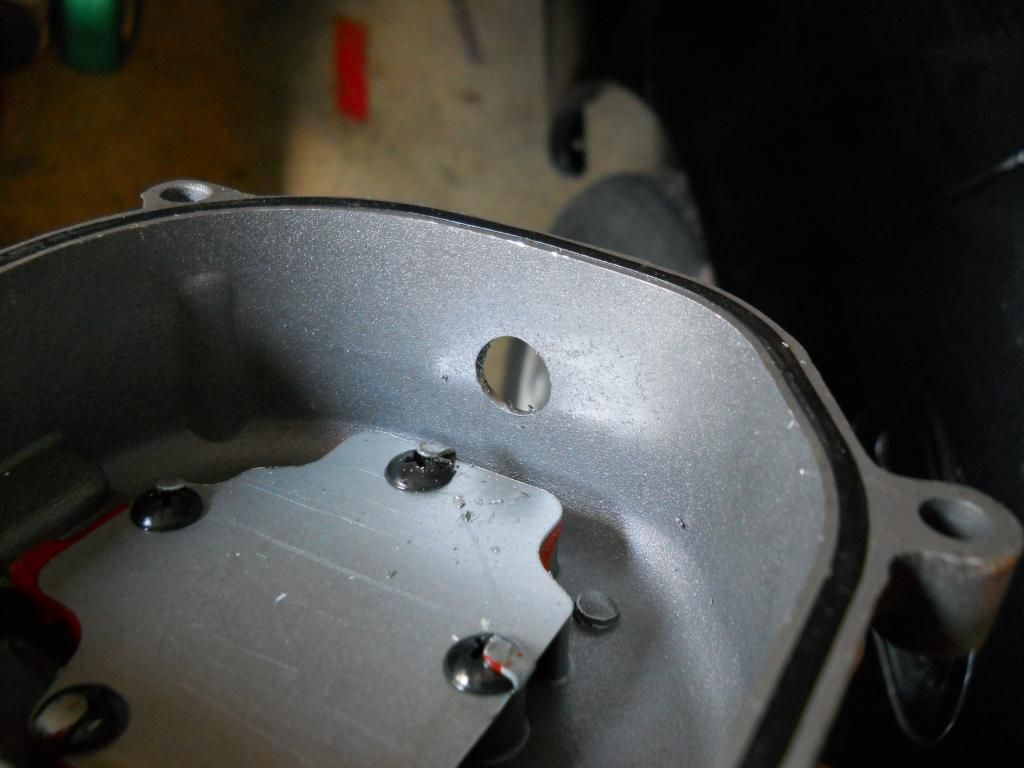 After I drilled the hole I meticulously cleaned the valve cover and oil labyrinth with water, then water with dish soap, then water, then alcohol, then water, then carb cleaner, then water, then wd-40 to remove any trace of metal shavings anywhere in it. Here: 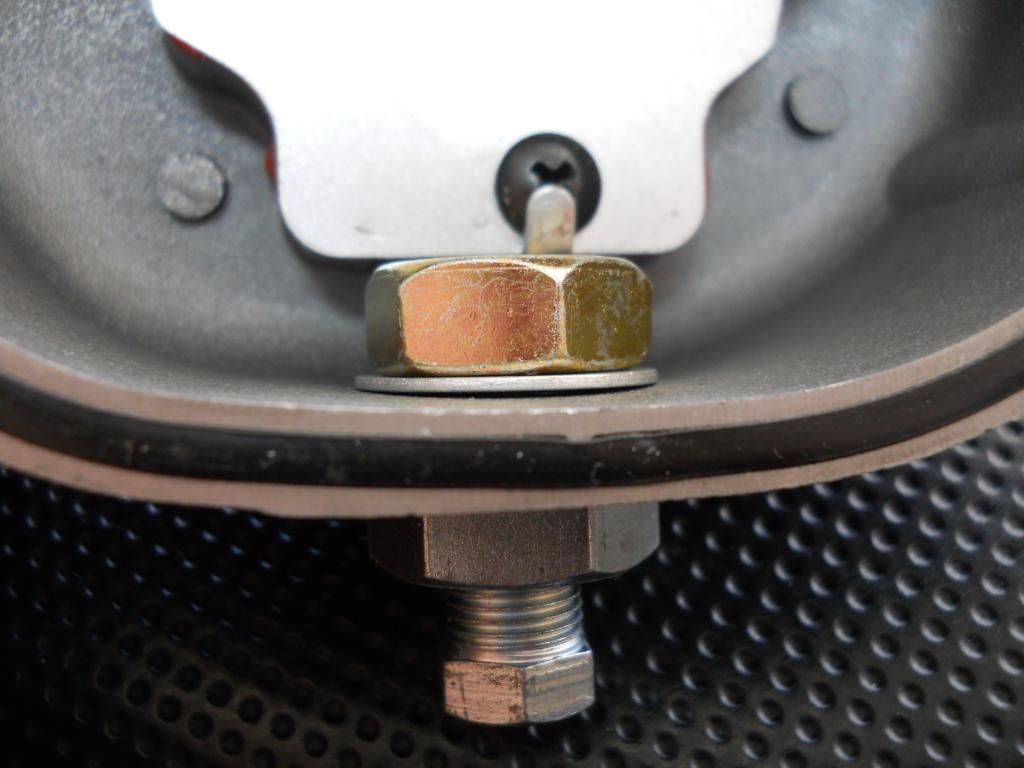 And here: 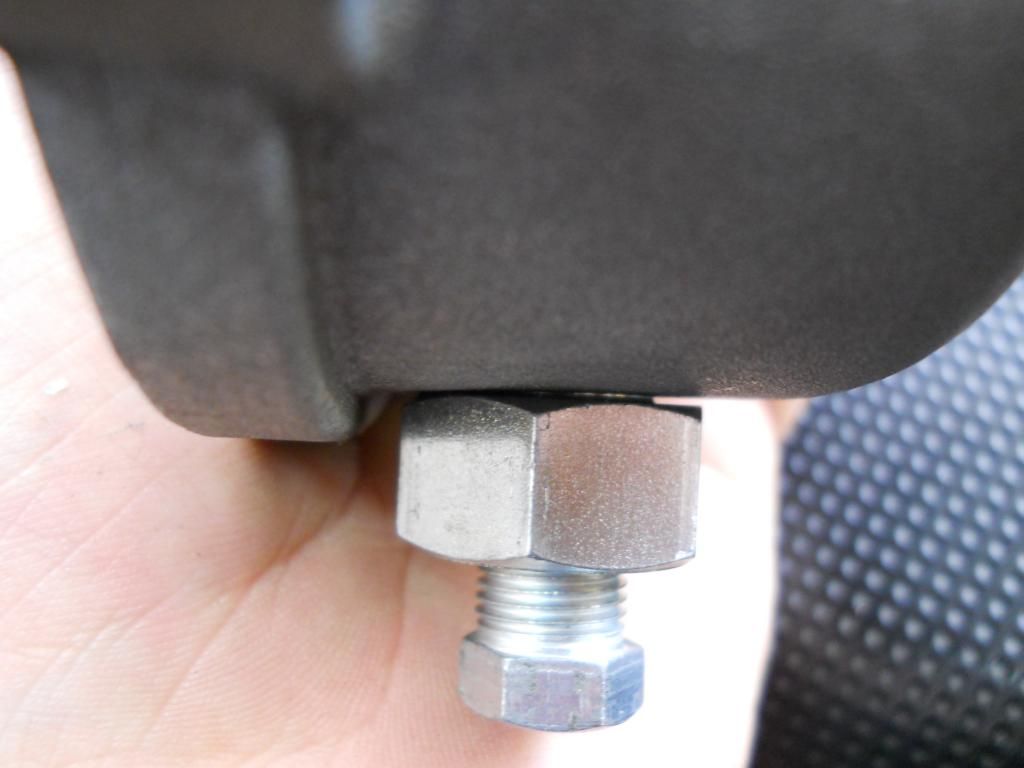 You can see the space from the rounded wall. I generously applied the silicone and assembled the add-a-drain: 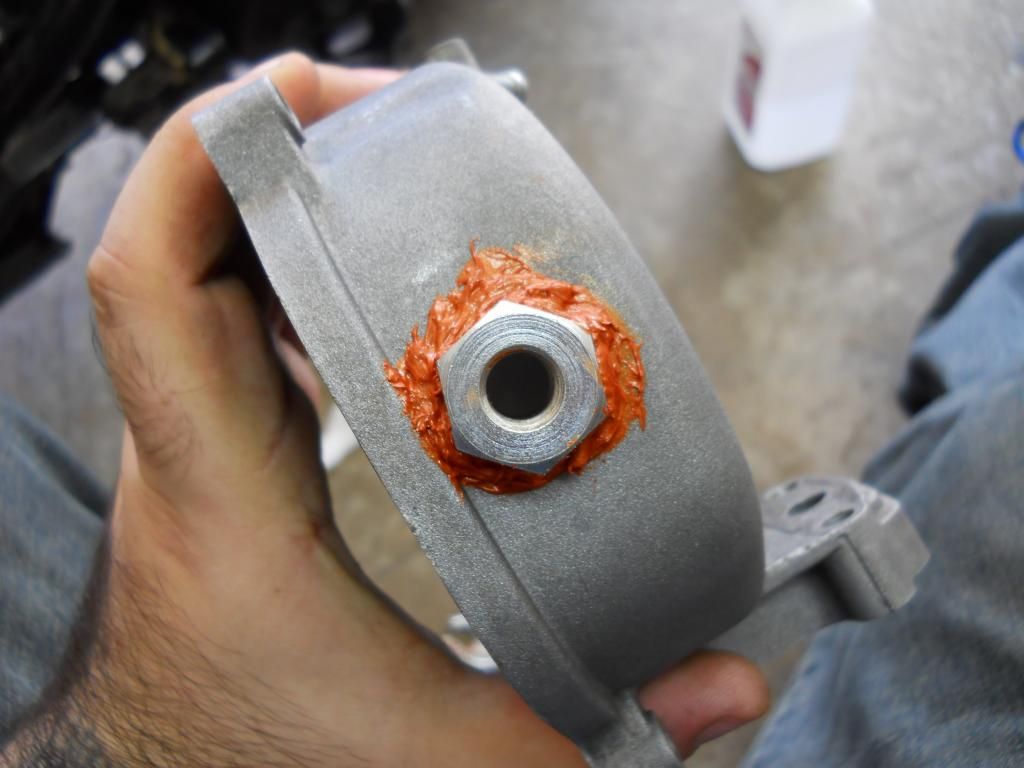 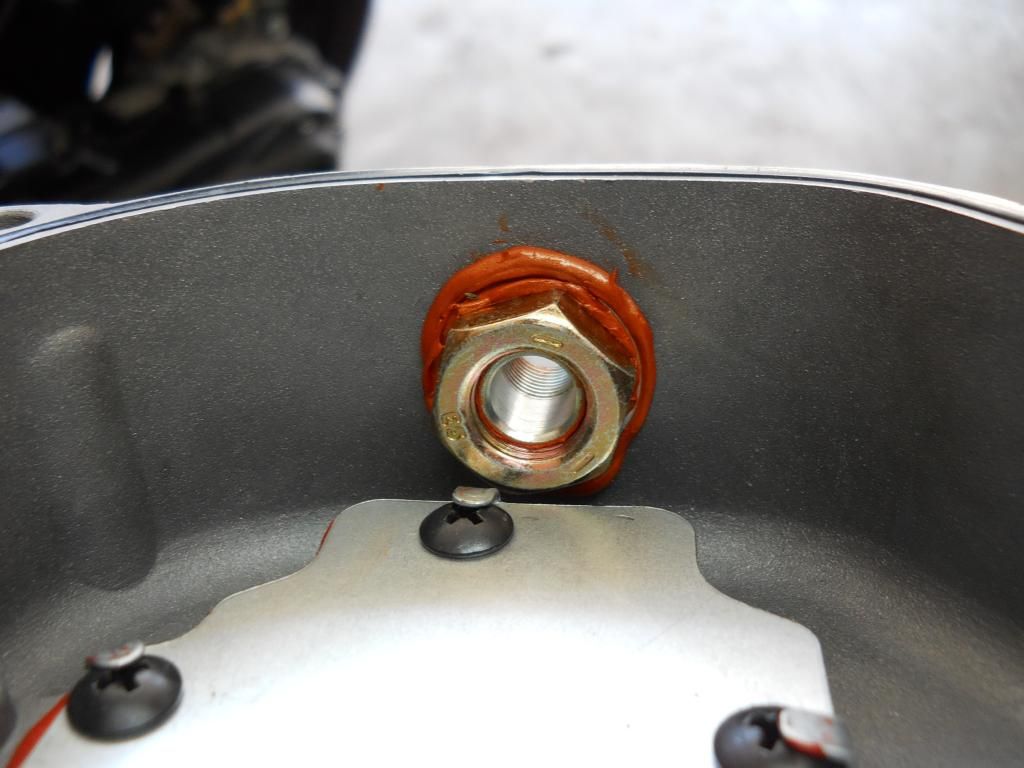 I've used this silicone stuff before as an exhaust gasket because the flange on my exhaust pipe isn't flat at all, and the fiber/metal washer was crap. If it can withstand exhaust temperatures, I'm sure it will hold up to oil temperatures. And yes, I did check to see if it will degrade/disintegrate with constant contact with oil, it won't. I just can't use it on anything that will cause it to come in contact with gasoline. Now I have the valve cover sitting in my room drying for a day. I won't do much in the garage tomorrow because my scooter is in there with a completely exposed valvetrain and I don't want any more bits of dust in there than there will already be. I'm off to research oil filters, later dudes. |
|

