Senior Clinician
  
Currently Offline
Posts: 225
Likes: 40
Joined: Sept 16, 2013 18:11:26 GMT -6
|
Post by jerryscript on Jan 25, 2015 13:39:08 GMT -6
I really like the speckled effect. Very nice job. Thanks! No strange looks from anyone while riding this morning, good to go!  |
|
Senior Clinician
  
Currently Offline
Posts: 225
Likes: 40
Joined: Sept 16, 2013 18:11:26 GMT -6
|
Post by jerryscript on Jan 24, 2015 21:28:26 GMT -6
Looks great my man!!!! Excellent work,,,I always use an exacto knife to score edges so it has a clean line and no tears,,, but all in all a very nice paintjob Where were you about 12 hours ago to warn me about that? LOL, rookie painter mistake, lesson learned, go light on the primer at the edges and use a blade to cut away when dry. I went to Pep Boys and got one of the touch up pens in indigo blue, nice and dark. I'll use it to clean up the edges I screwed up as much as I can. It's part of the Dupli-Color line, called a Scratch Fix All In 1. It has a couple of different tips, one for roughing and cleaning the scratch, a pressure sensitive tip to fill scratches, and a paint brush. It also has a foam brush in the handle with clear coat. I used the rough tip around the edges that I had issues with, and the pressure tip to clean it up. From a distance, you would never know, close up inspecting it all the flaws are visible. Can't say I've seen too many people spending a lot of time inspecting helmets up close, so I think I'm good to go! |
|
Senior Clinician
  
Currently Offline
Posts: 225
Likes: 40
Joined: Sept 16, 2013 18:11:26 GMT -6
|
Post by jerryscript on Jan 24, 2015 18:33:09 GMT -6
Thanks cyborg ! I spent today finishing her up. First wet-sanding with 2000 grit sandpaper wrapped around a soft sponge, then clean off and look for shiny spots and specks: 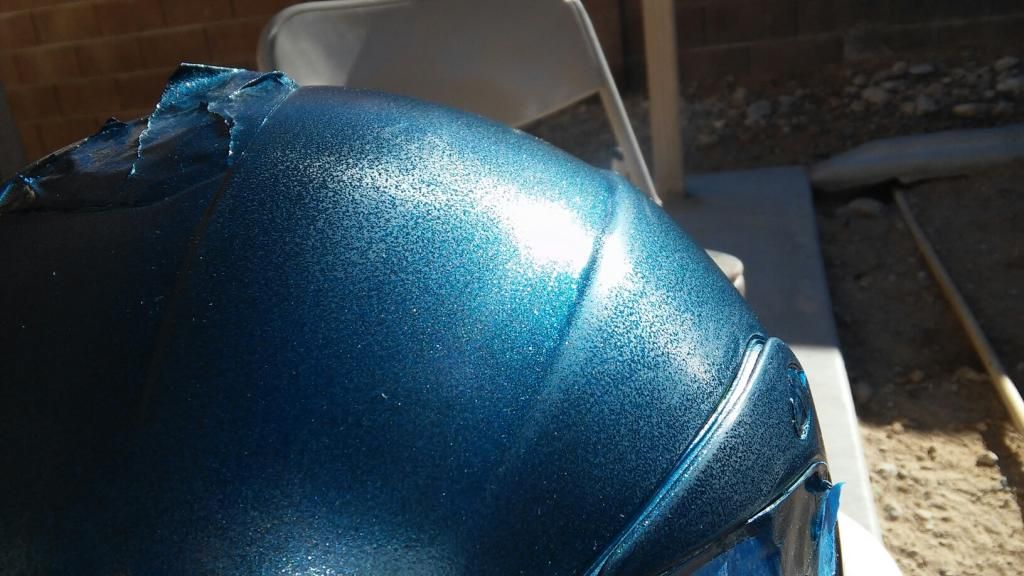 Getting closer: 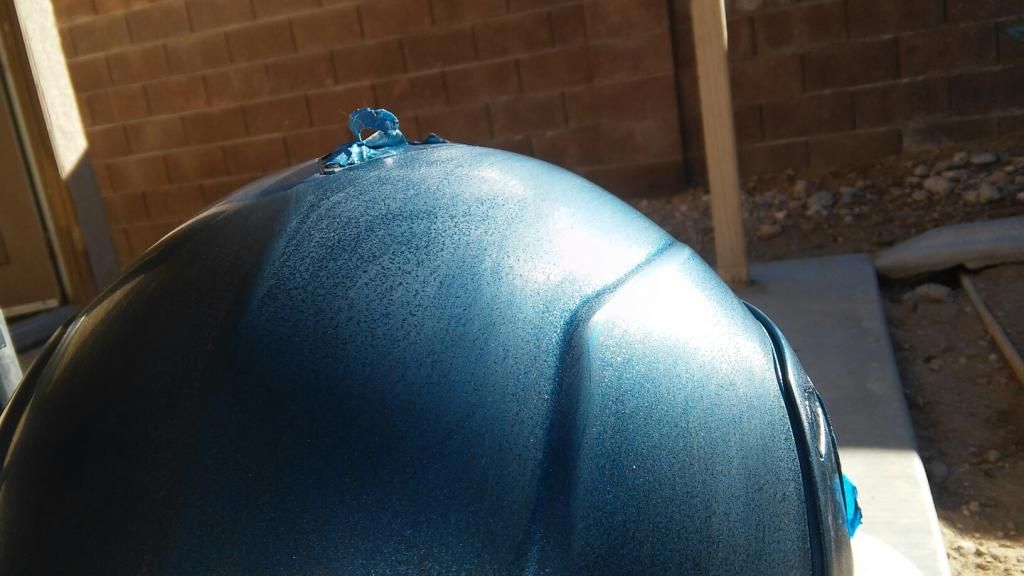 Almost there: 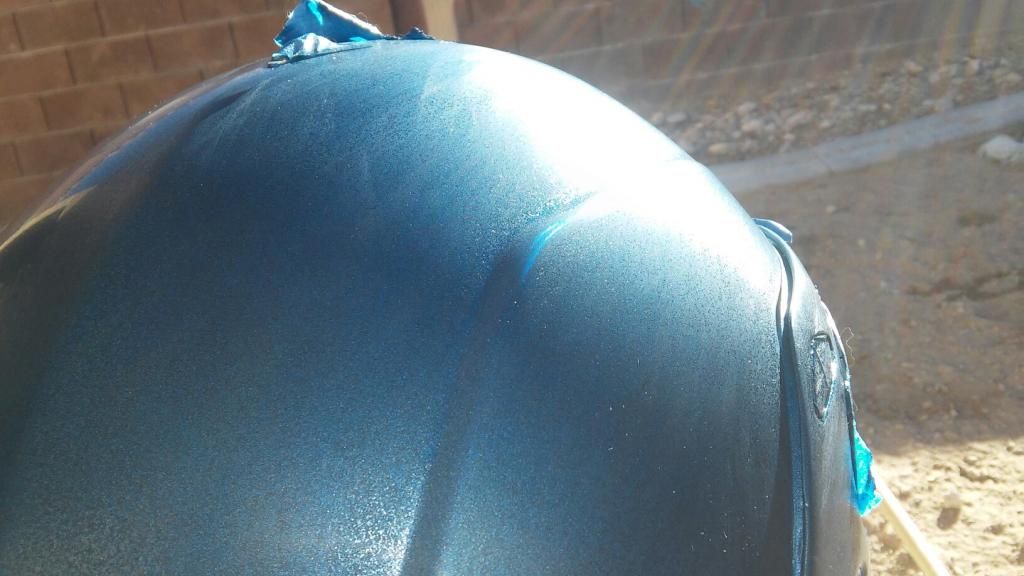 Next, I used Turtle Wax medium to fine polishing compound. Using a wet cloth, applying the polish generously, using a lot of elbow grease to really work it in, then buffing off with a soft dry cloth. After about a half hour, I'm starting to get a nice shine: 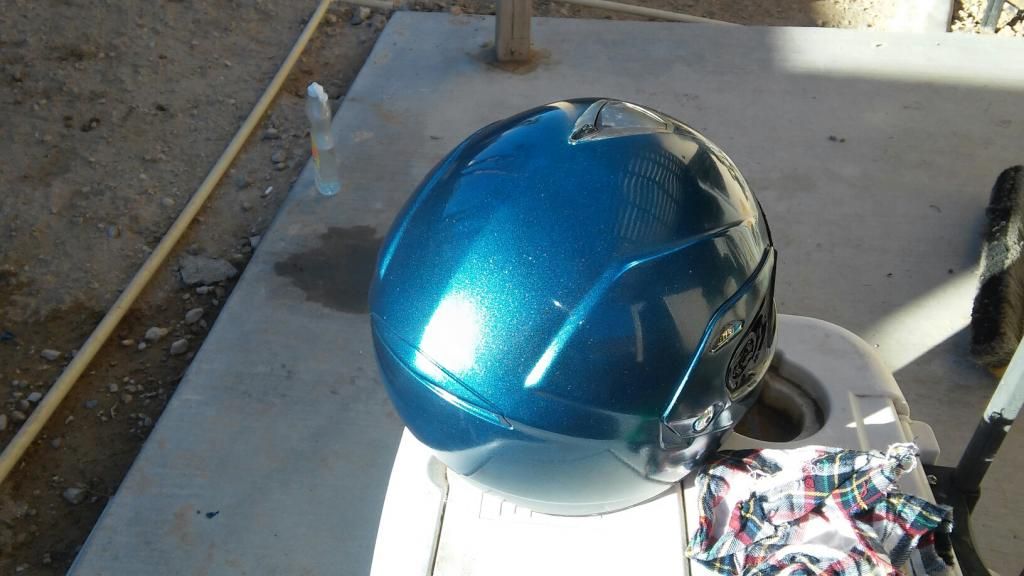 I don't have a buffer pad, if I did I could use even finer polishing compound to really bring out the shine, but I'm happy with what I have now. Just need to touch up some spots where the taping tore the paint and/or overlapped an area, thinking I may just use fingernail polish in some of those spots. Here it is all shined up next to the scooter: 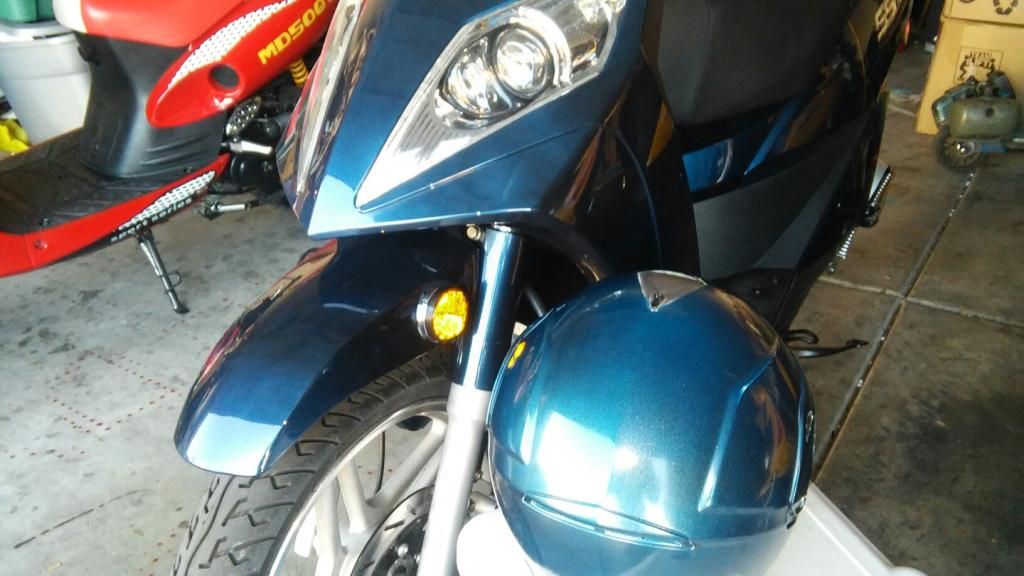 Here's a short video comparing the scooter and helmet paint jobs up close so you can see the metallic flake: |
|
Senior Clinician
  
Currently Offline
Posts: 225
Likes: 40
Joined: Sept 16, 2013 18:11:26 GMT -6
|
Engine swap
by: jerryscript - Jan 24, 2015 14:57:13 GMT -6
Post by jerryscript on Jan 24, 2015 14:57:13 GMT -6
Could be as simple as the spark plug boot. I had one begin to get loose. It was hard to start with the electric starter, but started easy with the kickstarter, I eventually found out because pushing down on the kickstarter pulled it just a bit causing it to make better contact. While riding, I would have times when I lost all power, surges and bucking like a bronco, then it would power back up. The looseness of the spark plug boot meant it only worked when vibrated into the right position, any hard bump or the right vibration could knock it loose, then it would vibrate back on. Replaced it after chasing down possibilities in the carb and elsewhere thru the system, and it has run perfect ever since.
|
|
Senior Clinician
  
Currently Offline
Posts: 225
Likes: 40
Joined: Sept 16, 2013 18:11:26 GMT -6
|
Post by jerryscript on Jan 24, 2015 14:49:01 GMT -6
What about the "Secret 60s" that were all the rage a few years ago? Did they have standard engine stamps?
I have the BN139QMB, it is standard stud spacing, but taller head with the valves that are 3mm taller requiring a different set of rocker arms.
|
|
Senior Clinician
  
Currently Offline
Posts: 225
Likes: 40
Joined: Sept 16, 2013 18:11:26 GMT -6
|
Post by jerryscript on Jan 23, 2015 21:30:13 GMT -6
Thanks! I used Dupli-Color primer and paint, and some generic clear lacquer I had left over from a cabinet repair. I went really cheap on the polishing compound, Turtle Wax light to medium polishing compound for $6!
|
|
Senior Clinician
  
Currently Offline
Posts: 225
Likes: 40
Joined: Sept 16, 2013 18:11:26 GMT -6
|
No spark.
by: jerryscript - Jan 23, 2015 19:23:23 GMT -6
Post by jerryscript on Jan 23, 2015 19:23:23 GMT -6
It may seem to be running fine, but alley's test shows it's running lean. If you run lean at WOT for a long period, you could melt the piston itself, or burn up the valves, or any of a half dozen other possibilities. Lean is not safe on engines that run at high RPMs for sustained periods.
If you follow alley's tuning guide, all the way through including the test rides where you back off the throttle, you will have a good running scooter.
Be sure you don't have any old vacuum lines while you're at it, even a small crack can cause issues.
|
|
Senior Clinician
  
Currently Offline
Posts: 225
Likes: 40
Joined: Sept 16, 2013 18:11:26 GMT -6
|
Post by jerryscript on Jan 23, 2015 17:47:33 GMT -6
Now that I have a beautiful metallic blue scooter, I need a matching helmet. I really like my safety yellow Bilt helmet, has decent ventilation, an inner sun visor, nice snug but comfy fit, and is modular so I can put on my glasses easy and take a drink at a stop. So I decided to try to paint it to match my scooter as close as I can. Here it is in the original safety yellow finish (my other scooter is yellow, but more of a sports car yellow): 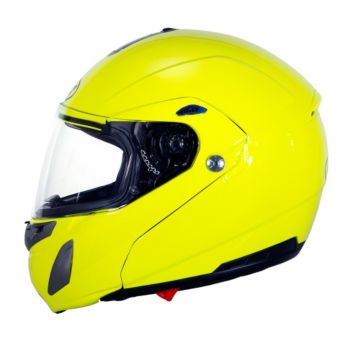 I started by roughing up the surface with 200 grit sandpaper, cleaned it up and let it dry. I then masked off all the parts I didn't want to paint, and all openings (solvents dissolve foam, must be careful). Next, I applied to good coats of grey sand-able scratch filling primer. Here's how she looks primed up: 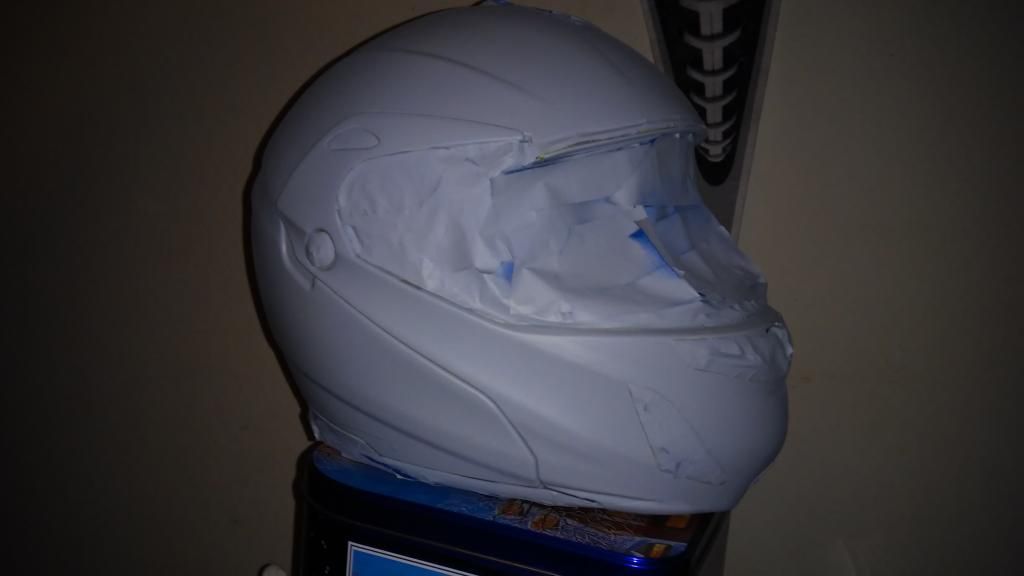 I let it dry overnight, even though it said it was good after 2 hours, I wanted to be sure the primer was cured (waited till no more smell). Then I wet sanded it with 400 grit sandpaper. I sanded through a tiny bit on a couple of the ridges, very hard to sand all the weird shapes on a helmet. I then cleaned it up and let it dry. Next, I applied four coats of the base metallic blue I found that was a shade lighter than my scooter, letting it dry for a half hour between each coat. Here she is with the base coat applied: 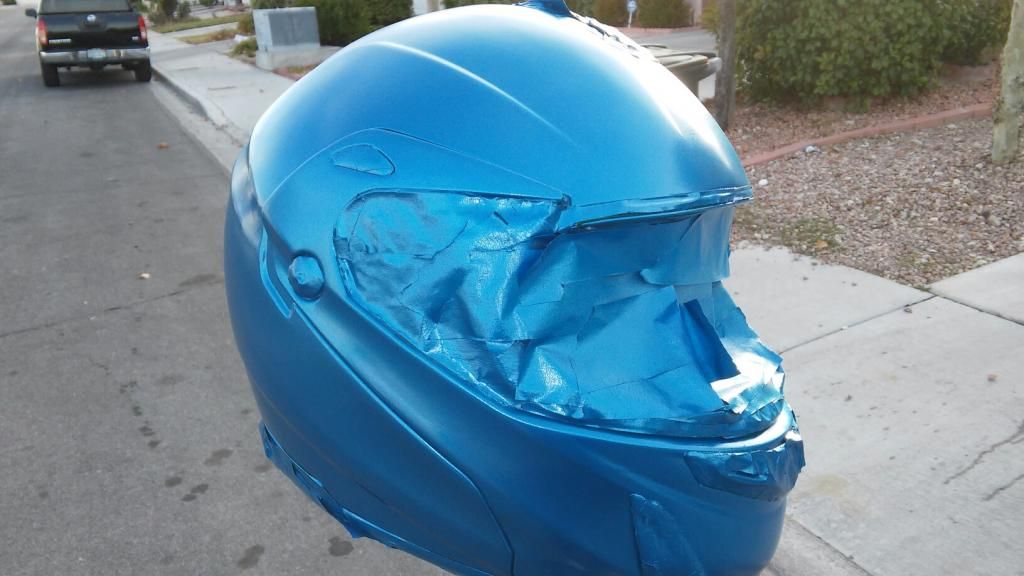 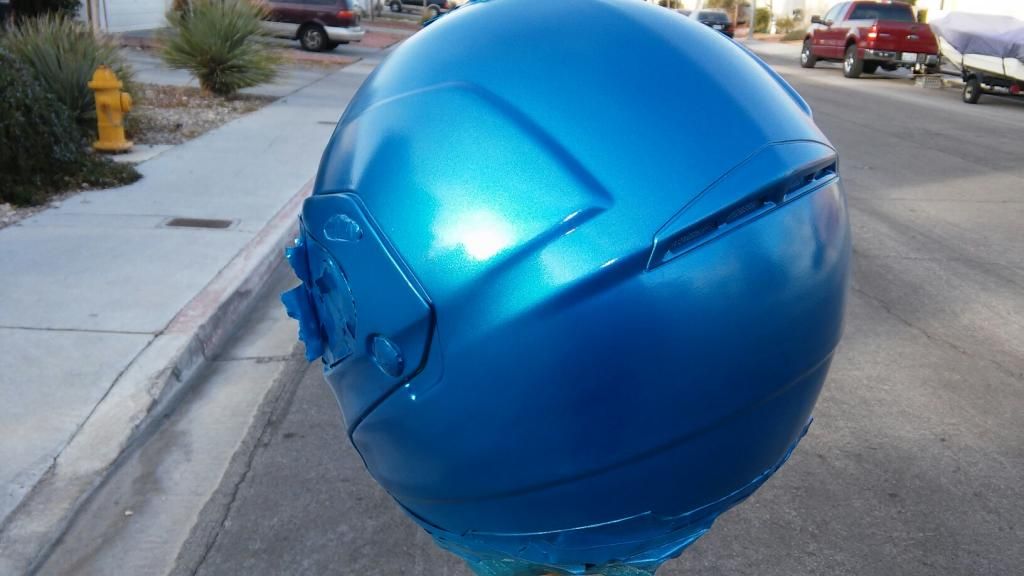 I let the base coat dry for about a half hour, then used a fogging technique to apply a black metallic over the base metallic blue in an attempt to match the dimensional look of my scooter's paint job. By fogging I mean I acted like a hairstylist putting hairspray on someone, holding the can back twice as far as normal and moving it rapidly all over the place, allowing the paint to fog/mist onto it. After comparing to the scooter, I fogged it two more times with the black metallic, then once with the blue metallic. Here it is after the fogging: 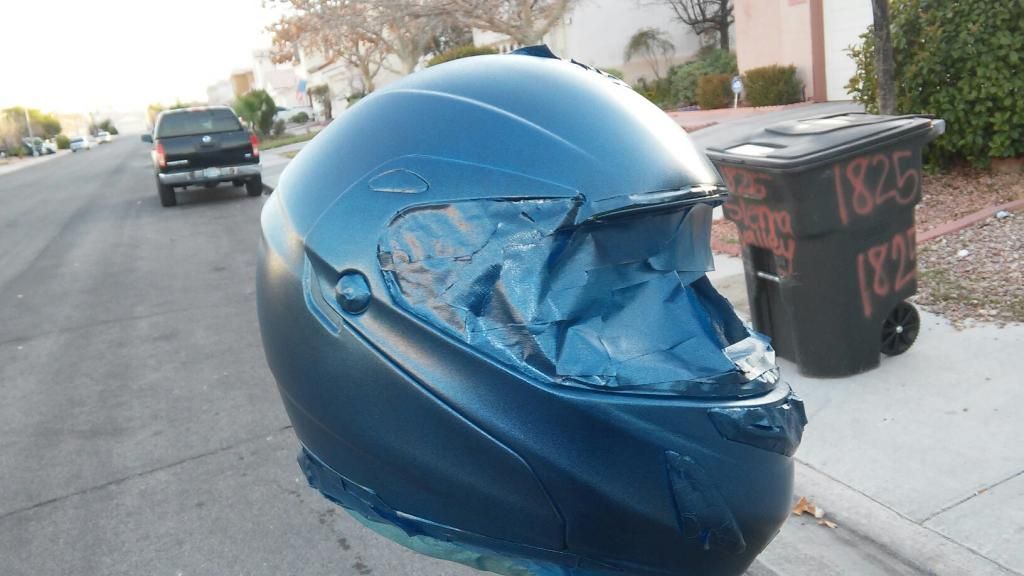 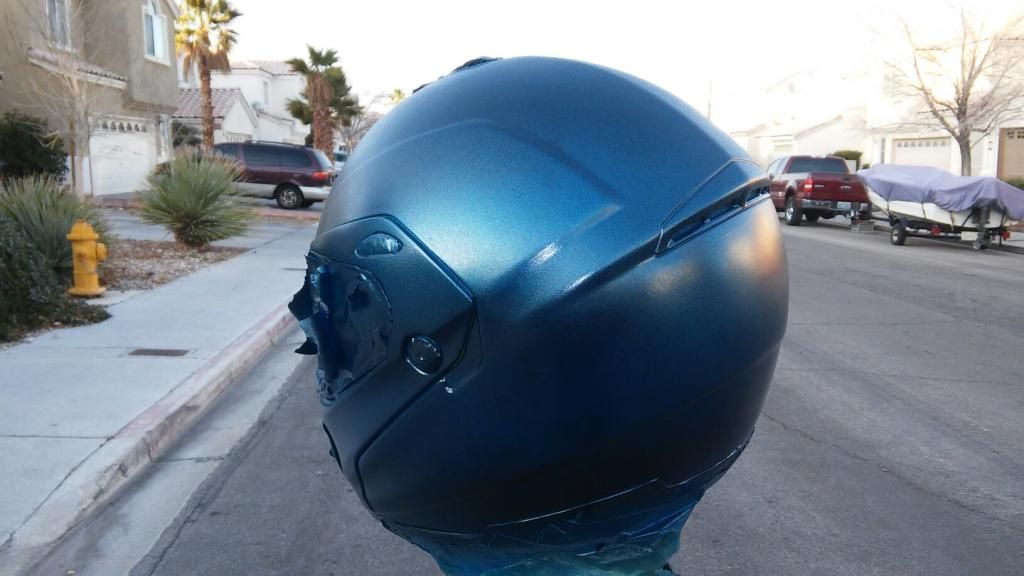 I let it dry overnight again, with colder temps it's always good to wait overnight between painting steps like these. Today I applied 6 very light coats of lacquer clear coat, allowing each to dry for half an hour. It was cooler than I hoped for when doing this, and I ended up with a lot of fisheye I'll have to wet-sand and polish out tomorrow. Here it is on the scooter after clear coating: 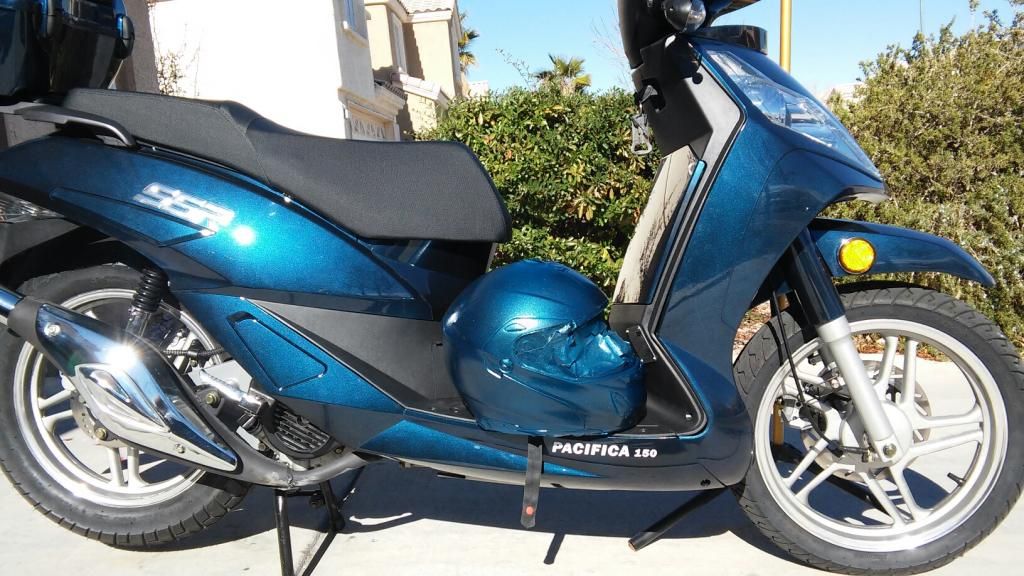 Even though it is a shade lighter than the scooter, I think I did a pretty good job approximating the dimensional effect the scooter's paint job has on my helmet. I'll post a pic of it all polished up tomorrow, gotta let the clear coat set all the way before wet-sanding, regardless of what the directions say safe handling time is (handling is not the same as sanding). |
|
Senior Clinician
  
Currently Offline
Posts: 225
Likes: 40
Joined: Sept 16, 2013 18:11:26 GMT -6
|
Post by jerryscript on Jan 23, 2015 13:39:05 GMT -6
Sorry to hear you had troubles with the first material, sucks having to spend more when you are DIYing it. Hope it goes better with the 1/4" material. Curious, how much does it deflect without cracking? Is the bend too much to force with the mounting bolts alone? My cheapo universal windshield is thin enough to wrap around my instrument cluster on my 50cc, and it has a more aggressive curve., but vibrations tore into the paint so I raised it just above the cluster since it only goes over the top most 1/4" of it. I mounted my trunk today, see what you mean about the holes, but I didn't have to re-drill, just started the two bolts at an angle and they cut in on their own. First time I've had a trunk on any of my bikes, scooters, or motorcycles, so I'm giving it a week to see if I like it. It's such a weak piece of crap I'm not very confident in it! I'm almost done with painting my helmet to match my scooter. Started out with my safety yellow Bilt helmet, which I used on my yellow 50cc for the past year and a half. I used 320 grit to rough up the surfaces, taped it all up, then applied duplicolor scratch filling primer, 2 good coats. Let it dry overnight, then wet sanded with 400 grit. My scooter is a multi-dimensional looking blue metallic flake with black fog. I found some metallic blue a couple of shades lighter, and applied 4 coats, then let it dry all day. I then fogged with metallic black by holding the can much further away and moving it fast like a woman applying hair spray. I fogged it two more times, till I got as close to the dark blue of my scooter as I could, then a very light fog of the metallic blue. Ended up with a decent dimensional effect. Today I'm applying 6 very light coats of clear. I'll let that set overnight, then wet sand with 2000 grit, and then hand polish with compound. Here it is after the fogging before clear coating:   Here it is on the scooter, camera doesn't show but it's a shade lighter, but I'm happy.  To post pics, open a free account at a photo hosting site such as Photobucket. Upload the pic you want to share, then select the IMG code they give (usually the bottom box in the share menu), and paste it in here. Looking forward to seeing it. |
|
Senior Clinician
  
Currently Offline
Posts: 225
Likes: 40
Joined: Sept 16, 2013 18:11:26 GMT -6
|
Post by jerryscript on Jan 22, 2015 16:31:57 GMT -6
I use an open end wrench and a wood deck screw with a square bit, fits the taper just right. Here's a video describing it, and a mathematical method for setting the gap.
|
|
Senior Clinician
  
Currently Offline
Posts: 225
Likes: 40
Joined: Sept 16, 2013 18:11:26 GMT -6
|
Post by jerryscript on Jan 22, 2015 12:00:05 GMT -6
Have you thought of making a solar charging circuit? You can use 2-3 of those solar walkway lights you can find at the dollar store. For about $5 you can forget those car chargers and make a solar charger for your <1a charging devices.
|
|
Senior Clinician
  
Currently Offline
Posts: 225
Likes: 40
Joined: Sept 16, 2013 18:11:26 GMT -6
|
No spark.
by: jerryscript - Jan 22, 2015 10:45:44 GMT -6
Post by jerryscript on Jan 22, 2015 10:45:44 GMT -6
Check your valves, check your enricher, and clean your carb. Those are the primary reasons for hard starts. Also, since you have been pulling it off and putting it back on a bunch lately, check your spark plug boot, the contacts can get loose from removing and re-installing.
|
|
Senior Clinician
  
Currently Offline
Posts: 225
Likes: 40
Joined: Sept 16, 2013 18:11:26 GMT -6
|
Post by jerryscript on Jan 21, 2015 20:26:12 GMT -6
I've always torn things apart to see what makes them tick, and I'm glad I did. My father always made me fix them as well, no matter how long it took.
My fav repair job memory wasn't electronic, but it was electrical. I was installing my first car stereo in my first car. I had it all wired up, and was listening to it as I was screwing the dashboard back together. I had 4 or 5 screws left, when smoke started pouring out of the vents. I of course freaked out, running around the car yelling. My father calmly walked out and removed the battery terminal.
I pulled the dashboard back out, and found the wiring harness melted all the way from the center dash to the left side of the car. Turns out I had connected all the ground wires from the stereo and speakers together (old school wiring, no connectors like today), but I never attached them to an actual ground spot on the car. My father told me I could save up and spend $120 for a new harness, or $20 for new wires and fix it myself. I was a teen, I didn't have $120, so I did it myself.
30 years later, I'm glad I learned how to re-build a wiring harness, it's come in handy helping people out with the scooters they buy off craigslist!
|
|
Senior Clinician
  
Currently Offline
Posts: 225
Likes: 40
Joined: Sept 16, 2013 18:11:26 GMT -6
|
Post by jerryscript on Jan 21, 2015 16:11:28 GMT -6
He already posted a very nice pic. Didn't you notice his avatar?  |
|
Senior Clinician
  
Currently Offline
Posts: 225
Likes: 40
Joined: Sept 16, 2013 18:11:26 GMT -6
|
Post by jerryscript on Jan 20, 2015 19:35:14 GMT -6
This is my favorite dyna-bead demo, really shows how well the concept works:
|
|

