|
|
Post by mxmatt on Mar 8, 2014 0:03:40 GMT -6
Great! Thanks. My stock flasher has a 3 prong plug though. Did yours? Mine was 3 prong. they are available. I got it on eBay. Rurc, any chance you have a link? When I did a search with the information above, I only got a 2 prong Flasher. |
|
|
|
Post by mxmatt on Mar 7, 2014 17:20:54 GMT -6
It's possible that the end of the bendix that sits in the left side engine cover isn't in the hole it's supposed to be in, or the washer that should be on the bendix shaft on the engine side might have fallen away. Bendix? |
|
|
|
Post by mxmatt on Mar 7, 2014 17:19:55 GMT -6
What method did you use to remove the variator nut? I have seen some methods actually warp the drive fave and that will cause your problem! Impact. Not that tight. Drive fave? |
|
|
|
Post by mxmatt on Mar 7, 2014 0:00:21 GMT -6
Before I replaced my crank, I never had this problem but now a good percentage of the time my starter seems to not engage, partially engage, or make a gear grinding noise before catching and then starting my bike. What gives?
|
|
|
|
Post by mxmatt on Mar 6, 2014 23:35:03 GMT -6
ok i'm back,,,,,i'm running a united pacific electronic D.O.T 2p 12v led flasher 20amp max heavy duty 90650,,,its plug and play,,,when you use it you can run anything LED and there's no fast flash or no flash ,,,just a nice steady rate,,this setup works very well for me,,,and let me rephrase the "i jump the thing",,,this is not supercross but a 2-3 second airtime thing,,,but enough to keep this old man happy,,,,,, Great! Thanks. My stock flasher has a 3 prong plug though. Did yours? |
|
|
|
Post by mxmatt on Mar 5, 2014 20:53:58 GMT -6
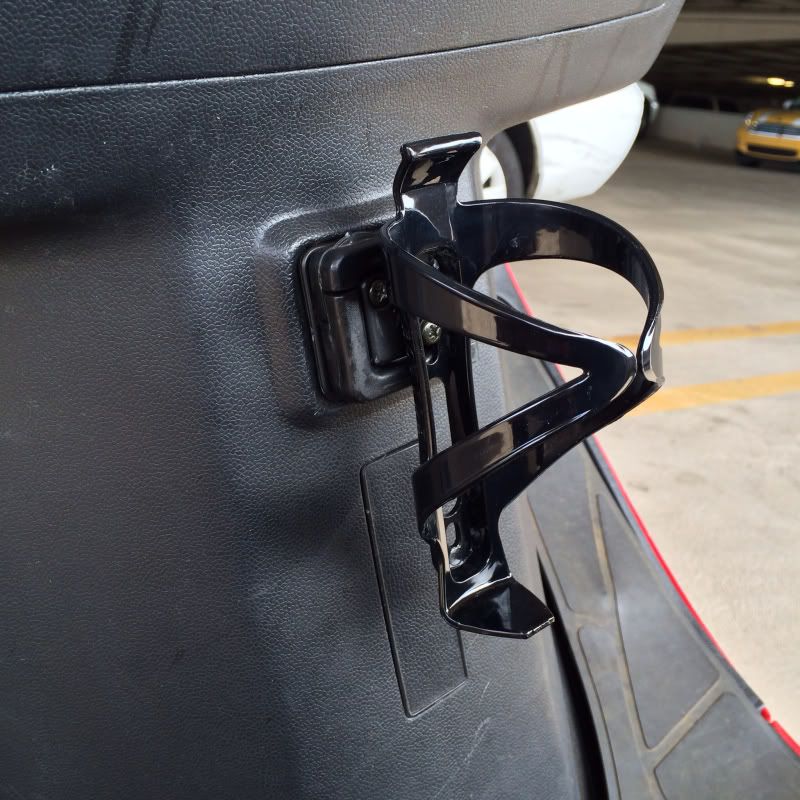
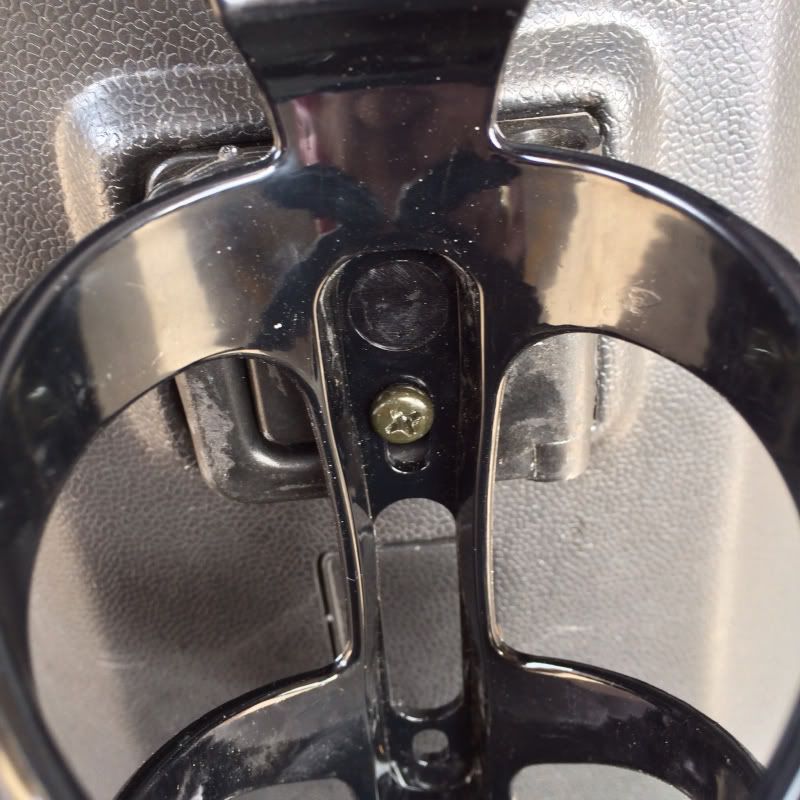
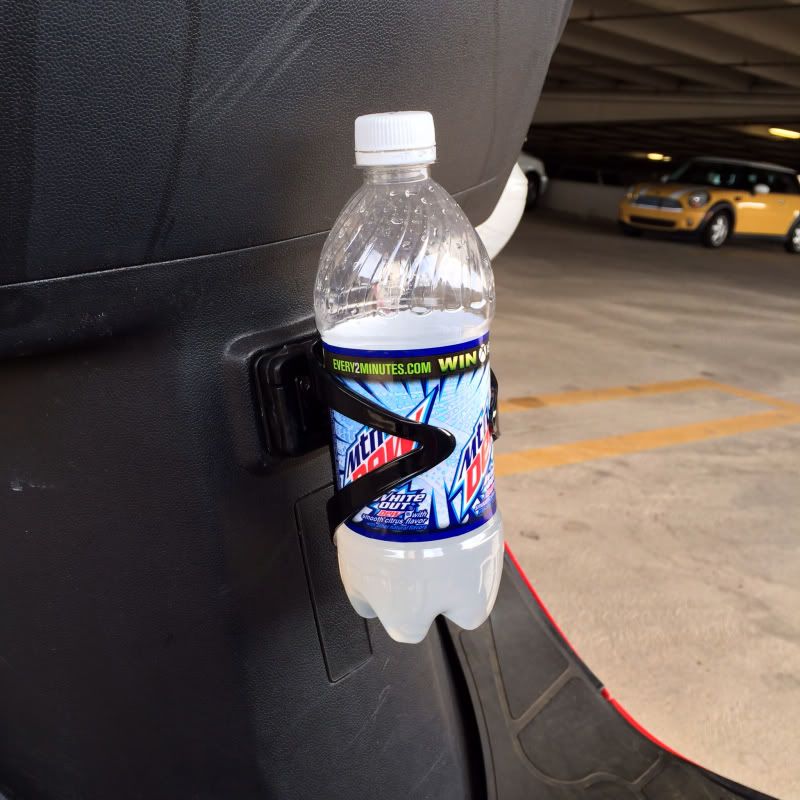
My Starbucks would pop right out of that drink holder. Or leak. Haven't quite solved that issue yet And it won't hold my 44oz Polar Pop either! Bummer. At least it gives easy access to a bottle of water or soda. I was tired of having to get into my seat trunk to quench my thirst. |
|
|
|
Post by mxmatt on Mar 5, 2014 4:14:18 GMT -6
Hey Matt, those images in the first post were lost. I tried to retrieve them but it wasn't possible. I've had a few requests about what was on them. Can you get me a link to your PB pix or another link? Thanks pal, Rich I got it fixed. I moved the photos in my PB to a new folder and it caused this to occur. May have to do some more in the AM.  ? |
|
|
|
Post by mxmatt on Mar 5, 2014 0:41:29 GMT -6
And for just $1 more... ...you can have this amazing drink holder!  Just remove one screw from the grocery bag hanger...  ...and Wahlah!  |
|
|
|
JR
by: mxmatt - Mar 3, 2014 18:00:14 GMT -6
DrRocco likes this
Post by mxmatt on Mar 3, 2014 18:00:14 GMT -6
Wasn't around when it happened. Don't need to know about it now.
What I do know is that both Rich and JR (and others) are very knowledgable folk and willing to impart their acumen with a lost scooter soul like me.
|
|
|
|
Post by mxmatt on Mar 2, 2014 10:42:33 GMT -6
Cut several small pieces of the fiber mat small enough to fit inside the hole. Sand the surrounding area with some 80 grit sand paper so the resin will have something to bite. Clean it good with brake parts cleaner. Brake cleaner does not leave any residue behind when it dries. Tape the back side with masking tape. Make sure that you follow the directions precisely so that it will cure properly. Mix some of the resin and hardener and remember that you need to work quickly once it's mixed. Put a thin coat of the mixed resin down in the hole and the tape will support it. Build it up by using the small pieces of mat that you cut earlier and resin, mat and resin, mat and resin and so on till you get it filled. Then cover the whole repair with a piece of mat and resin that will cover about two inches bigger than the hole and make sure that it's built up a little higher than the body panel so you can sand it and get the right contours. This is called blocking. Use rough sand paper to block it in and then use progressively finer paper to get it smooth. Let this all cure over night. Now peel the tape from the back side and use 80 grit paper to rough up this side and to remove any left over tape. Clean with brake cleaner and glass this side also so it will support the repair. Remember to work quickly and if at any time the resin starts to get to thick to work with don't use it. Mix some more. When you get done this repaired area will be stronger than it was from the factory. That is fact. When you are ready for paint let me know. brockharwell@live.com Thank you Brock. I'm on it. |
|
|
|
Post by mxmatt on Mar 1, 2014 22:30:08 GMT -6
If I have spark, does that mean my stator is good?
|
|
|
|
Post by mxmatt on Mar 1, 2014 18:02:34 GMT -6
another alternative is to keep the hid lites and switch to led flasher and bulbs,,,they draw nothing,,and will work because the flasher relay works if there is a load or not,,i run them on my bikes they are great Cy, what flasher are you using? |
|
|
|
Post by mxmatt on Mar 1, 2014 17:58:27 GMT -6
I hear PVC pipe glue works well . John John. Would this work with filling in the hole, or just the cracks? |
|
|
|
Post by mxmatt on Mar 1, 2014 11:39:04 GMT -6
You can get a small fiberglass kit at any auto parts store for around $20.00. Just follow the instructions and do all the prep work first. Then work quickly. You van build up that hole by taping up one side with masking tape. Fill it with glass mat and rosin and let it set up. Then peel the tape off and sand it good and glass that side. Sand it smooth using finer and finer sandpaper till it's smooth. Clean it and paint it. Good as new if not stronger than new. I'm on it! Thanks Scatter! |
|
|
|
Post by mxmatt on Mar 1, 2014 11:20:26 GMT -6
I never thought about the two part paint . It maybe to strong and crack or too thick and give an orange peel effect . John Valid points. |
|

